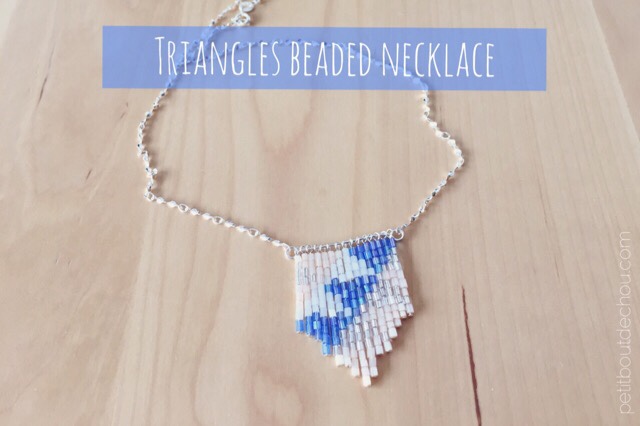
Hi everyone, for summertime I have prepared this insanely easy DIY to make this elegant sterling silver necklace with beaded triangles. The printable pattern is free and you can download it below.
Supplies needed:
- Beads in 4 colors of your choice – I would recommend A&A Accessory Co., G/F 211 Yu Chau Street, Sham Shui Po, maybe not the cheapest but they have a large selection of all sorts of beads and accessories for jewellery.
- Pliers (chain nose, round nose & side cutter) – If you are interested in beads jewellery, I would recommend buying a set like the one below that I got from amazon, it has everything you need, good quality and comes with a zipper case where you can fit everything in!
- 1 sterling silver necklace of your choice 16 inches long (or more depending on your neck size!)
- 1 sterling silver chain
- 15 sterling silver head pins: Length 50mm, Wire Gauge 0.511mm/24 gauge, Head 1.5mm
- 1 sterling silver eye pin: Length 50mm, Wire Gauge 22
- 70mm long silver sterling chain (I used leftover from another project with small links – about 2mm long each => I will call it basic chain in the following steps to distinguish it from the necklace chain.
DIY steps:
1. Beads assembly on head pins
Print the free pattern. One column of the pattern is one head pin with beads to be prepared.
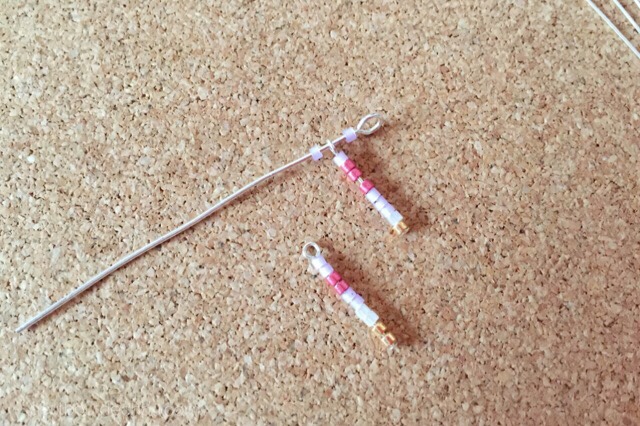
Once you have all the beads on the head pin. Use your pliers to create a loop at the end and also to secure the beads on the head pin. See here, if you don’t know how to do this.
2. Assembly of head pins on eye pin and basic chain
Once all of you headpins are ready and arranged in the correct order to create the pattern, you need first to fix one link of the basic chain in the eye pin loops.
Then, count 15 links, create a loop with your pliers at the end of the eye pin corresponding to the 16th link position. Fix the 16th link of the basic chain in this new loop of the eye pin.
Finally following the pattern order, fix each beaded headpin in one link and around the eye pin thread at the same time. The purpose of the chain is to prevent the headpins to slide along the eye pin and “break” the nice overall shape of the beaded head pins.
3. Mounting on the necklace chain
This is the easy part: find the center of the necklace chain. Cut one link.
Fix each loop of the eye pin to each of the free links of the necklace chain. And you are done!
Update on 9th of December 2015:
I have used since then another technique to maintain a fixed spacing between the head pins that I will show you below.
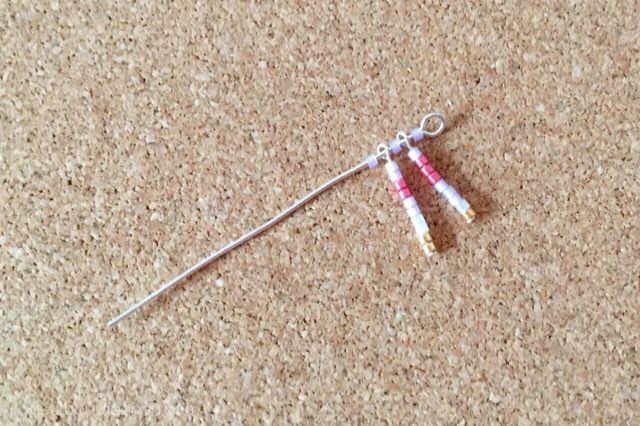
Once you have prepared all your head pins following the pattern, prepare the hooks with special care to make them as small as possible. This is to ensure no be can cross through this loop. The loop should be blocked by the beads.
Then, insert one bead on the main eye pin, then one head pin and so on until all head pins are inserted and finish by a bead before making the final hook.
I have found this technique much easier than the previous one. Let me know what you think about it! I would love hearing your feedback.
I hope you liked this DIY. Please do not hesitate to share it or to comment it below.
Happy crafting everyone!

