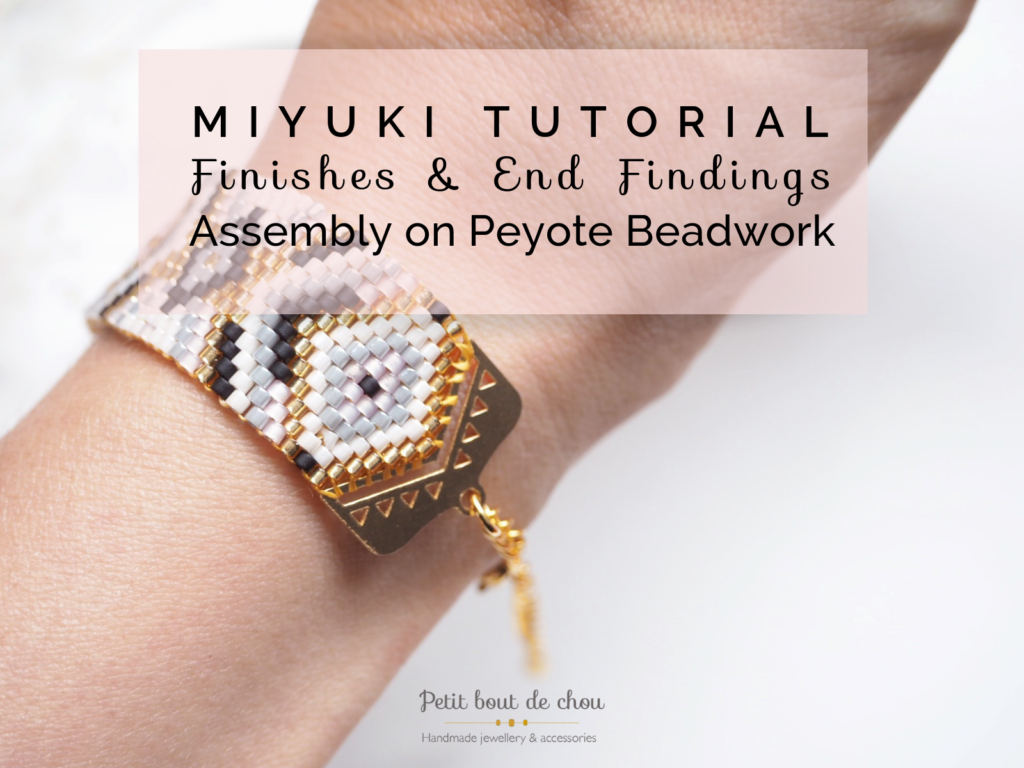
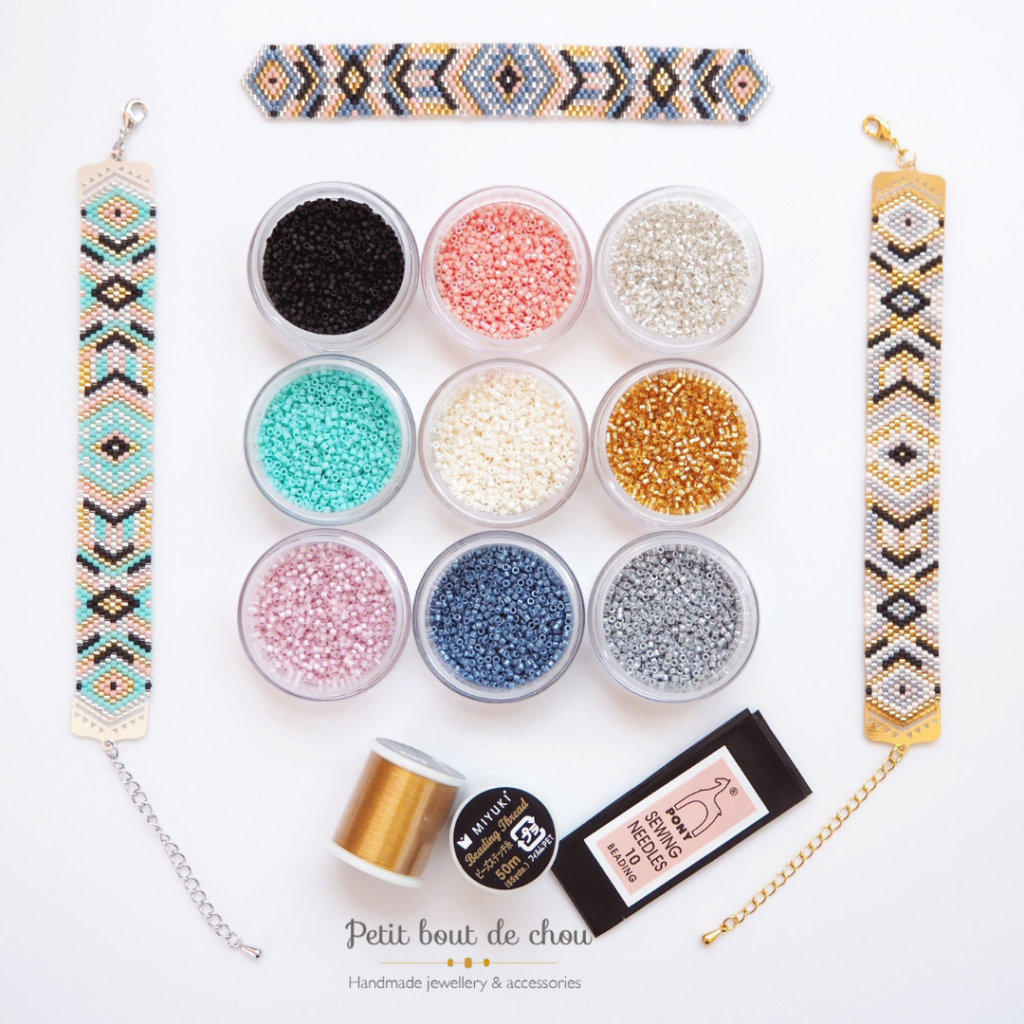
This tutorial is an addition to my intermediate level beading kit available in my Etsy shop to discover the peyote beading technique while starting your Miyuki delicas 11/0 beads with a selection of 9 essential bead colour references.
You can find the reference end findings used here at the end of this tutorial. They can be used with 13 rows peyote patterns.
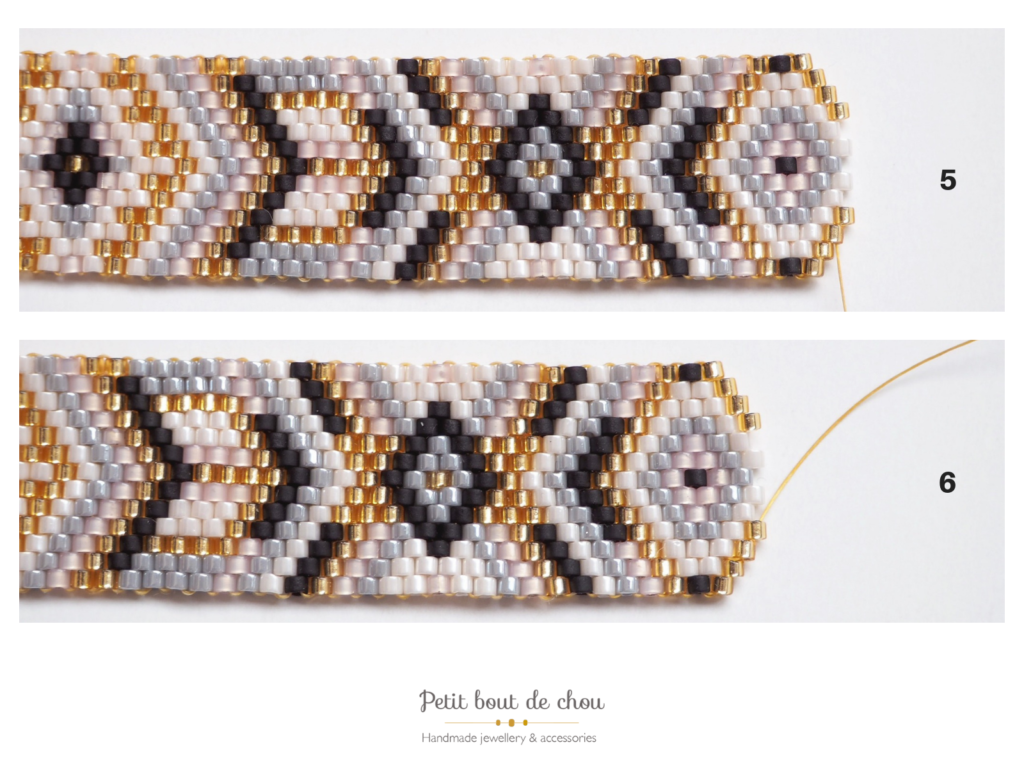
Step 1: Finish the peyote beadwork
Continue the peyote beadwork by progressively reducing the number of beads per row to form a triangle.
The principle is to weave through the beadwork to go from the position of the thread shown in (1) to the one shown in (2) where you go out through the black bead and go up through the 2 golden beads so that you can thread the beads of the next row like in a normal row (1 gold, 1 white, 1 grey, 1 white, 1 gold).
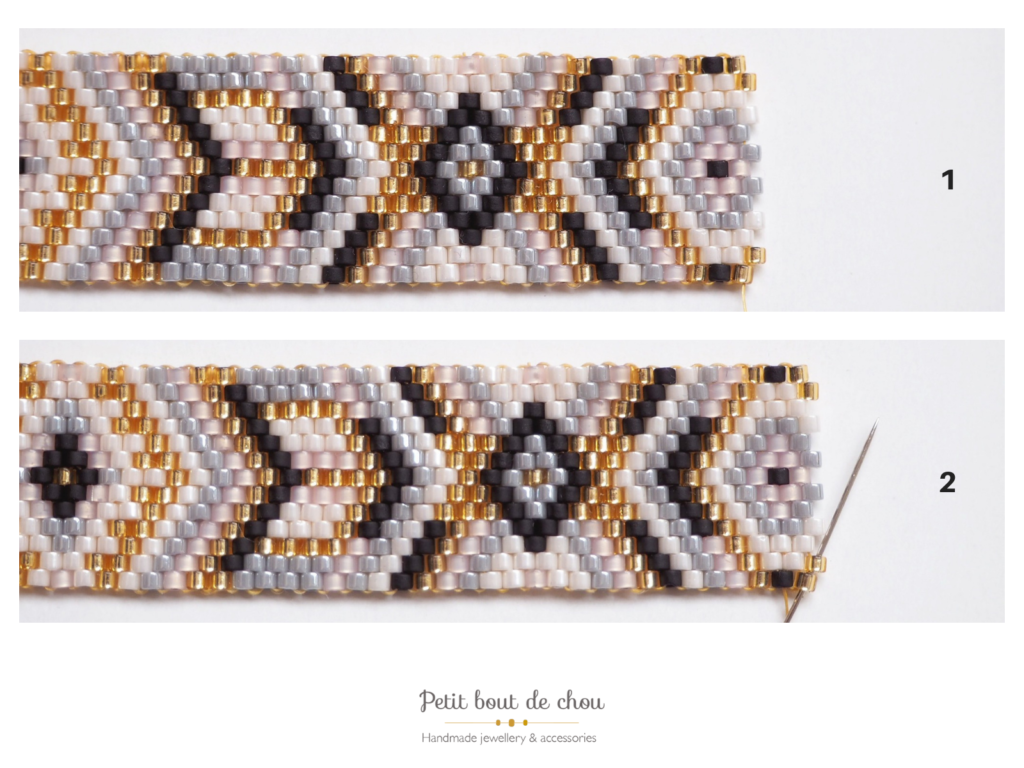
And we go on like this: finish the row with the thread in position (3). Then weave through the beadwork to bring back the thread to position (4).
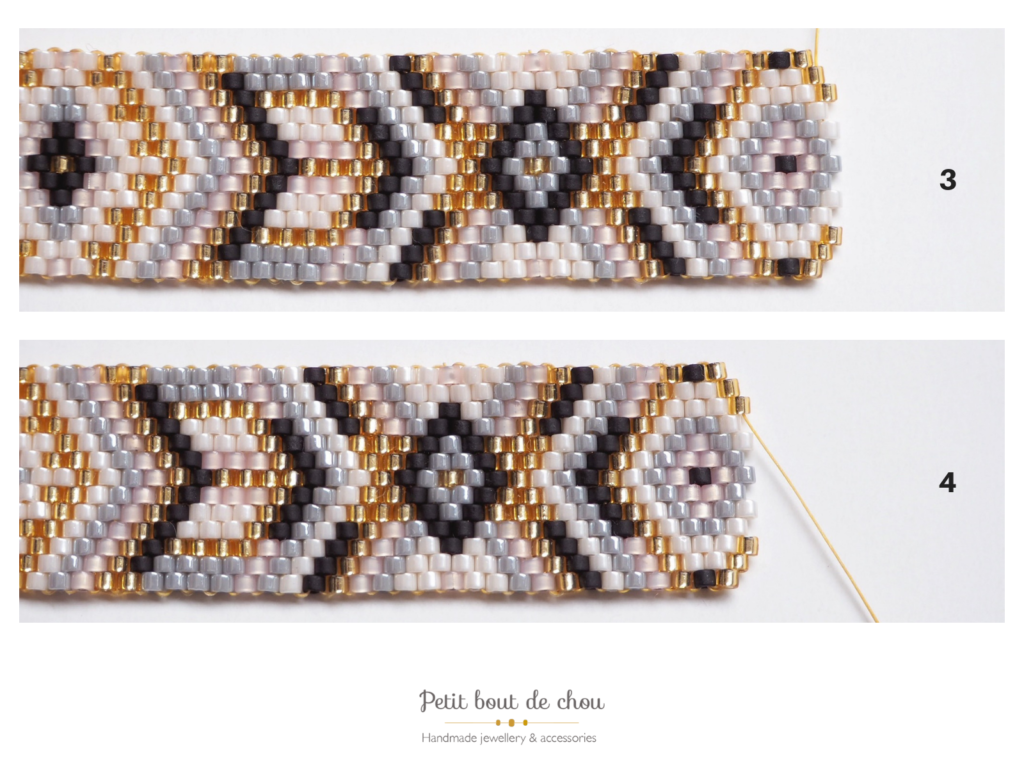
You can then thread the beads of this new row as usual (1 gold, 1 white, 1 white, 1 gold) until you reach position (5). Like the previous step, weave through the beadwork to get back to position (6).
We can then thread the beads of this new row (here 3 beads: 1 gold, 1 white, 1 gold). And then get in position for the new row (7) (1 gold, 1 gold) to arrive in position (8).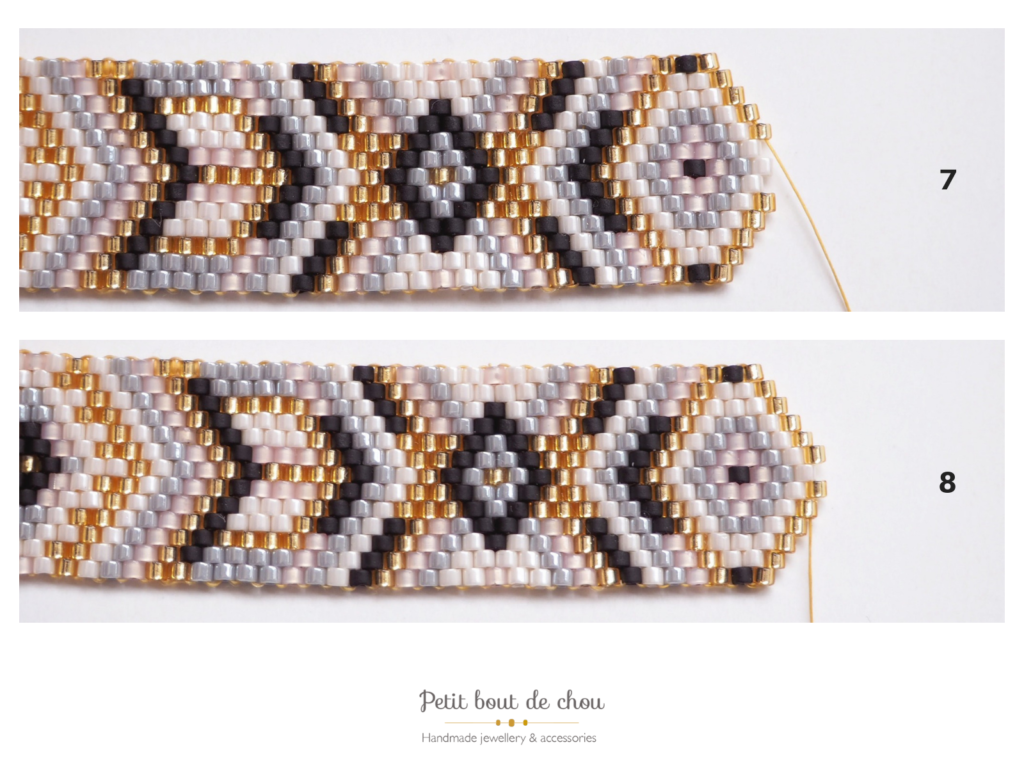
Finally, get into position to thread the last gold bead (9).
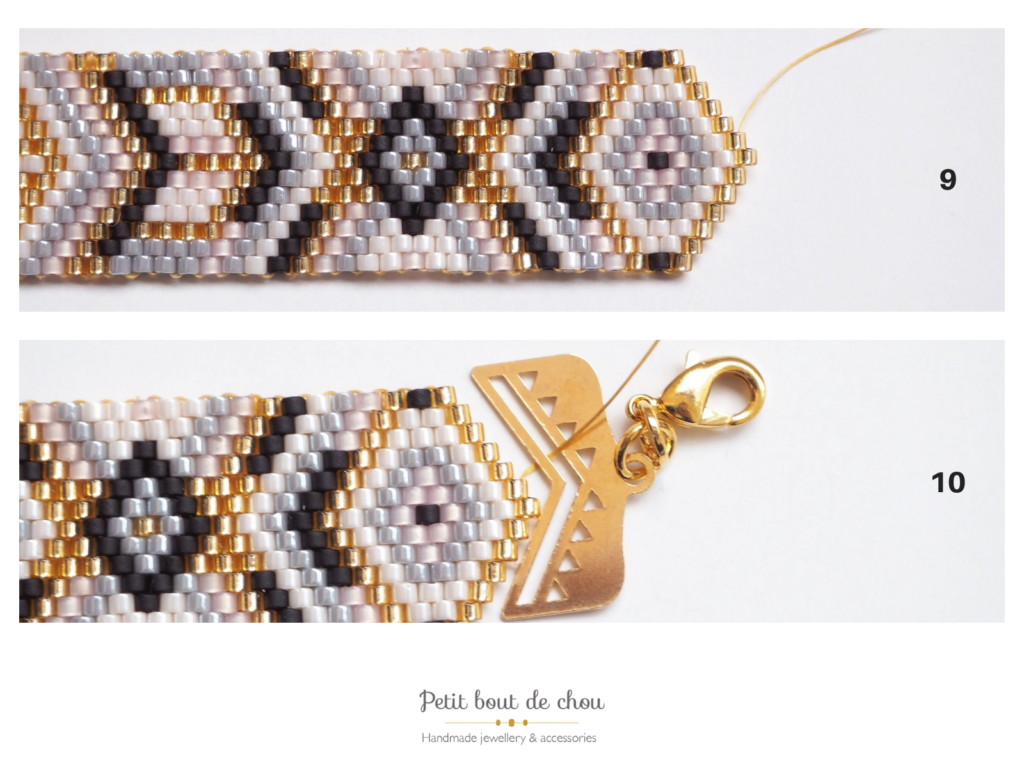
Step 2 : Fix the beadwork to the end findings
We will start by fixing the 3 beads in the center of the bracelet.
Starting from the last beading position, put the needle through the opened part of the end finding (10) and go back through the same bead in the opposite direction (11).
Then fix in the same way the bead of the tip on both sides going through the opened part of the end finding and the third bead only on the side in contact with the end finding (12) then (13).
Fix the beads of one diagonal first then go on the other side to fix the other diagonal (14).
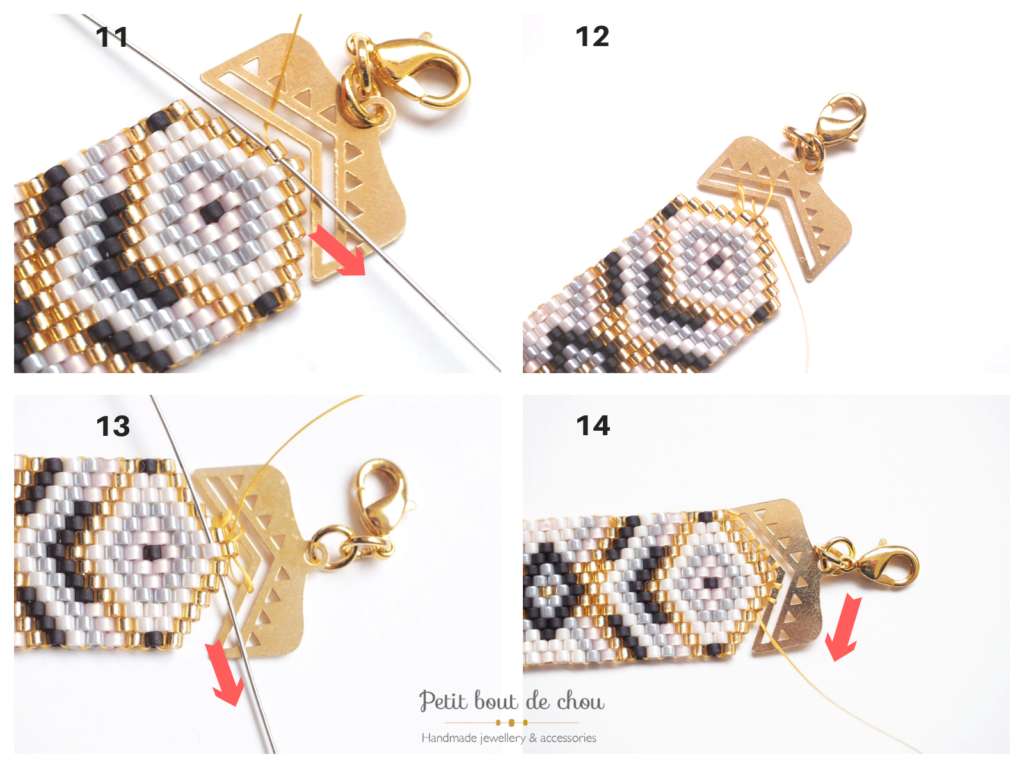
Make sure that the thread is tightened well but be careful not to break it.
Stuck the thread inside the beadwork by weaving through it (15) and repeat this operation on the other end of the bracelet (16).
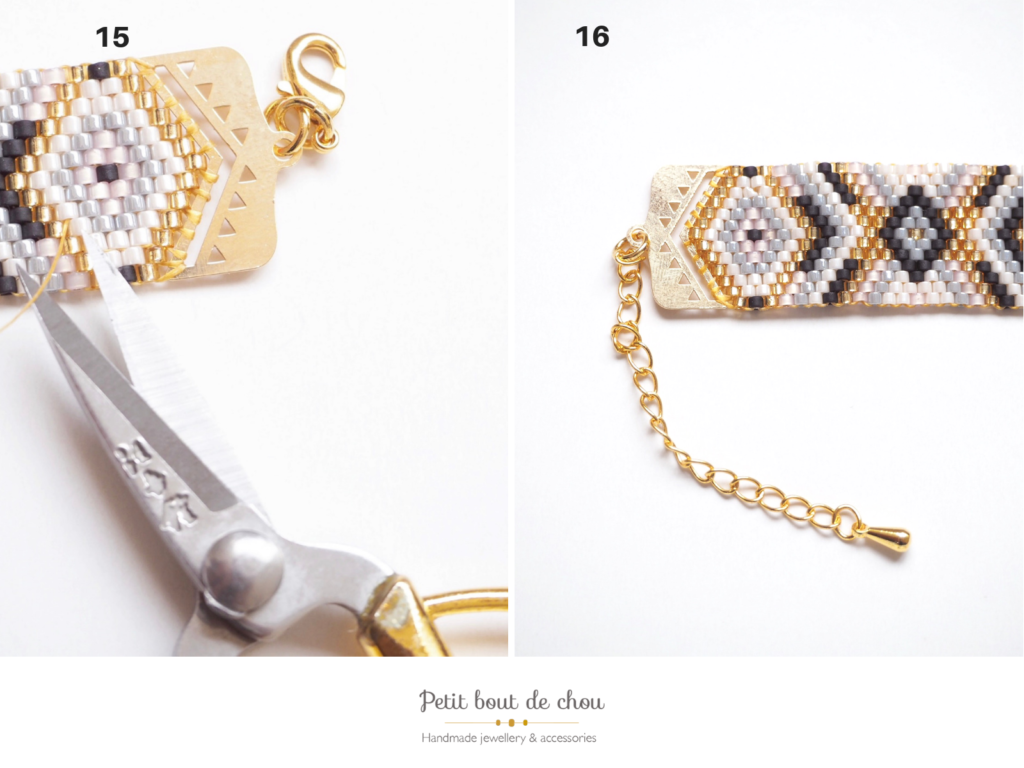
Your bracelet is now assembled with the special end findings from Perles & Co that you can find here:
I usually add some adjustment chains and clasps to the end findings. Their references are listed below:
I hope this tutorial will be helpful.
Enjoy beading!
Follow me on Pinterest, Instagram, Facebook or YouTube.
I am always happy to read your comments below so do not hesitate to leave me a few words.


3 Comments
Bonjour Estelle!
First of all, thank you very much for your tutorials, I find them very clear and helpful to realise all my ideas in my head.
I have a question though regarding this finish. I am using the same Miyuki Delica 11/0 beads, with the same gold, end finding from perles & co, however my finish does not look the same, the end of the beadwork does not fit neatly underneath the finding, it sits a bit on top… It still looks ok, but I am not sure why it doesn’t look like yours.. I wonder if I could have your email; so I could send you and picture and discuss?
Merci à vous!
Georgia
Very nice Bracelet, Awesome color combinations
Thanks a lot for your comment. I am glad you like it!