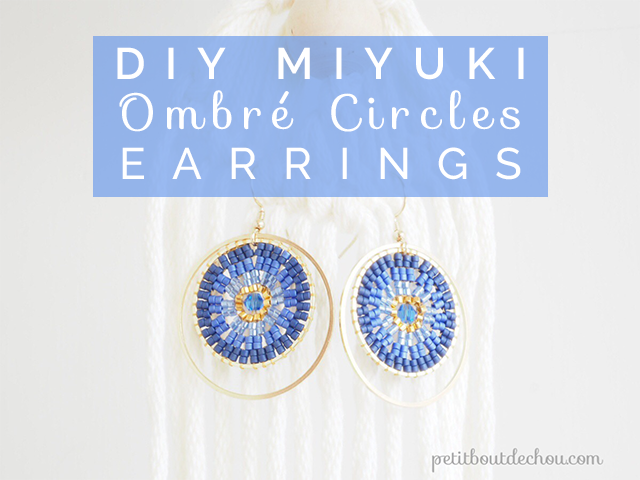
I am a big fan of the ombré colours trend. With miyuki delica beads, it is a great way to use many of these amazing colours at once in a project. These pretty earrings are made using the circular brick stitch that I used previously in my spring bird creoles but using 2 beads at a time. There are many other ways to make a circle by weaving beads and one technique is well explained the blogs of Marie “Au fond de mon tiroir” and Emilie “Coeur-citron“. Both are in French.
As usual this model is registered and protected under CC-BY-NC-ND-4.0 license: it is not for commercial use.
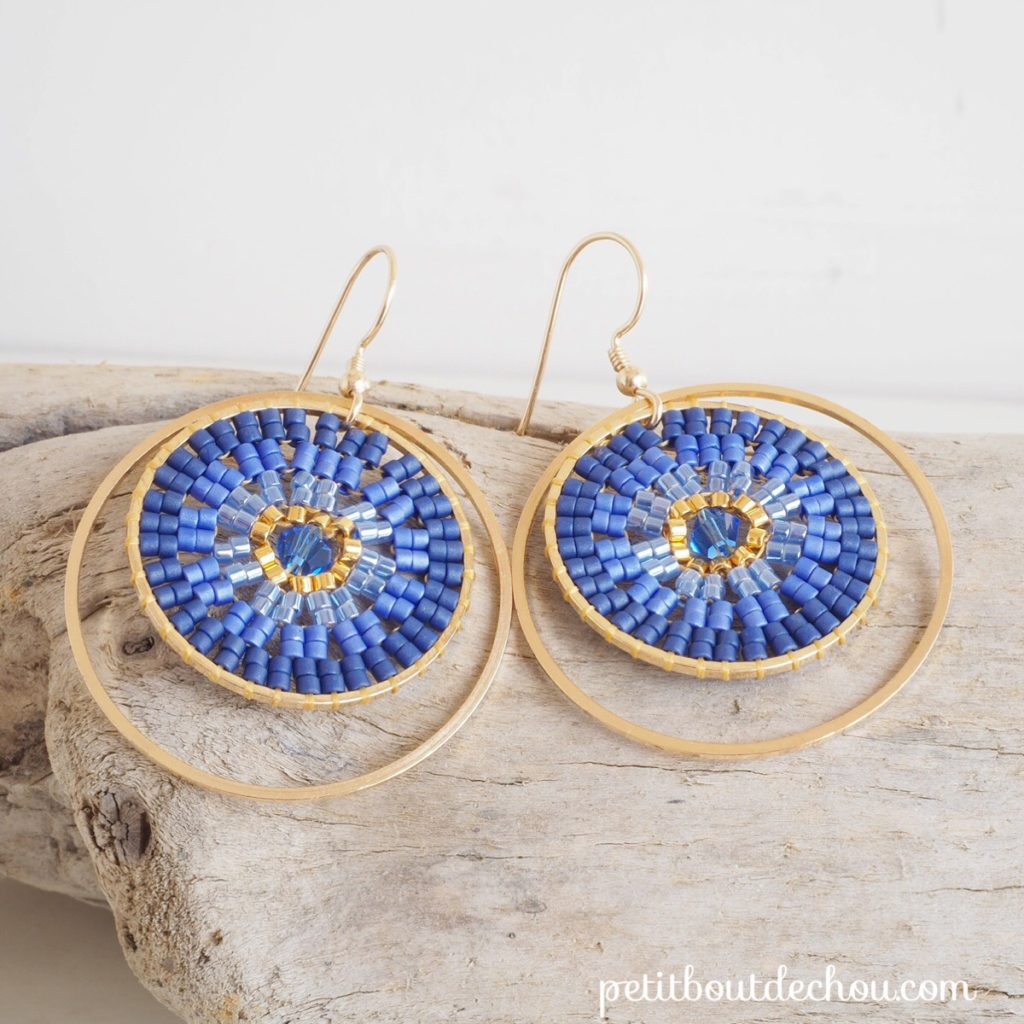
Let’s start our tutorial to create these 2-bead brick stitch ombre earrings.
Supplies needed
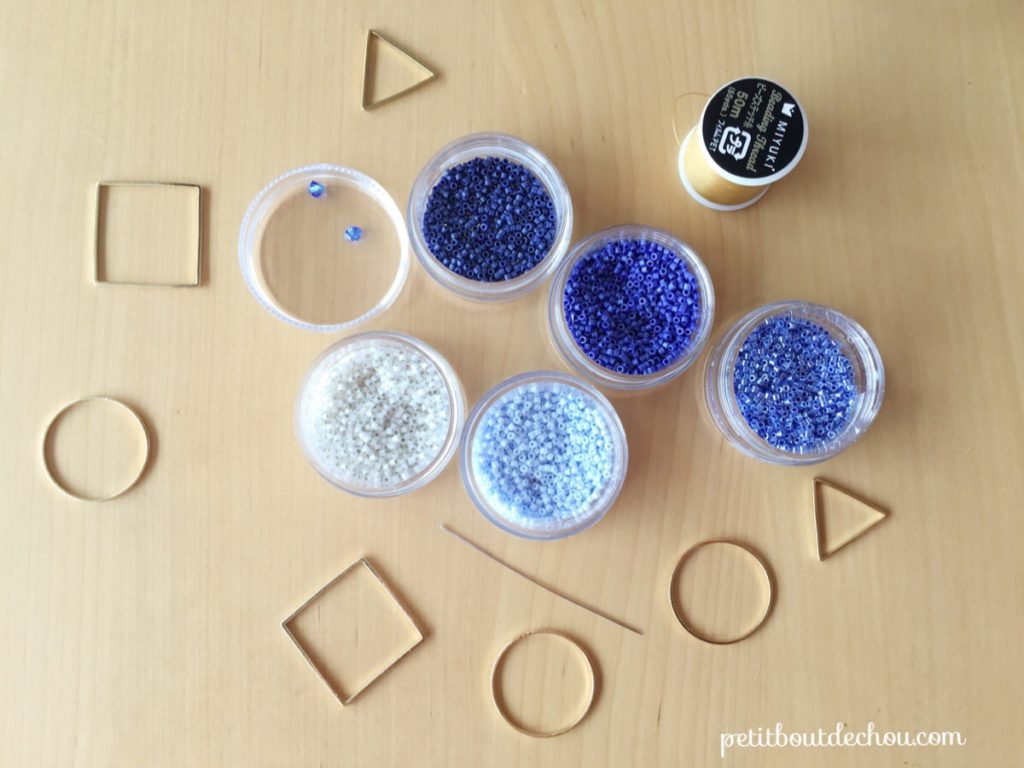
- Gold colour beading thread Miyuki
- Miyuki long and thin beading needles
- Scissors
- 2 blue Swarovski bicones
- 2 gold plated earwires 14k
- 2 medium size gold metallic circles (here 2.4 cm diameter)
- 2 big size gold metallic circles (here 3.1 cm diameter)
- Jewellery pliers
If you are new at Miyuki delica bead weaving, discover my comprehensive guide for materials and tools.
DIY steps
1. First & second rows
Thread your needle with about 1m of beading thread.
Start by making a double knot leaving about 15cm of thread free on the smallest circle.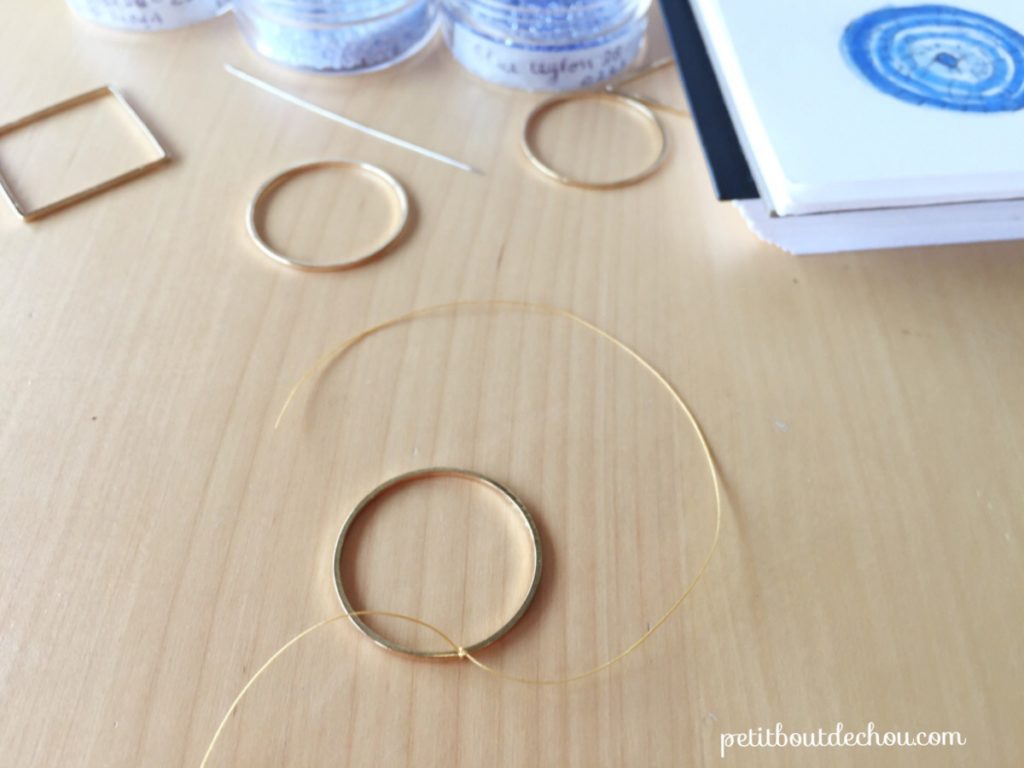
We will now make the first row using the darkest blue colour DB 0377.
To start the row, we will use the same technique as the decrease at the beginning of the row in brick stitch except that we will use 2 beads at a time. If you would like to learn the basics of brick stitch, refer to this post.
Thread 4 beads (1).
Go around the ring with your needle.
Come back through the last two beads from bottom to top (2).
Go downwards through the first two beads (3).
Go upwards again through the last two beads (4).
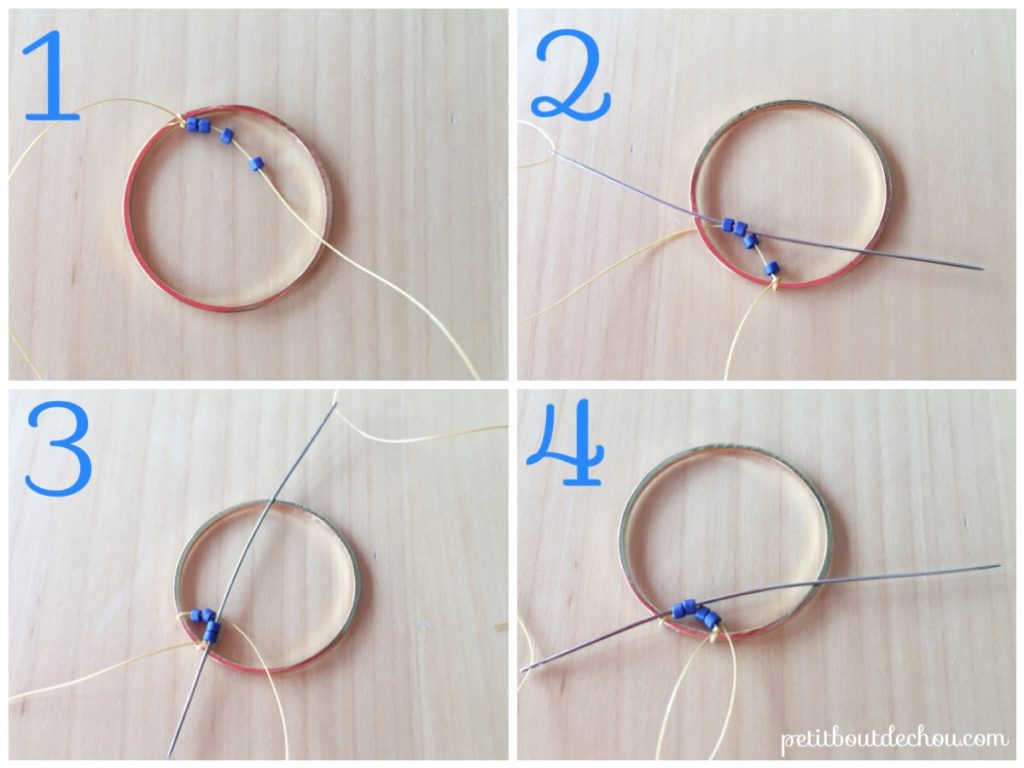
You have now two columns of 2 beads (5).
*Thread two new beads and o around the ring with your needle (6).
Come back upwards through the beads (7).*
You have now 3 columns of 3 beads.
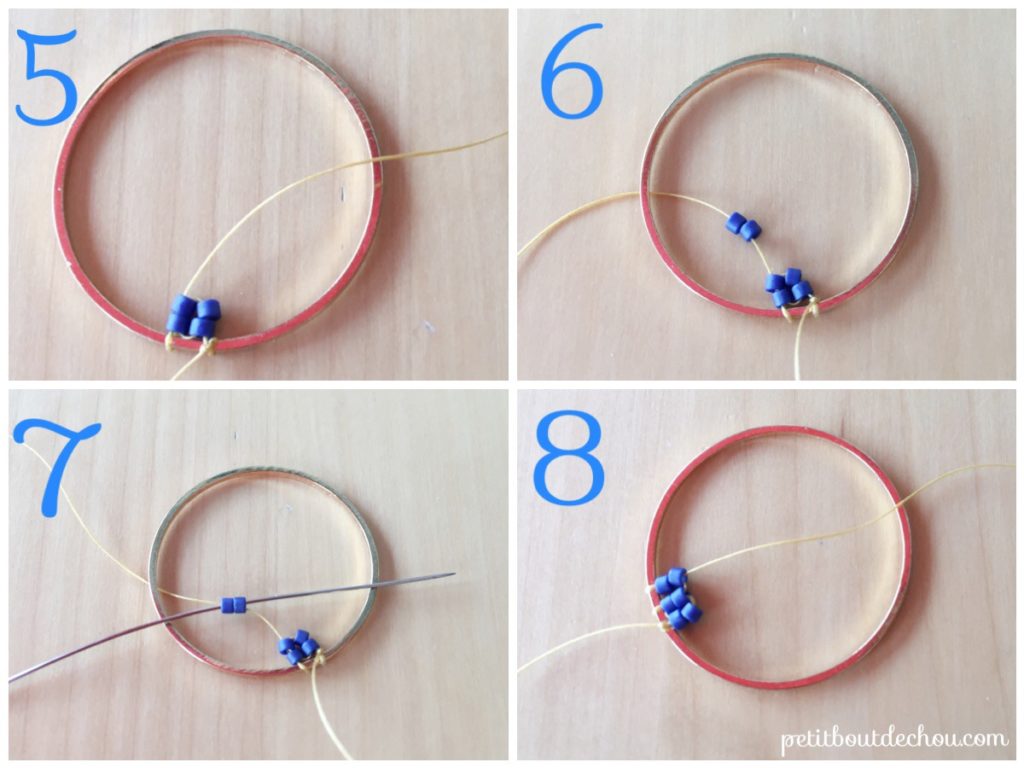
Repeat the steps between * to complete the circle.
Go through the first column (9) and through the last one (10) to start the second row.
Thread 4 beads (11) of opaque cobalt luster DB 0361.
Pick your needle between the second and the third column of the previous row (12).
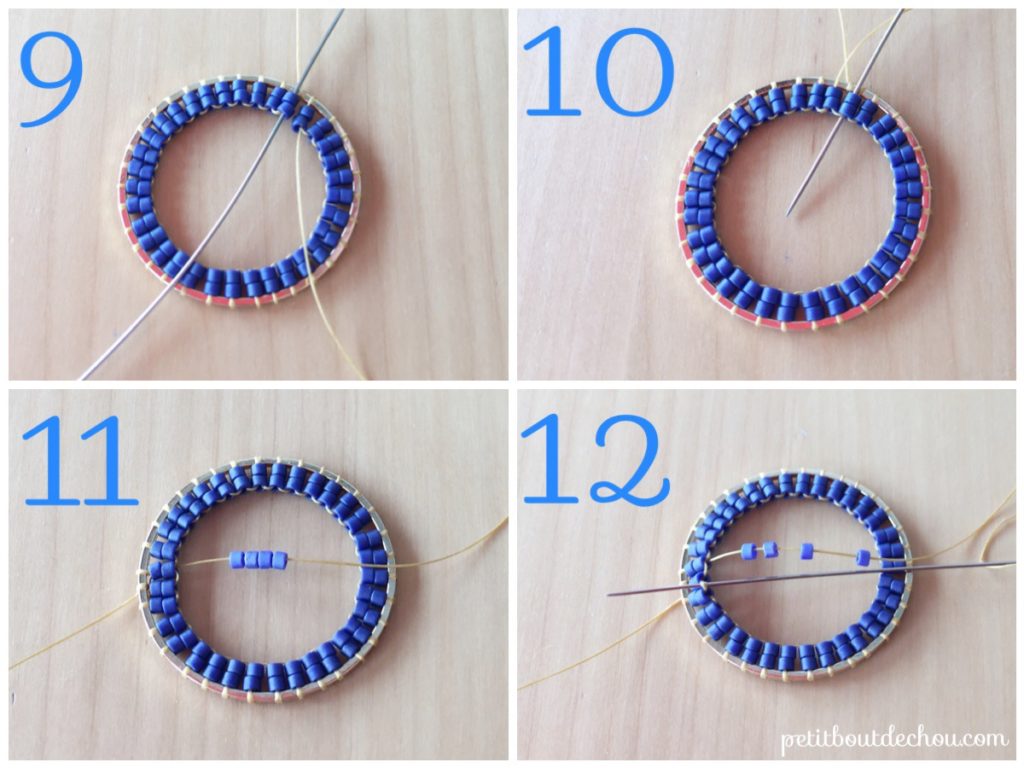
Come back through the last two beads from bottom to top (13).
Go downwards through the first two beads (14).
Go upwards again through the last two beads (15). These steps are similar as what we did on the first row.
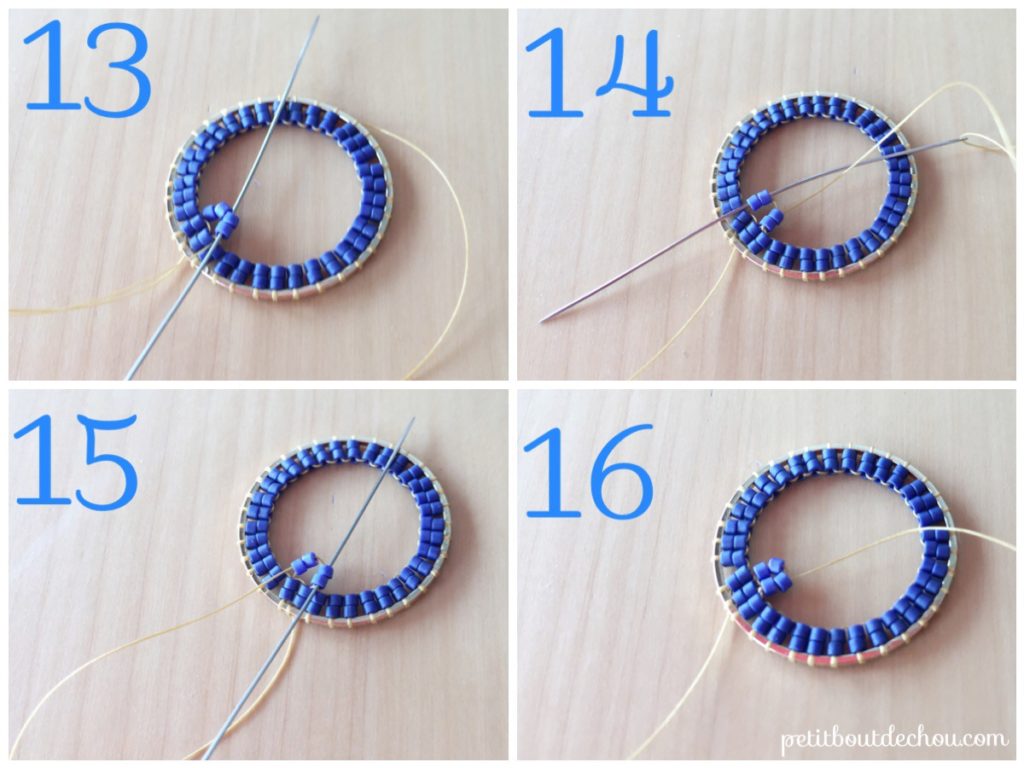
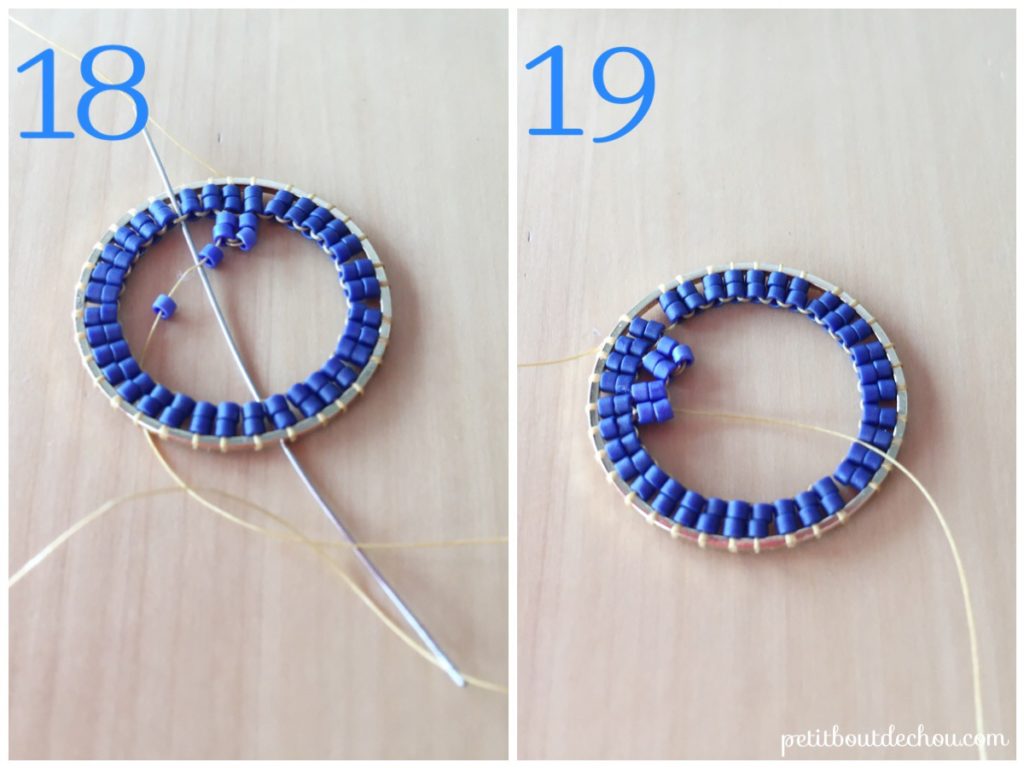
Then, thread on 2 beads and pick your needle leaving one gap (18).
Make your second column adjacent to the previous one (19) and continue until the ring is full.
You may end up like me with the last 3 columns together.
Go through the first column of the row, then back through the last one to start the third row.
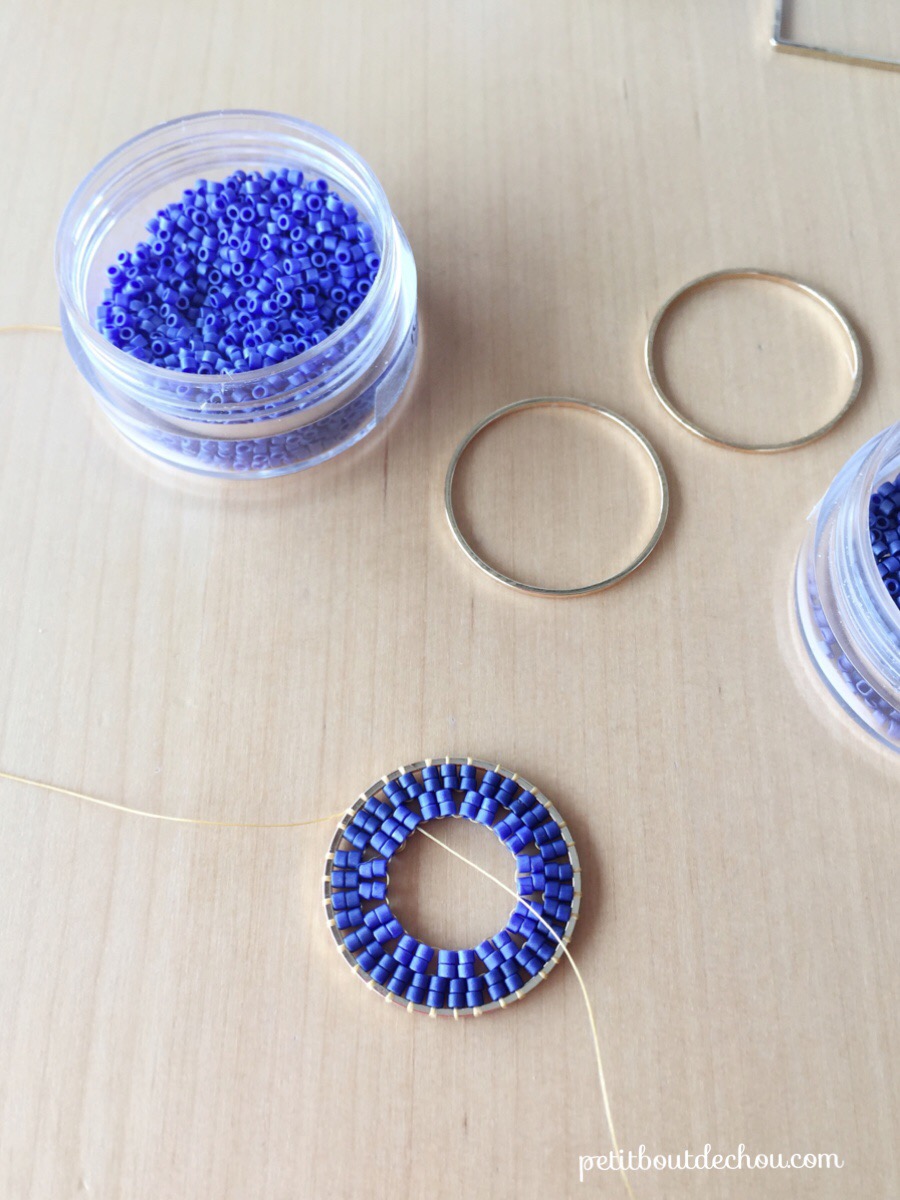
2. Third & fourth rows & bead fixing
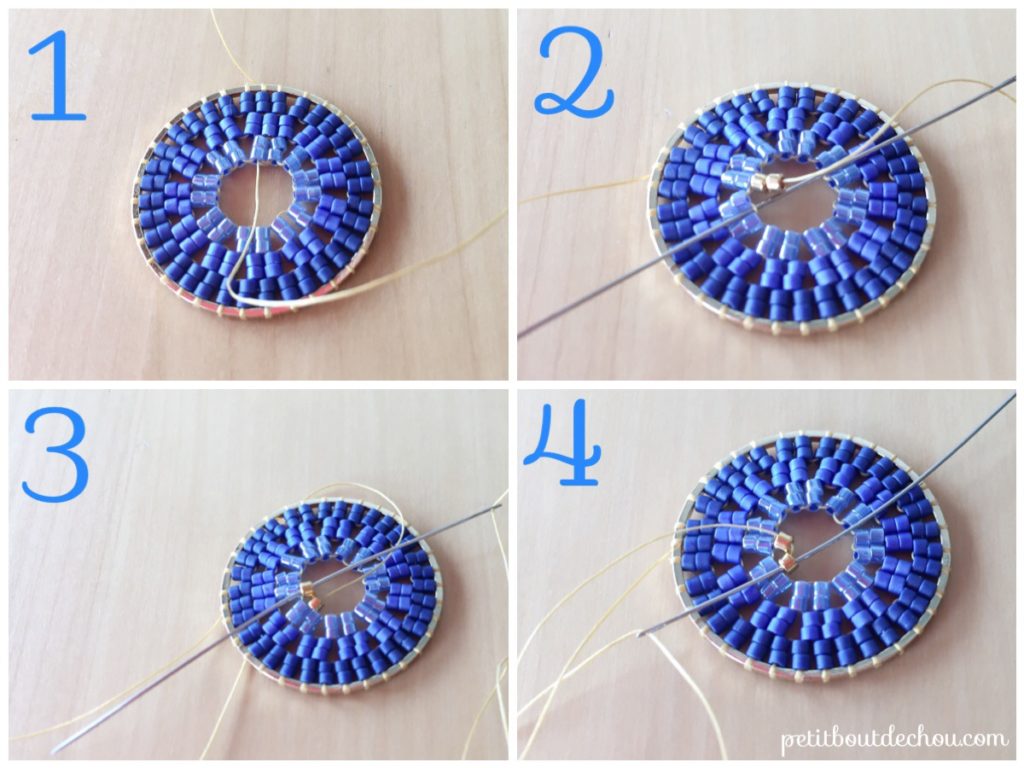
Following the same steps as the second row, use the blue ceylon DB 0243 to form the third row (1).
Then we will make the last row with only one bead at a time of DB0031 gold plated colour.
Thread on two beads (2) and pick your needle between the second and the third beads of the previous row.
Come back through the last from bottom to top.
Go downwards through the first bead (3).
Go upwards again through the last bead (4).
Place one more bead in the group, then make one gap, a group of 2 and continue making groups of 2 until the circle is done. Then weave through the circle to come back though the center bead of the group of 3 (1).
Thread the Swarovski bicone bead and go downwards through the gold bead below and upwards through the adjacent bead.
Go through the bicone again (upwards this time).
Hide the thread in the beadwork (2).
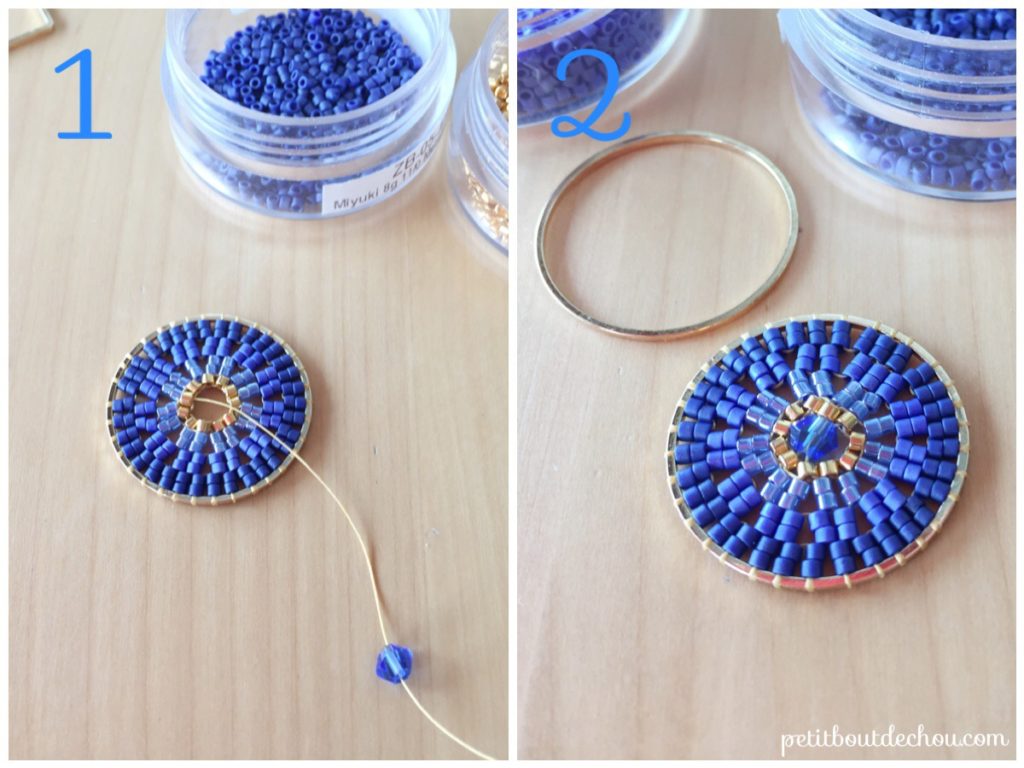
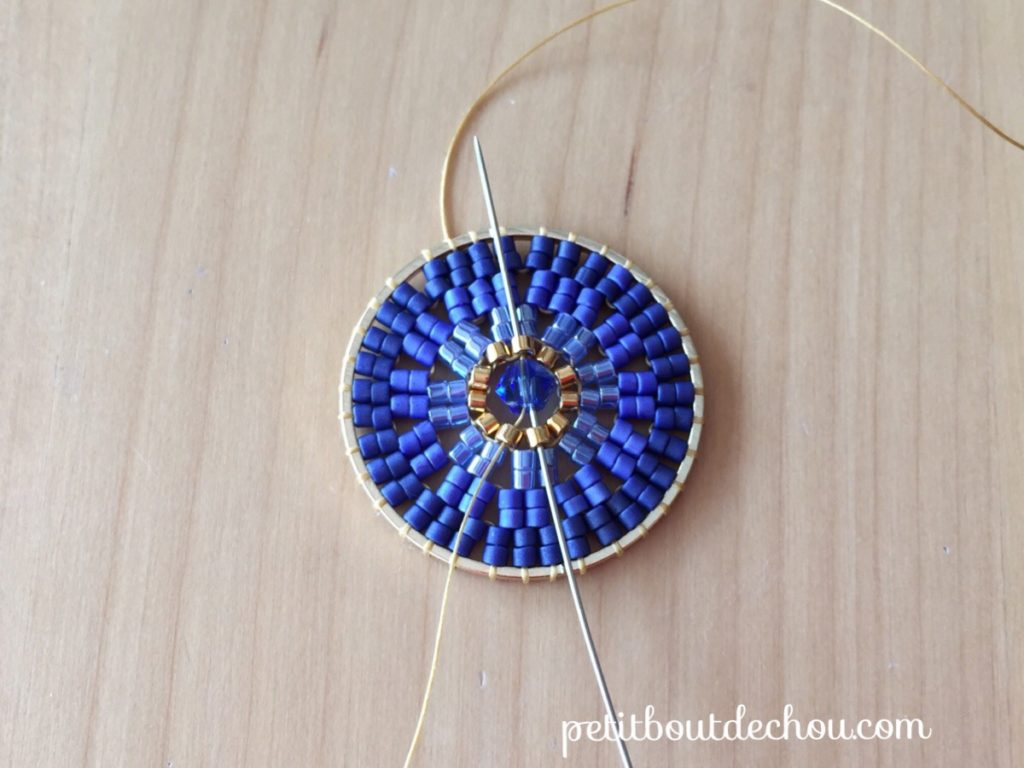
Here is a better view of the beadwork:
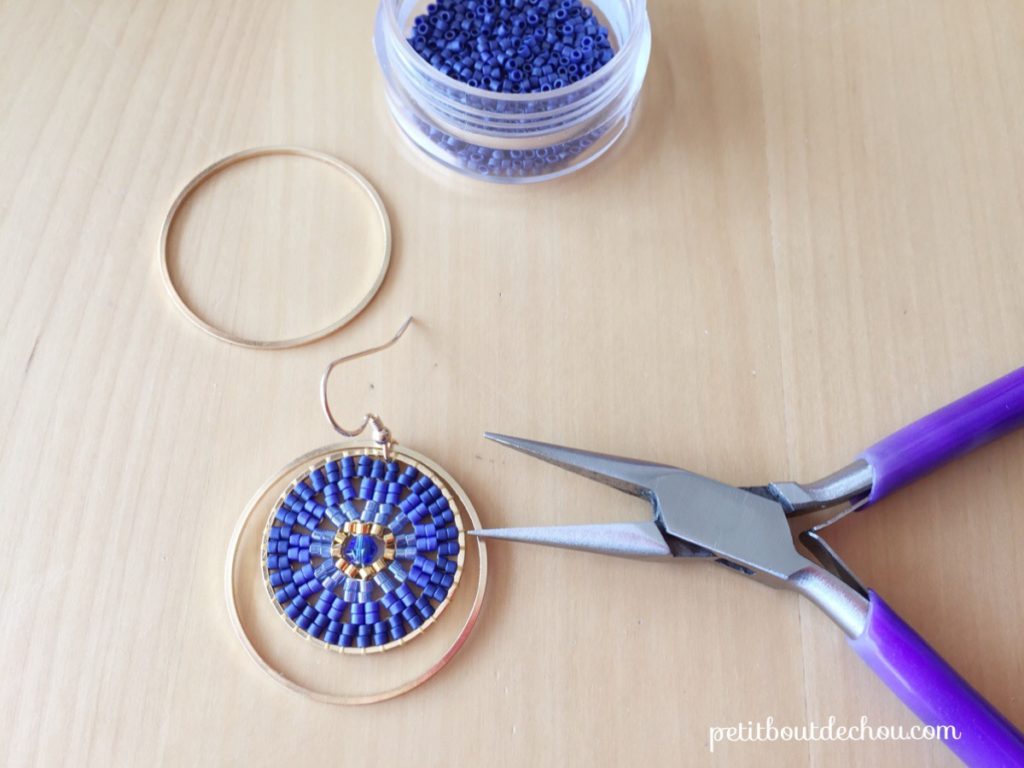
3. Assembly
We will now assemble the big circle with the small one and fix them to the earwire.
Use your pliers to open the ring at the bottom of the earwire.
Insert both cercles inside and close the ring with your pliers.
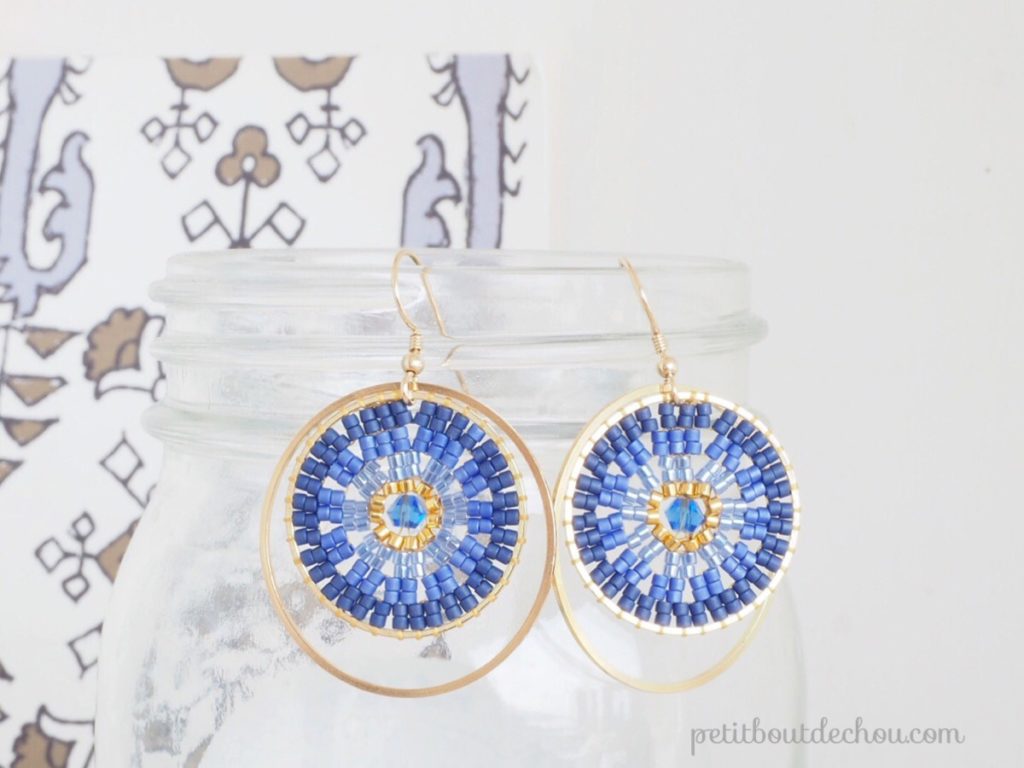
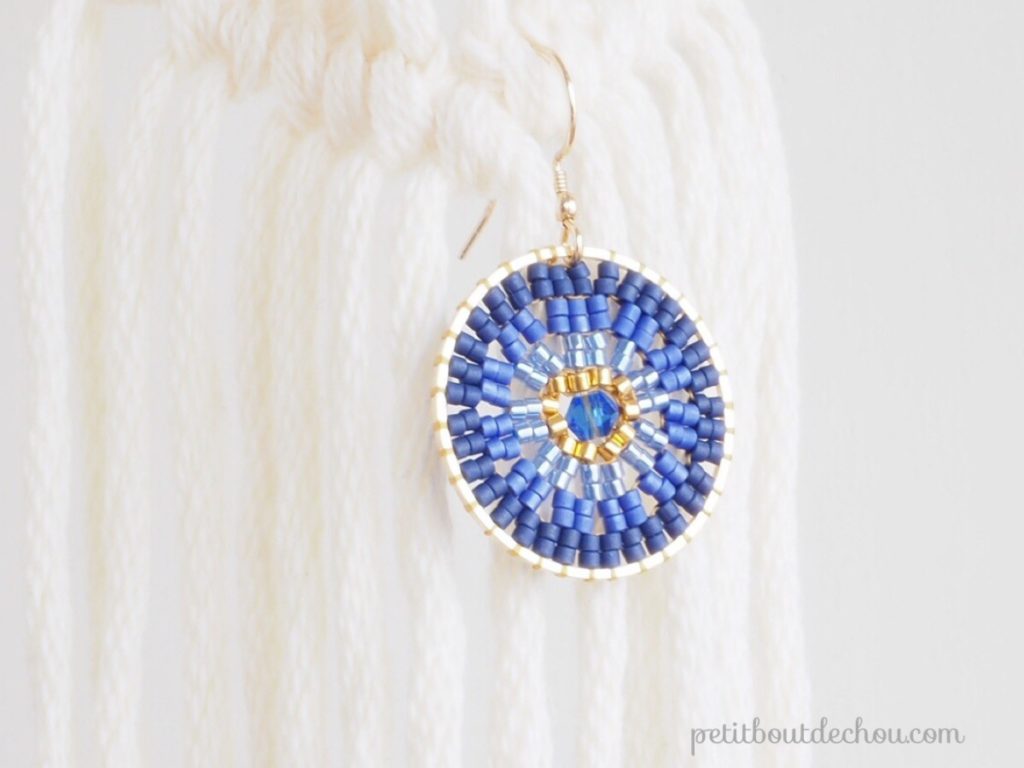
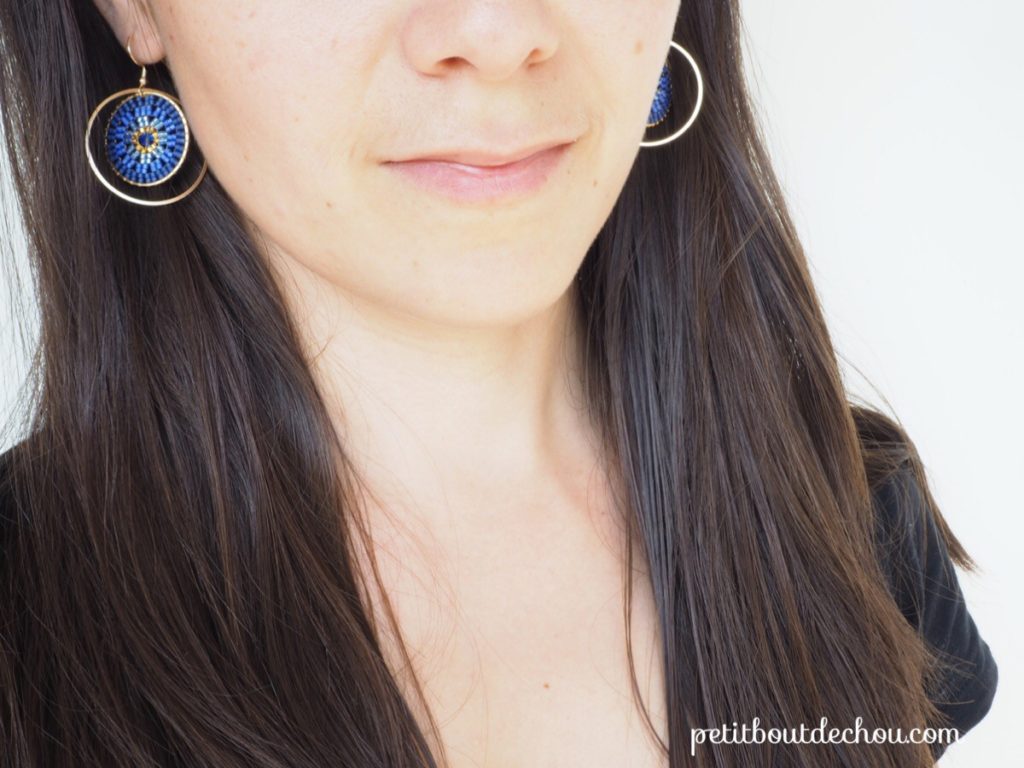
Your earrings are ready! On time for summer.
I hope you enjoyed this tutorial. You can also find these earrings in my Etsy shop and order them in any colour you like.
You may also like:
- my little owls in brick stitch
- my Chinese New Year rooster and lanterns in brick stitch
- my Ginko leaf in brick stitch
- my origami elephant in brick stitch
- my fringes earrings
Happy beading!
Follow me on Pinterest, Instagram or Facebook for more craft supplies tips, DIYs and free printables.
I am also always happy to hear about you in the comments below.


7 Comments
Elles sont vraiment très belles et bravo pour le choix des couleurs.
Merci beaucoup. Je suis ravie qu’elles te plaisent. J’ai testé une nouvelle teinte aujourd’hui, elles sont chouettes aussi 😉 A vour bientôt sur instagram…
So pretty! I think what made the earring design pop is the use of the extra rings! Will share on my blog so others can come visit here again!!
Thank you for sharing! I am glad you like their design 🙂
Les boucles sont vraiment très belles!! J’adore tout, le dégradé de couleurs et le style!
Do you have a link, or item name, for the metallic circles?
Hi Rachel, I actually bought mine here in a small shop of Hong Kong but they have nice ones on perles and co as well: this one is the 25mm but they also have a 30mm size. https://www.perlesandco.co.uk/Spacer_for_beadweaving_round_25_mm_gold_tone-p-94193.html?affiliate_banner_id=1&ref=1003
I hope this helps.