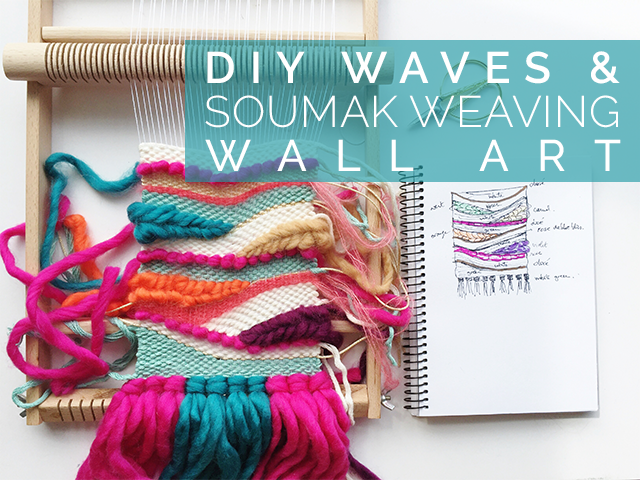
 To prepare this weaving, I have used three specific techniques: the Rya knot, the wave weaving and the soumak weaving techniques which makes these pretty braids.
To learn more about the basic techniques of weaving such as the warping of the loom and the simple weaving rows, I invite you to read this great tutorial from Perles and co which describes very well these techniques.
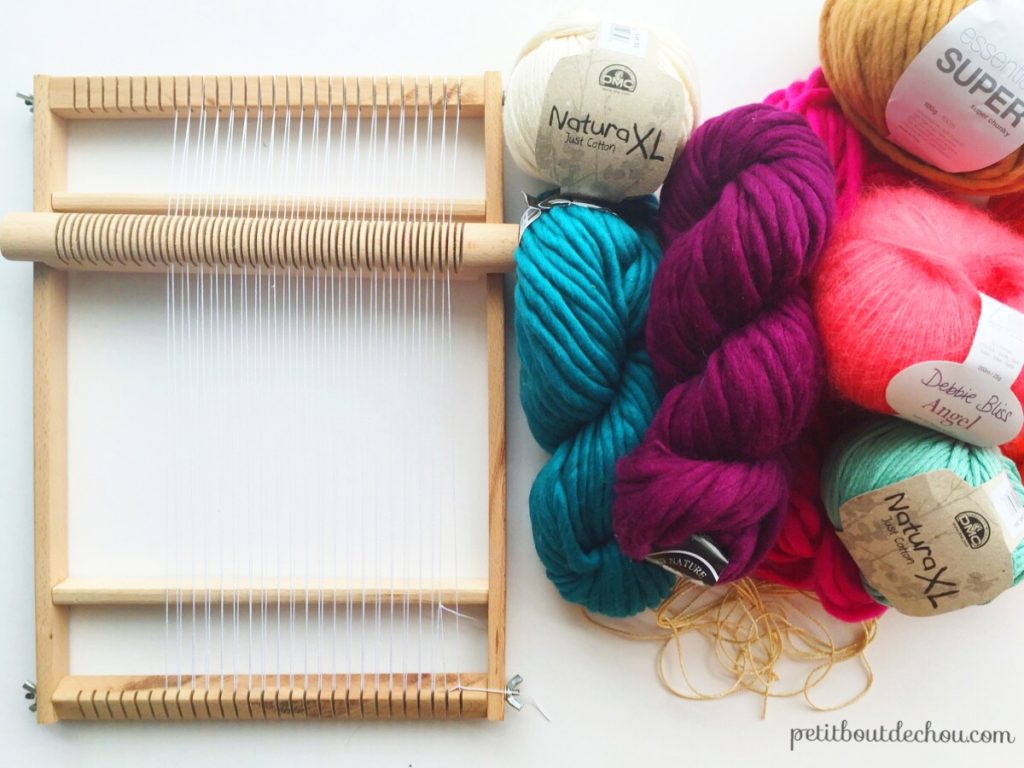
SUPPLIES NEEDED:
- Weaving loom with weaving sword
- Weaving needles (long enough to cross the loom and with a big hole to thread the thick yarn skeins)
- Thick Cotton yarn balls for the main part of the work – natura XL cotton DMC
- Chunky yarn for the soumak braids – XXL merinos yarn
- Mohair and silk Debbie Bliss Angel yarn to add another texture
- Golden rope
- Scissors
WEAVING TECHNIQUES USED
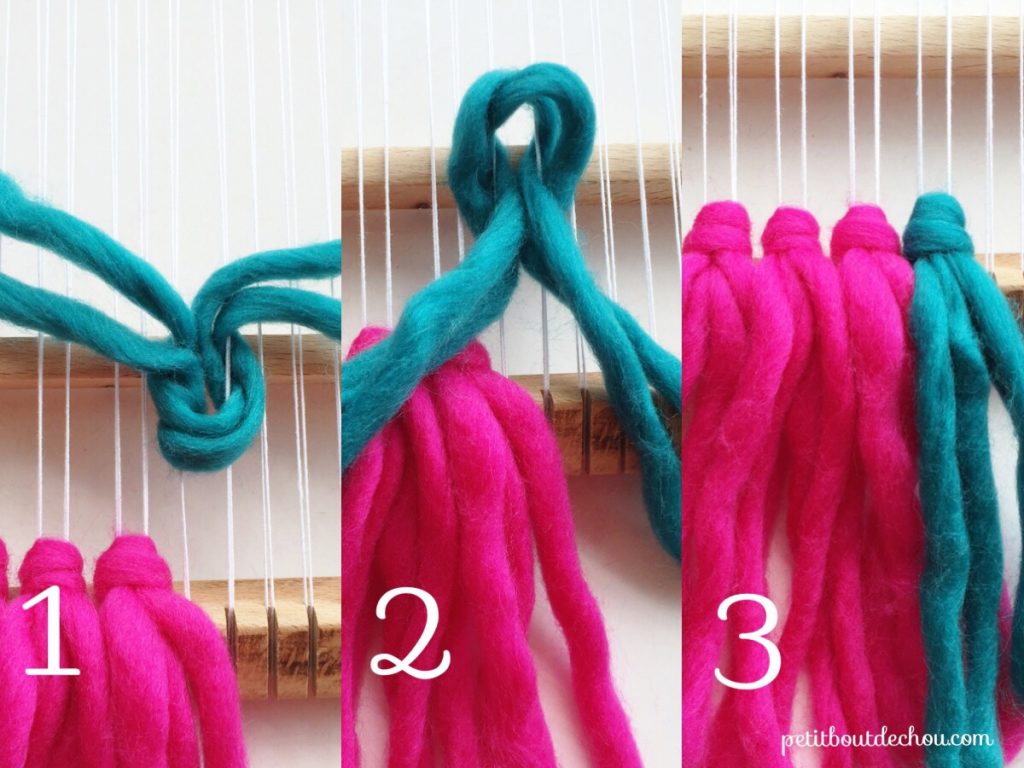
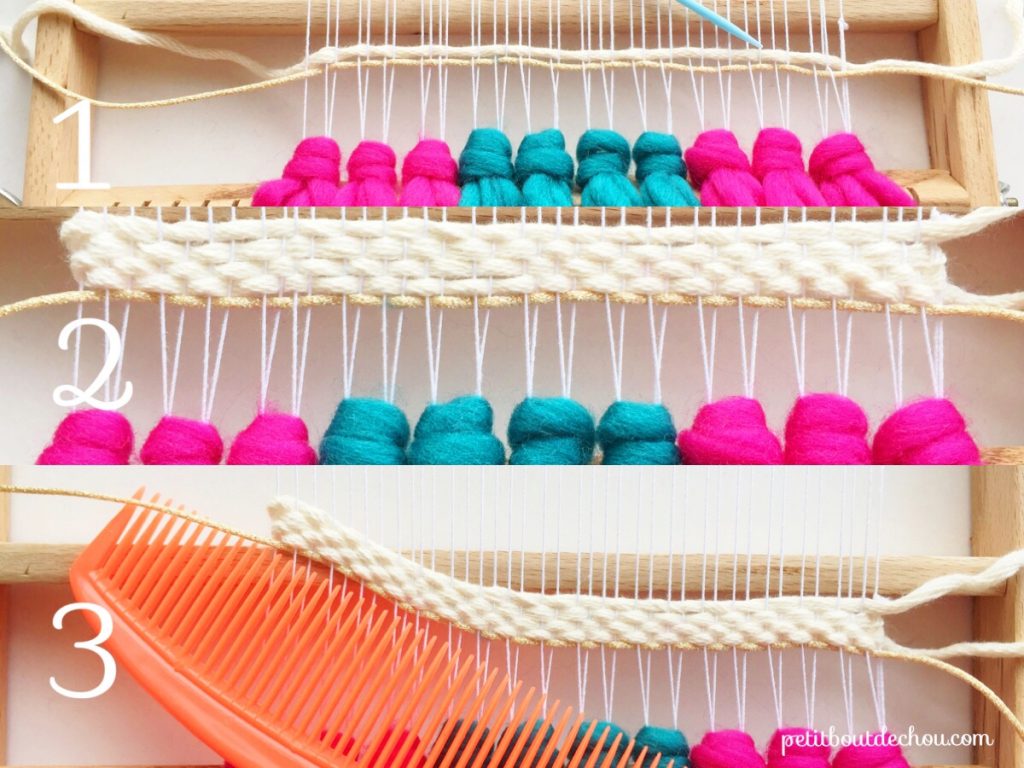
How to create a fringe using the Rya knot?
To create a pretty fringe at the bottom of your work, you can make a few Rya knots.
Fold the skein in two. We will work on 4 warp threads grouped by 2.
Wrap the skein around these 4 threads from the outside and bring the 2 skeins up between the two groups of threads (1).
Then, take these skeins towards the bottom of the loom inside the loop created to get the knot (2).
Push the knot towards the bottom of the weaving loom(3).
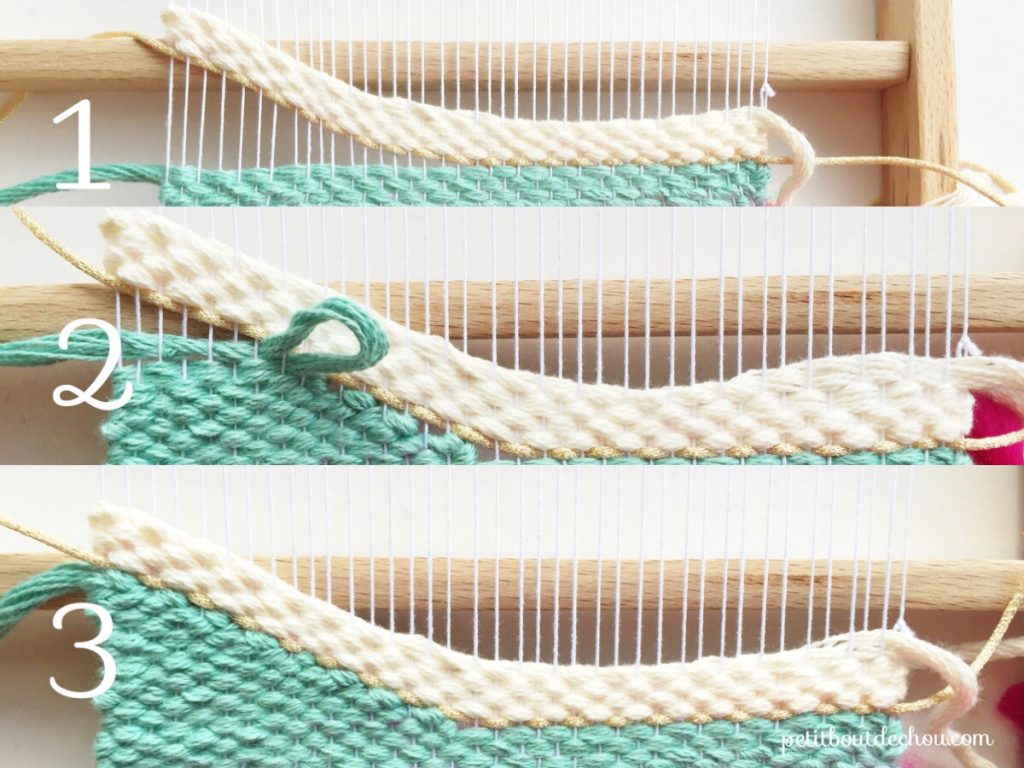
How to create the wave weaving?
To initiate the wave in your weaving, start by weaving a few straight rows (1& 2).
Use the weaving sword to create the wave by pushing these rows (3).
Then you just need to weave a few rows up to the rows of the wave (1) and weave stairs against which you will push these rows. These stairs are created by decreasing the number of stitches for each new row as shown in the example below (2 & 3) up to the weave. Push the weave against the stairs using the sword to finish the wave.
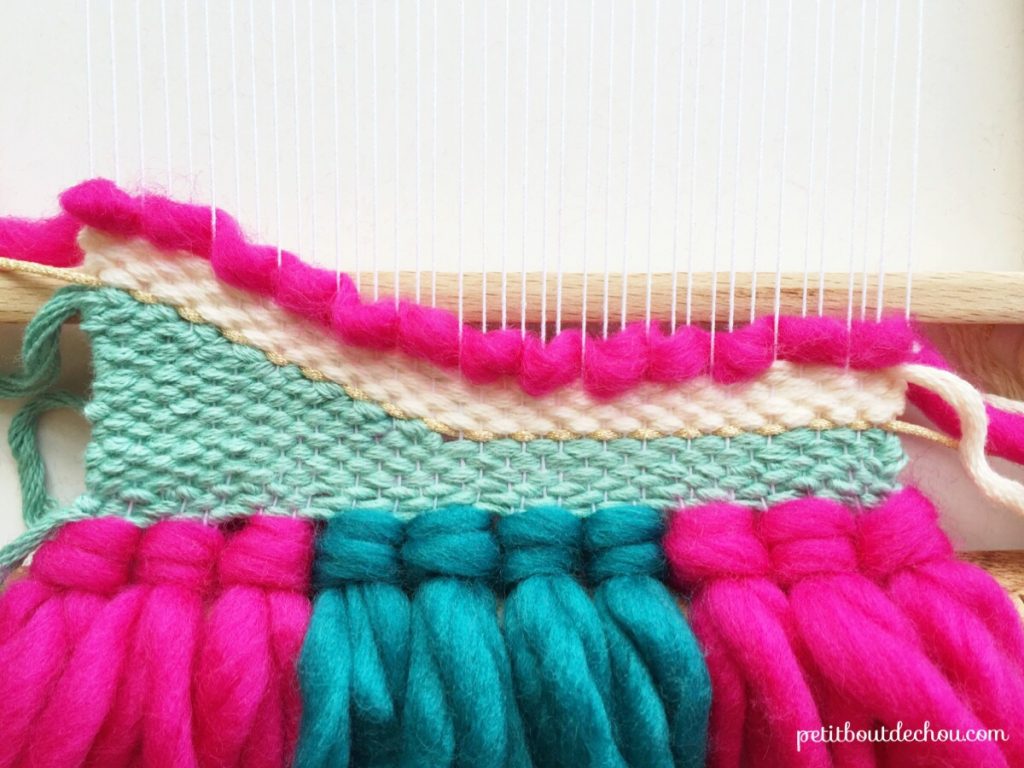
A little partition here created by going below once, above twice etc. with the XXL yarn. Pull on the yarn to give it this nice volume.
How to create a braid in soumak?
Instead of working on each individual warp thread, take two threads at a time to get a bigger pattern.
The braid is created in two steps.
We will always work from the center to the side of the braid.
First step
Bring the yarn between the first and second threads.
Take it over the first thread and the group of two threads from the outside. Go below the two groups of 2 threads going backwards. You have formed the first braid.
Go below the two groups of 2 threads. Take the yarn below the first group of two threads going backwards and repeat until you reach the end of this side of the braid (1).
Push the yarn against the previous rows (2).
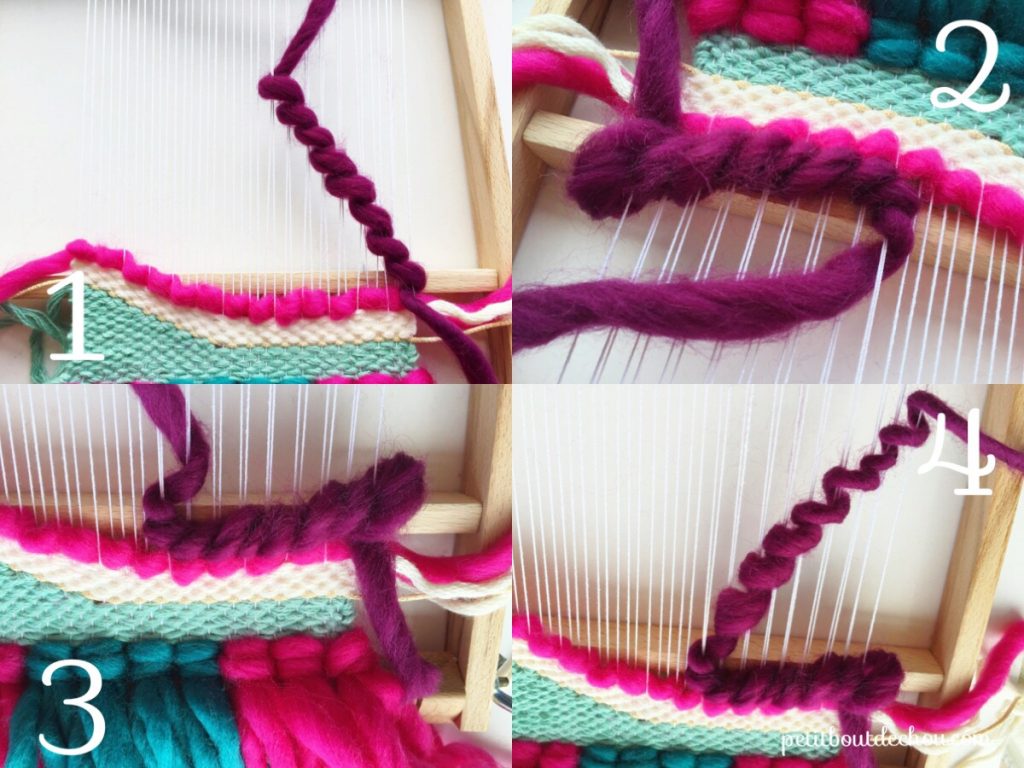
Second step
We continue with the second side of the braid by going backwards.
Bring the yarn above the first group of two threads (3).
Come back from the outside below these two threads (3).
Go above the two next groups of 2 threads. Take the yarn below the first group of two threads going backward from the outside and so on until you reach the end of this side of the braid (4).
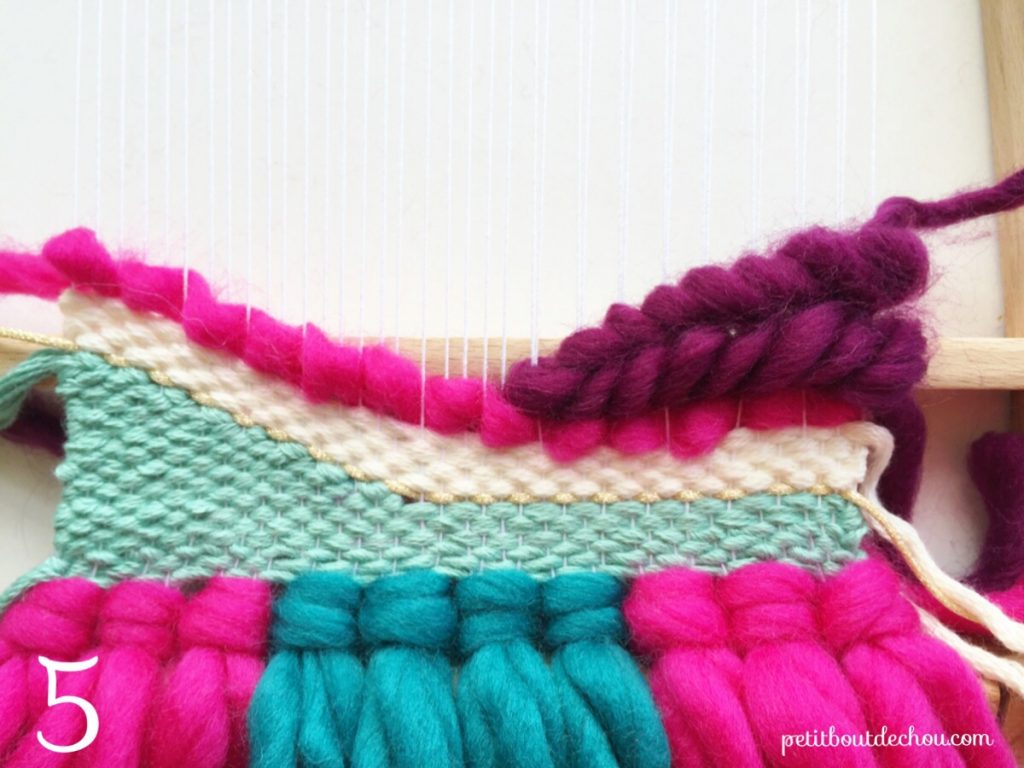
Push this side against the previous one to form the braid (5).
To get a nice volume effect, tighten the tip of the braid and loosen progressively the yarn with your fingers.
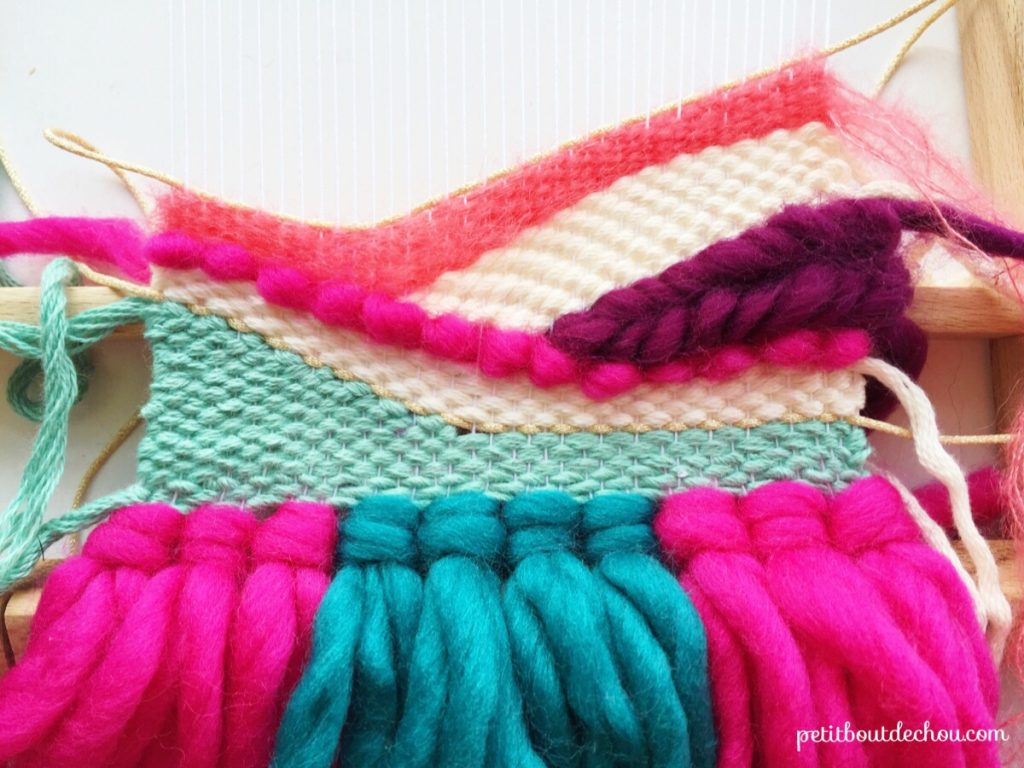
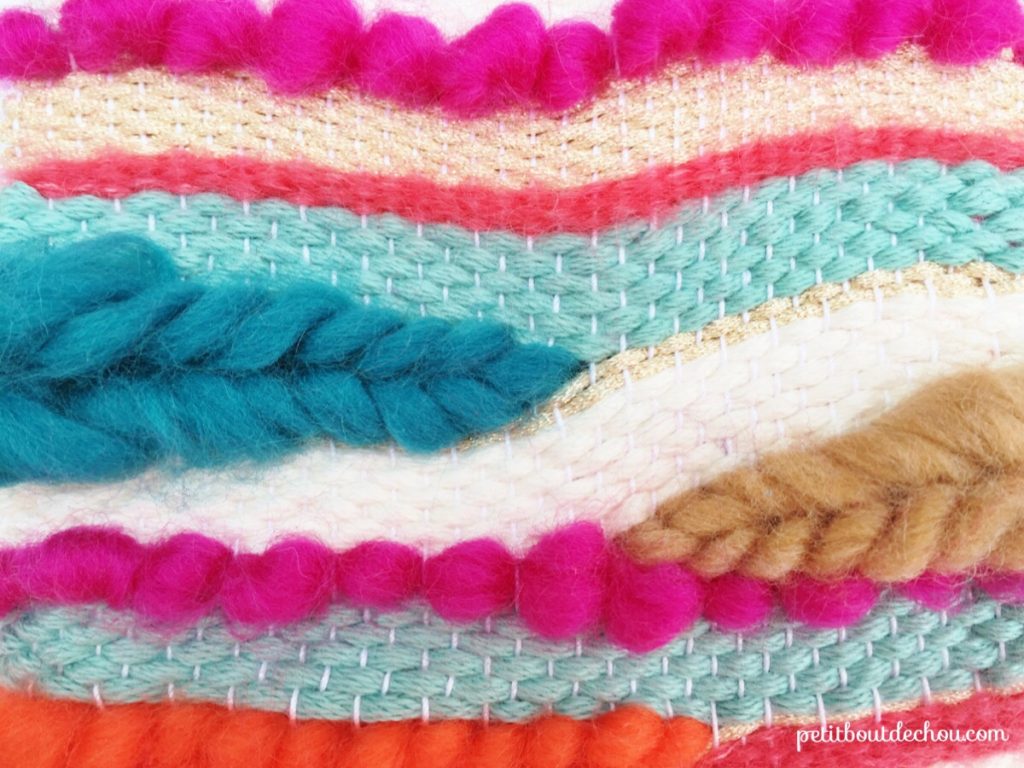
Continue the weaving alternating waves and braids. You can introduce some rows using the Debbie Bliss yarn (woven here with 4 skeins at the same time) and with the golden rope to vary the texture.
About the finishes: to stop and hide the skeins and to take off the weaving from the loom, please refer to the tutorial already mentioned above which gives a detailed explanation of these steps.
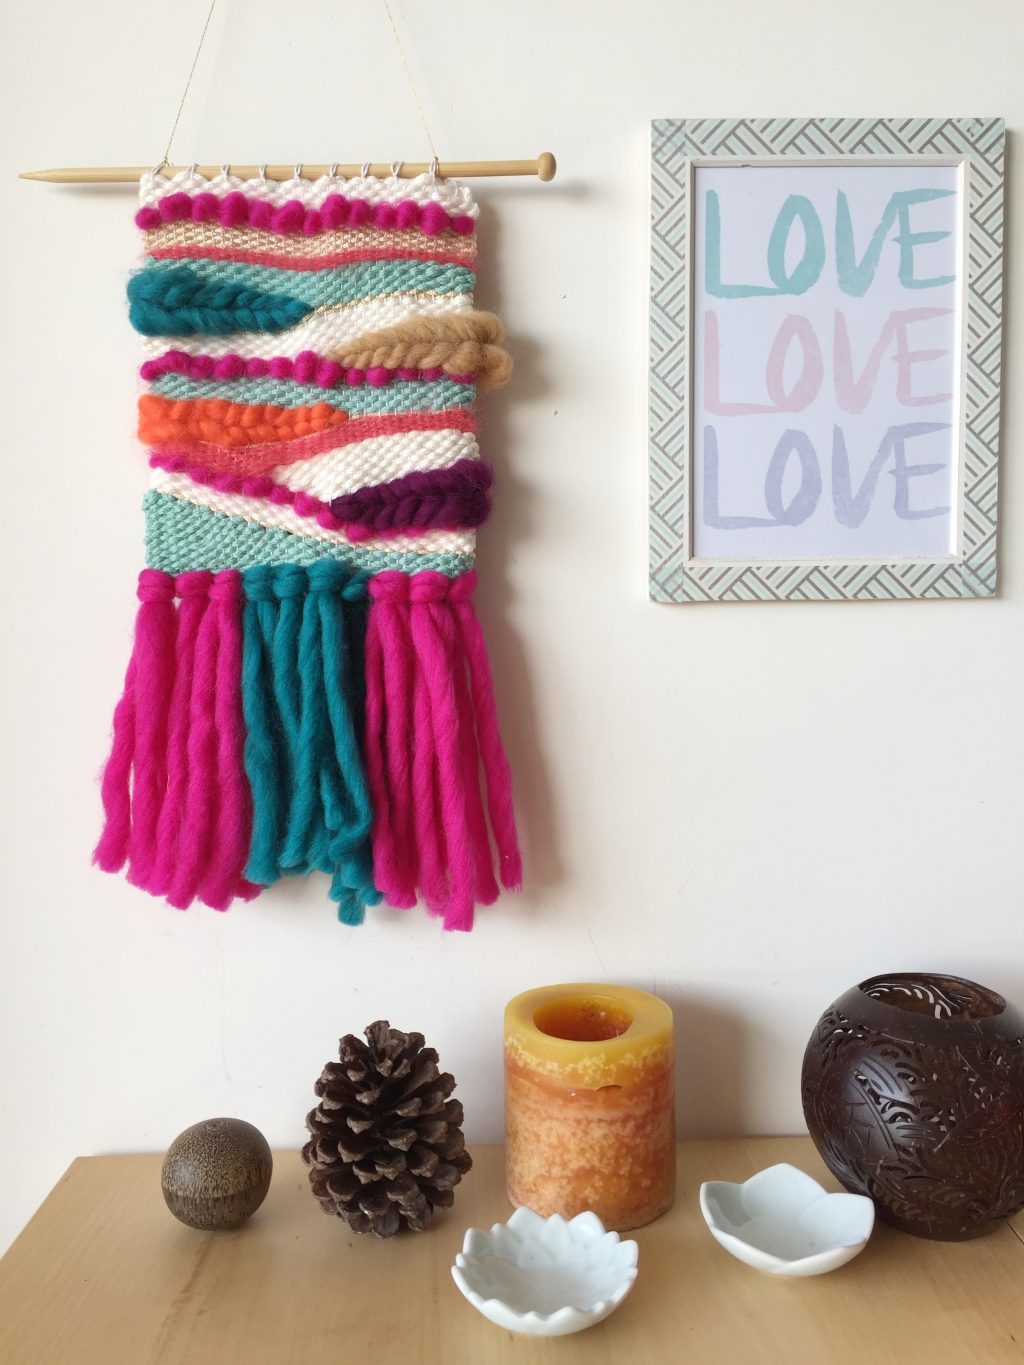
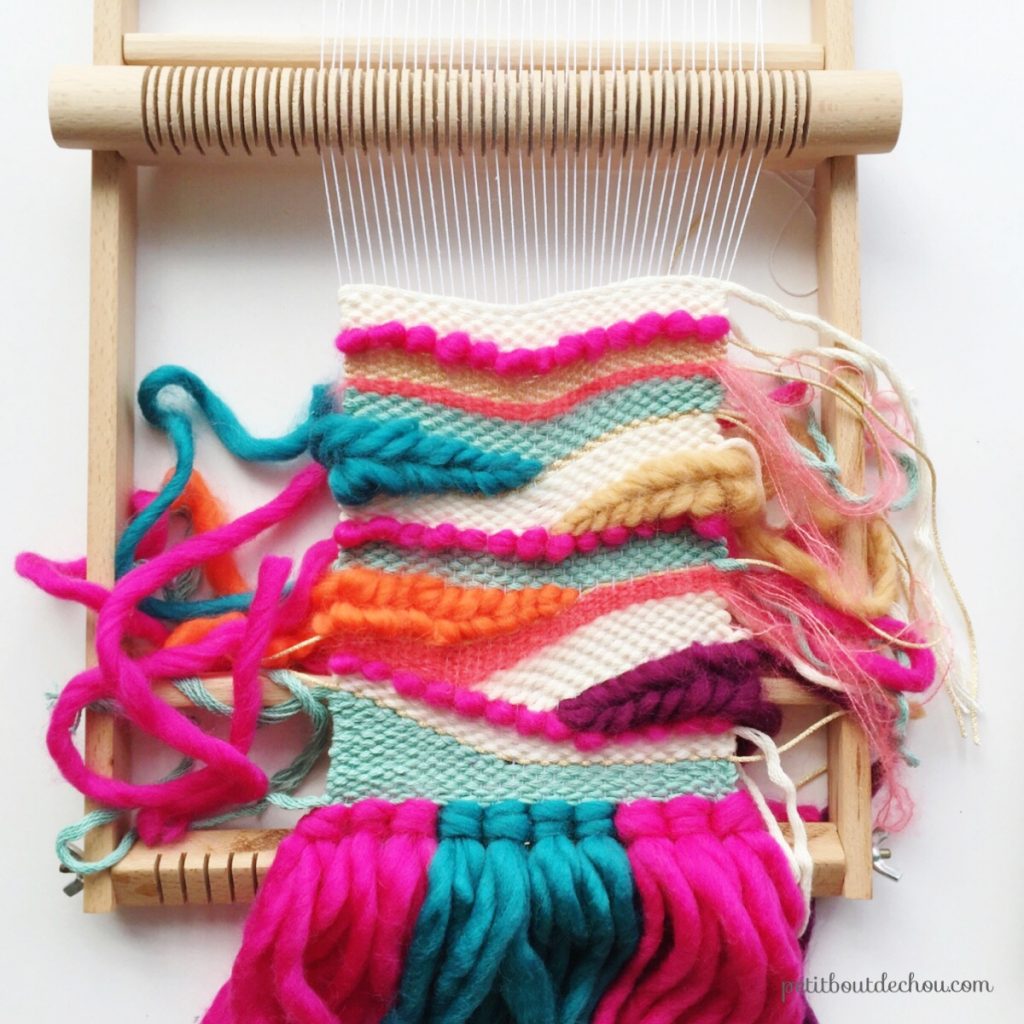
Now you just need to find a nice place to hang your weaving in your home!
I hope you enjoyed this tutorial.
You might also like:
Subscribe to Petit Bout de News my monthly newsletter to make sure you do not miss any post 😉


11 Comments
Waou, l’explosion de couleurs Estelle!!! C’est superbe!
Et ton tuto tout en détail, quelle patience 😉
Bises, Méli
Merci de m’avoir rendu visite. Un tuto étape par étape demande une certaine patience en effet ;-). Bises
ce weaving est magnifique j’adore les couleur et cet effet vague 🙂 mais j’ai une question je ne sais pas comment arreter les fils sur les coté pour la finition j’ai pas trouvé d’explications peux tu m’aider ?
Merci beaucoup Maeva. Pour les fils sur le coté, il faut les cacher sur l’arrière de l’ouvrage à l’aide d’un crochet. Il y a des détails dans ce tuto sur perles and co : https://www.perlesandco.com/Tissage_de_laine_mural_Laine_Essentials_et_Laine_Fashion_Gigantic-s-2287-42.html J’espère que cela te sera utile.
Il suffit de les dissimuler tous les bouts en les repiquant discrètement à l’arrière du tissage à l’aide d’une aiguille.
Cela prend énormément de temps, comme toutes finitions d’ailleurs, pour que un beau rendu.
L’aiguille ça marche bien aussi! Merci beaucoup Monique. Grâce à toi je me suis rendu compte que ma réponse à Marva n’était jamais apparue sur le site…
Le crochet aussi en effet, mais j’ai constaté que mes élèves préfèrent l’aiguille 😉
Pour la réponse, je ne voulais pas m’immiscer dans la conversation; je me souvenais t’avoir laissé un comm’ sur ce post il y a bien longtemps, et suis revenue te lire. Bises Estelle
Pas de souci Monique, au contraire, c’est une grande chance d’avoir ton avis sur le sujet et je t’en remercie. Tu as bien plus d’expérience à ce sujet ;-). Et puis je suis ravie que tu sois revenue me lire. Bises
Merci beaucoup Maeva. Pour les fils sur le coté, il faut les cacher sur l’arrière de l’ouvrage à l’aide d’un crochet. Il y a des détails dans ce tuto sur perles and co : https://www.perlesandco.com/Tissage_de_laine_mural_Laine_Essentials_et_Laine_Fashion_Gigantic-s-2287-42.html J’espère que cela te sera utile.
Very nice and very cute colors! Really how much time did it took to make these?
Hello, it was quite quick to do. I would say two or three hours maximum.