
You will be surprised to learn how easily you can create your very own personalised notepad in a few steps. I am a big fan of notebooks and notepads as I always need to take notes throughout the day. In fact I love beautiful stationery in general and always spend a lot of time selecting the most stunning items. This is the reason why I find it quite chic and original to make my own notepad with a design I love.
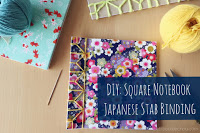
Follow me if you would like to learn how to do this too. You can also see my Japanese notebook stab binding DIY for another great binding technique.
This post was first published on Zalora community Hong Kong.

Supplies needed
- A4 paper 80gsm
- A4 cardboard of your choice – I took craft cardboard
- Paper trimmer
- Mod Podge + transparent gelatin powder or sheets – (optional) or padding compound
- Paint brush
- Binder clips

DIY steps
1. Design your typical page and print it!
Prepare a custom design for your notepad using any office software (Word, Pages) or Photoshop if you have it.
To make one similar to mine, simply put some grey lines, add an image decor of your choice for the background. Place a white rectangle on top of it and adjust the transparency until you get the result you like. My transparency was set to 65%.
Then you can also add your name or initials to customise even more.
Copy your design 4 times so that it fills the A4 format and print as many pages as you want to fill your notepad with. I made a small one by printing 8 pages.
Go to my free printable page for this design in psd (photoshop) format and more DIY patterns.
2. Cut it!
Cut your pages in 4 precisely using the paper trimmer.
Do the same with your cardboard to prepare the back of your notepad.
Cut also 1 more scrap paper to this format if you have or just know that 2 pages will be scraped from your total number of pages.

3. Glue it!
Make a pile with the 2 scrap pages on top, the typical pages in the middle and the cardboard at the back.
Tap it gently so that the top border of your sheets are well aligned.
Use your binder clips to hold the top sides (4).
Prepare your own homemade padding compound or buy it already made. I made mine with mod podge and some gelatine sheets.

Just melt the gelatine sheets in some hot water and mix it with mod podge in a jar (1).
Apply the padding compound using a small paint brush on the top edge of the sheets, try to apply a few layers to make sure you have covered all the sheets (2).
Use a tissue to remove the excess of padding compound on the backing cardboard.
Then put some more binder clips on this edge to press the sheets together (4).

4. Let it dry and enjoy!
Let it dry for 12 hours.
Remove the binder clips with care and strip the first two scrap pages.

You are done! I hope you enjoyed this tutorial and you have learned how easy it is to create your own stationery.
I also made a special notepad for my beading works as you can see below.
These special notepads are available in my Etsy shop: they are made to prepare beading patterns in bead loom or brick stitch/peyote technique.

You can find these useful notepads for Miyuki beading jewellery makers here.

Follow me on Pinterest, Instagram or Facebook for more craft supplies tips, DIYs and free printables!
You might also like:
You can subscribe to Petit Bout de News my monthly newsletter to make sure you do not miss any post 😉


2 Comments
I love Miyuki beading as I always creative it by my idea way as like practice. Although I would love to learn more about Miyuki beading in different way, (not ear hearing).
I hope to hear from you soon.
Thank you
Hi Helen, thanks for your comment. I guess you can find quite a lot of tutorials on the blog as well as on my YouTube channel to learn about the main beading techniques. If you are interested to know more, please subscribe to my newsletter and you will receive my e-book as well as a series of useful emails to help you on your Miyuki beading journey. Happy beading times!