Winter freezing temperatures are an invitation to cocooning! I have chosen these winter pastel colours to create a decorating object that will be both soft and warm: a cushion cover knitted in stockinette stitch, an ideal and easy stitch for beginners.
This post was prepared in collaboration with perlesandco.com. You can read the French version of this tutorial here on their website.
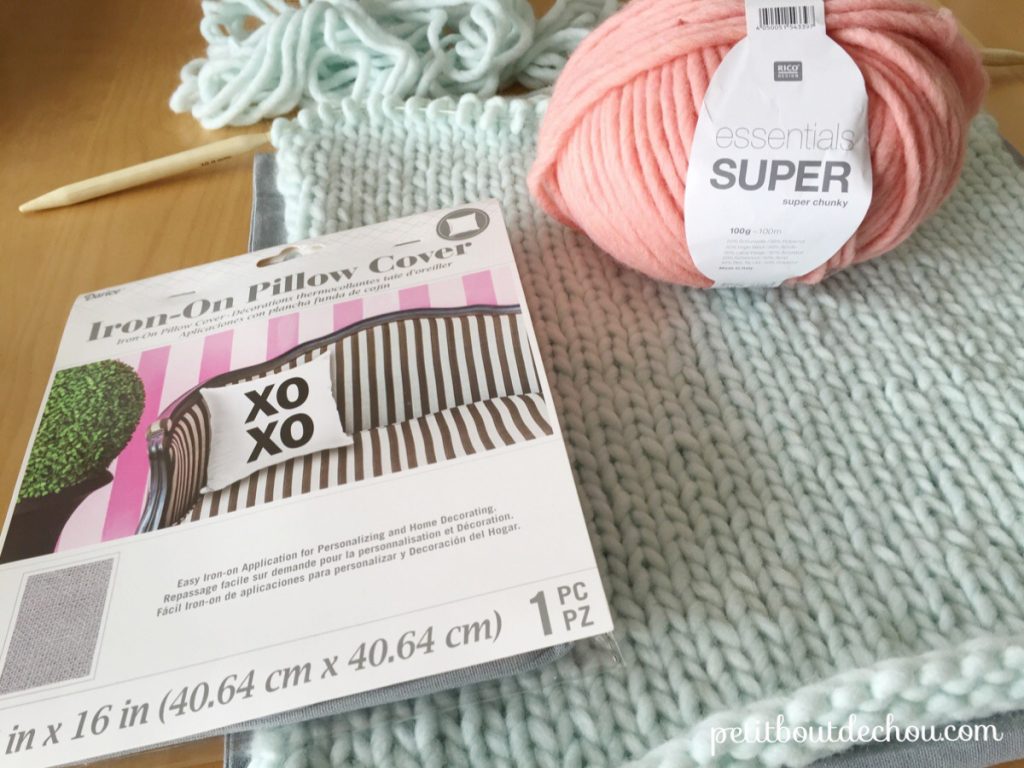
SUPPLIES NEEDED
- Essentials SUPER – super chunky from Rico design mint colour
- Essentials SUPER – super chunky from Rico design salmon colour
- Circular needles 10mm – 60cm long
- A cushion cover with zipper 40cmx40cm
- A cushion 40cmx40cm
- Tapestry needle
DIY STEPS
1. Cast on the stitches
Cast on 30 stitches in mint colour.
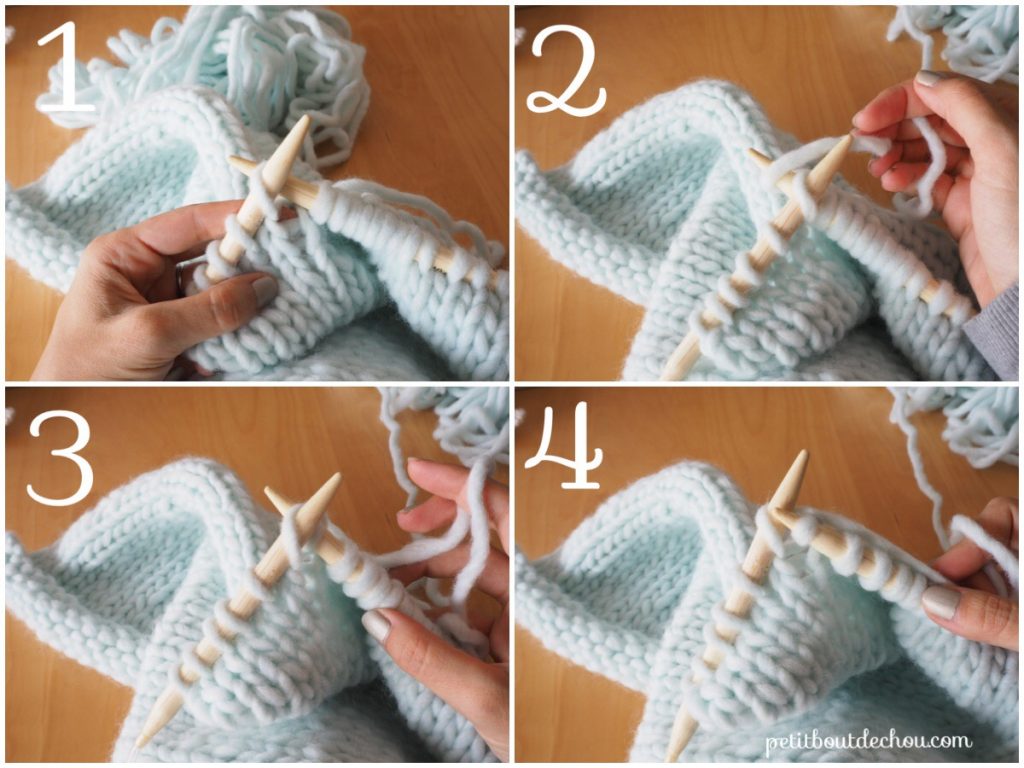
2. Stockinette stitch knitting
Knit in stockinette stitch (alternate one knit row with one purl row, etc) until one side of the cushion is covered. Odd row: knit
Pick the stitch on the left needle from the back using the right needle (1)
Yarn over (2)
Pull this loop through the stitch of the left needle (3) et (4)
The knit stitch is done (5).
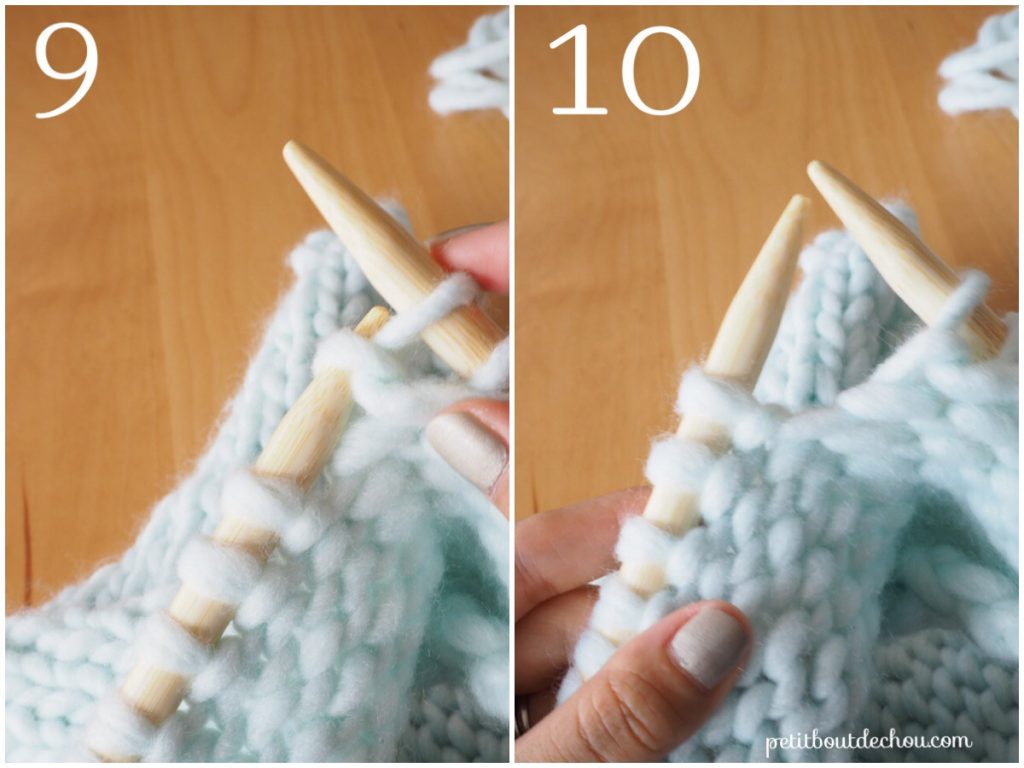
Even row : purl
Pick the right needle in the left needle stitch from the front (6).
Yarn over from the bottom (7).
Take this loop through the stitch on your left needle (8).
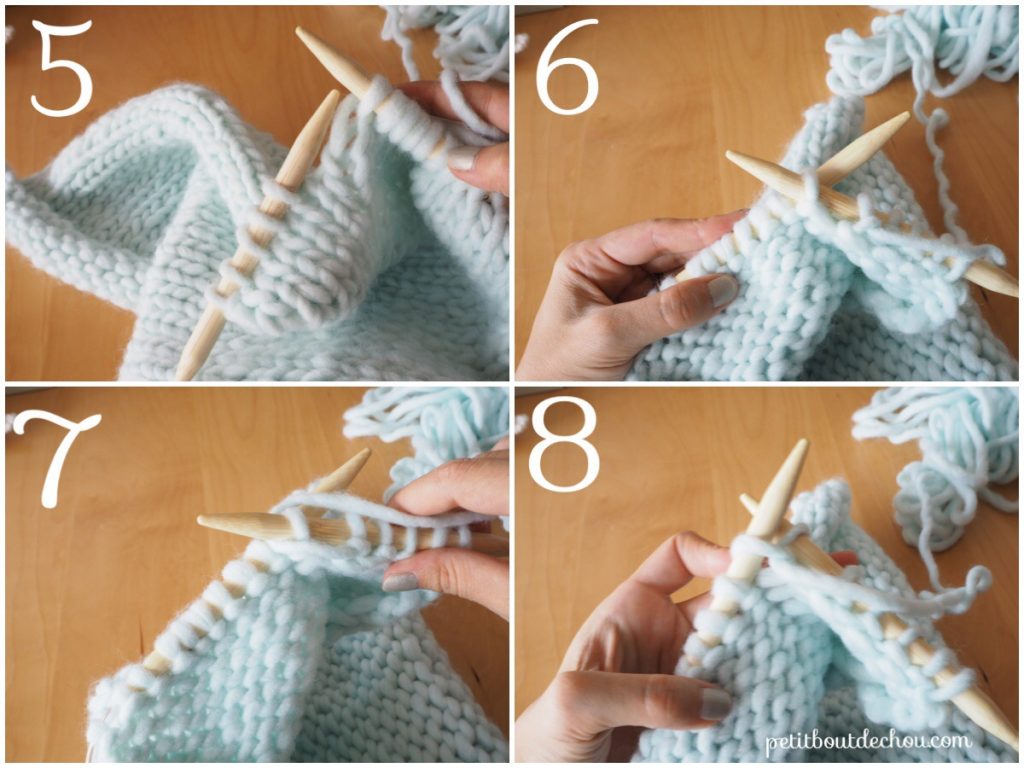
Pull the loop out of the left needle (9).
Your purl stitch is done (10).
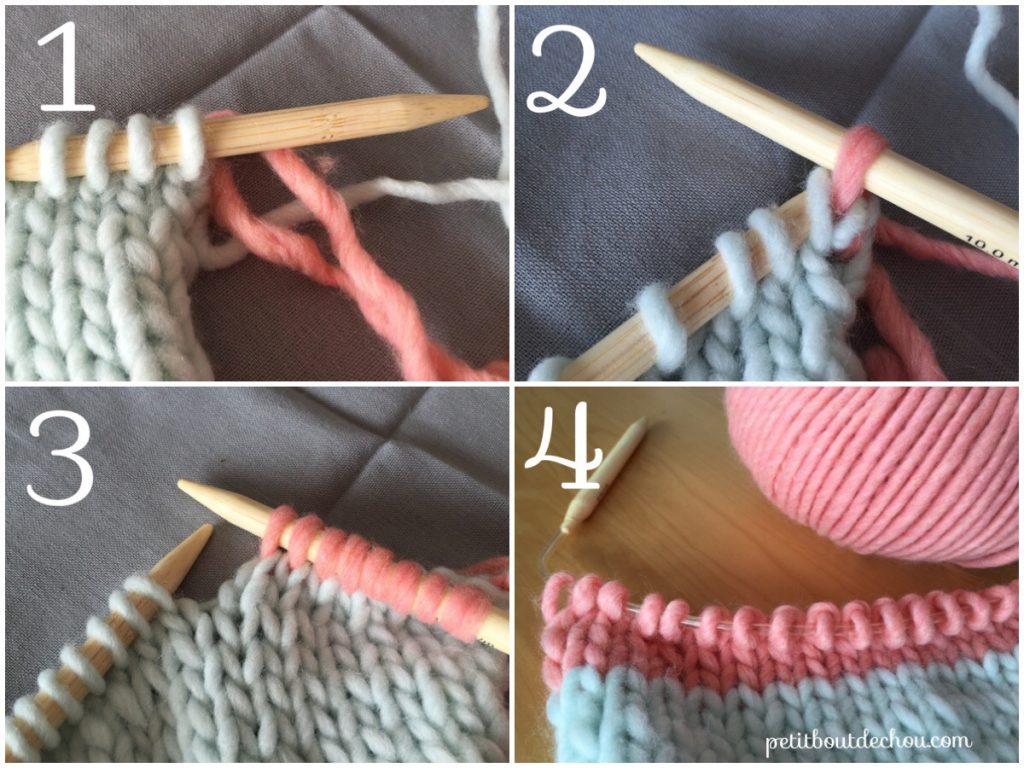
3. Change your yarn colour
To do so, fasten a thread of yarn with the remaining thread of mint colour and position it on the back of the knit (non-visible side) (1).
Continue in stockinette stitch (2) (3) until the second side of the envelope is also covered.
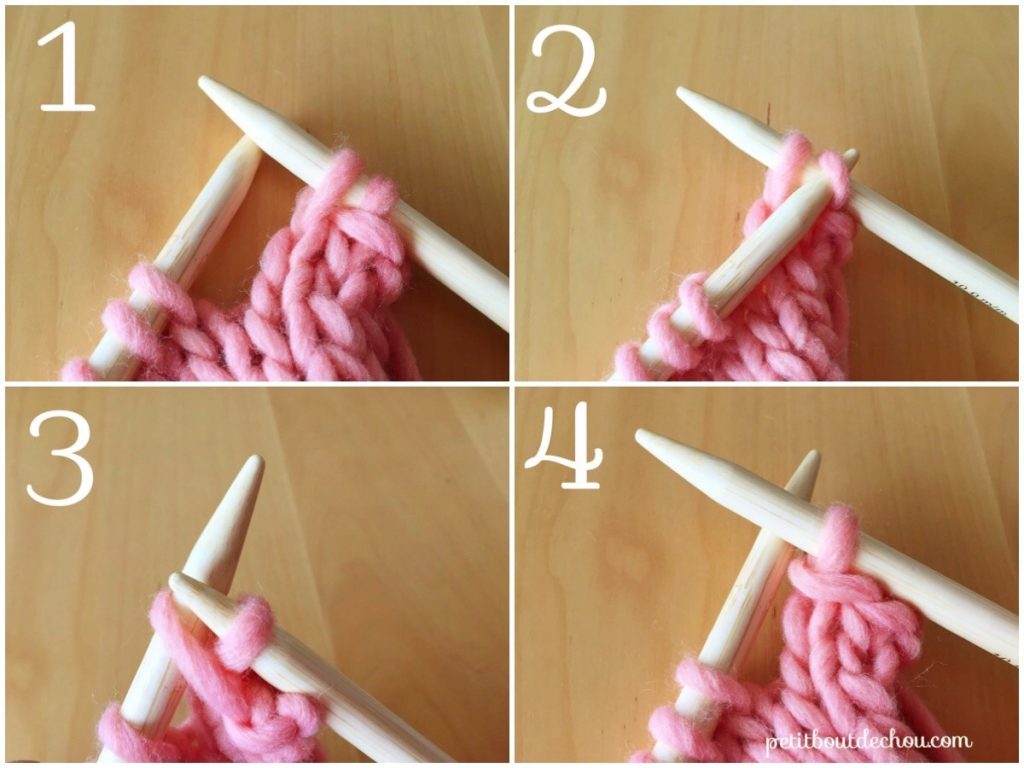
4. Cast off the stitches
To do so, knit two stitches (1) – you have now two stitches on the right needle.
Pick the first stitch with your left needle (2).
Pull this stitch over the second one on the right needle (3).
You only have one stitch left on the right needle (4).
Knit another stitch and star again with two new stitches on your right needle until the end of the row.
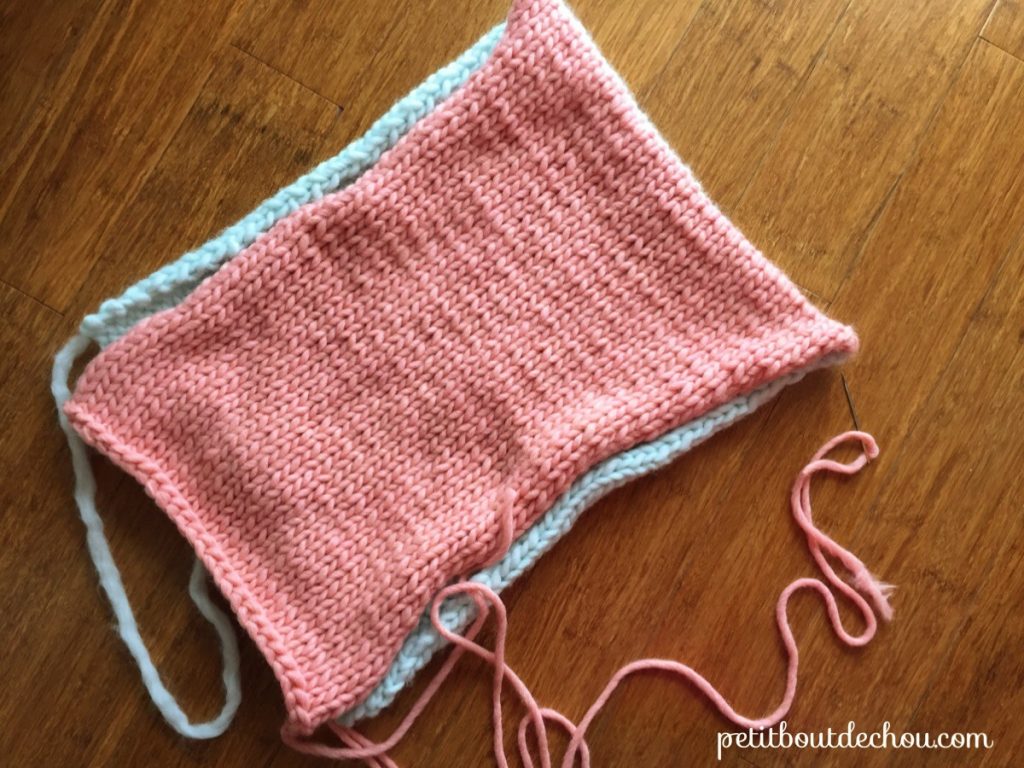
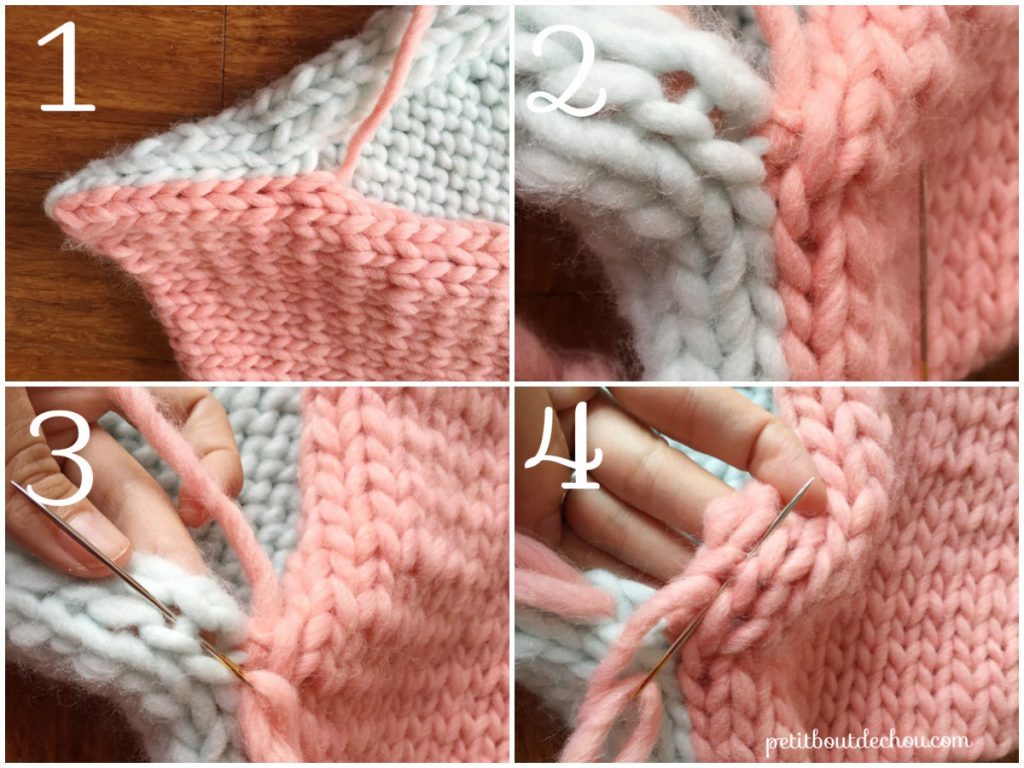
5. Assembly
Stitches are now cast off. We need to assemble both sides of the knit starting at the change of colour point which is aligned with your fold.
To do so, we use the mattress stitch (1) used a lot in knitting.
First lay out your pieces next to each other and try to spot the horizontal running threads that connect stitches when you separate the main stitches (2).
Prepare a thread of yarn on a tapestry needle. Make a knot on the backside at the change of colour.
Pass your needle below this thread on the mint side (3) and below the running thread on the salmon side at the same level (4). Continue alternating mint and salmon side until you reach the bottom of the cover. By pulling on the thread as you go, you will see both sides aligning so that the sewing becomes invisible.
Place the cushion in the cover with zipper, then insert in in the knitted cover. Make sure the zipper is at the bottom.
You can sew a few stitches on both sides of the zipper to reduce the knitted cover opening side.
You are done!

Follow me on Pinterest, Instagram or Facebook for more craft supplies tips, DIYs and free printables.
Subscribe to Petit Bout de News my monthly newsletter to make sure you do not miss any post 😉


