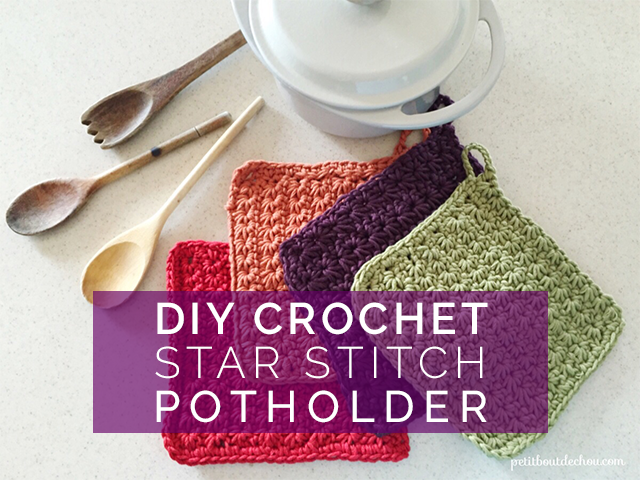
It has been a while since I spotted this beautiful crochet stitch on Pinterest for the first time (I know it sounds a bit like a love story…) I finally found recently the opportunity to try this new technique and guess what… I love this stitch! In fact it is much simpler than it looks and the finish is stunning.
I thought it would make a nice potholder using a thick and colourful cotton yarn. So that’s what I tried and I am really pleased with the result.
Follow me to learn this great crochet stitch in this step by step tutorial to make these stylish potholders in autumnal colours. They will be the perfect accessory both useful and decorative for your kitchen this fall.
This post was originally published for perlesandco.com
Supplies needed:
- Cotton Natura XL
- Crochet 7mm
- Scissors
- Needle

The star stitch is base on two rows: the first one will create the bottom of the star. The upper one will form the top part.
Abbreviations
Ch: chain
Hdc: half double crochet
Sc: single crochet
Hdc: yarn over, insert hook in stitch and pull up a loop, yarn over again and pull through the 3 loops on hook.
Foundation Chain
Chain 27

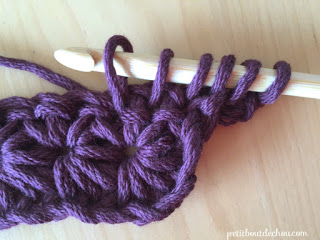
Row 1
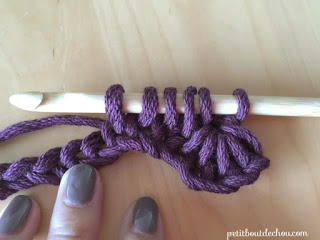
We will create the bottom of the first star by pulling 5 loops that will form the spikes of the star.
Insert hook in the 2nd ch from the hook (see drop marker) and pull up a loop.

Repeat in each of the next 4 ch (you should have now 6 loops on the hook),

You will now form the bottom of the first star.
Yarn over and pull through all loops on hook,
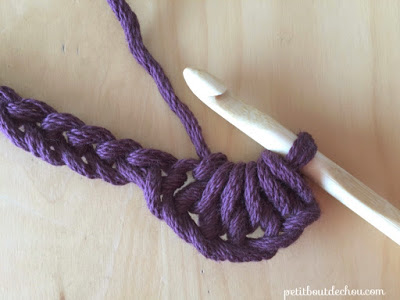
then ch1 to form the “eye” of the star.
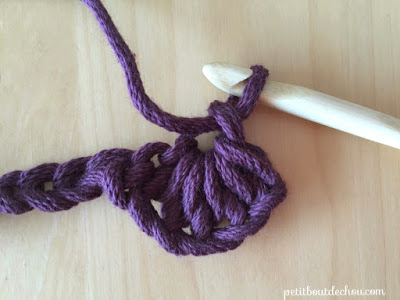
We will now create the bottom of the second star.
*insert hook and pull up a loop in the eye of last star

insert hook and pull up a loop through the last loop of previous star,

insert hook and pull up a loop through same ch as last loop of previous star,

insert hook and pull up a loop in each of next 2 ch (you should have now 6 loops on hook),
yarn over and pull through all 6 loops, chain 1. We get the second half star.
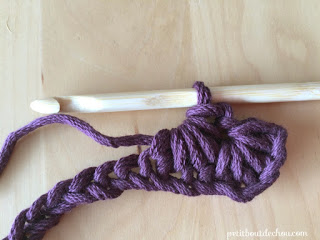
Repeat from * across, until you have only one chain remaining from the foundation chain.

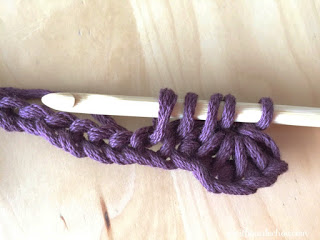
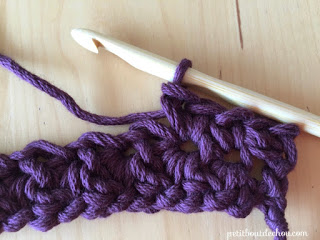
end the row with 1 hdc in last chain, and turn.
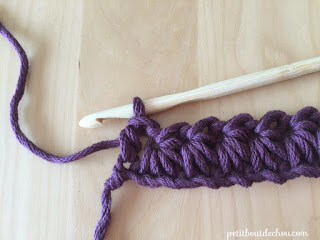
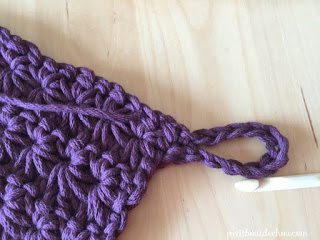
When you turn, it should look like this:

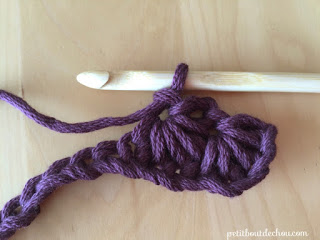
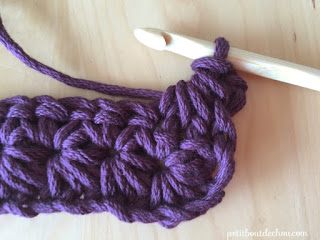
Row 2
We will now form the top part of the stars.
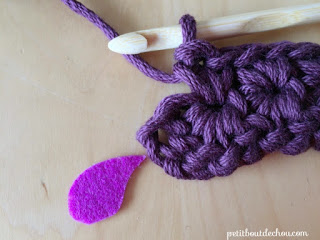
Chain 1, make 1 sc in the hdc,
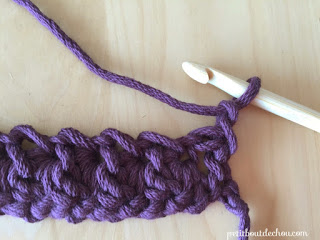


1 sc in the eye of the next star stitch,
2 sc in the eye of each star stitch across,
End with 1 sc in the top of the turning chain and turn. The drop marker shows in which stitch you should insert the hook.
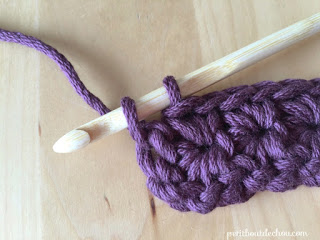

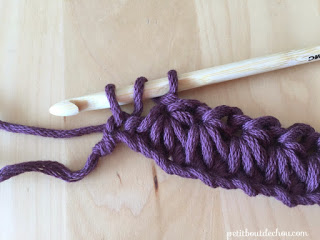
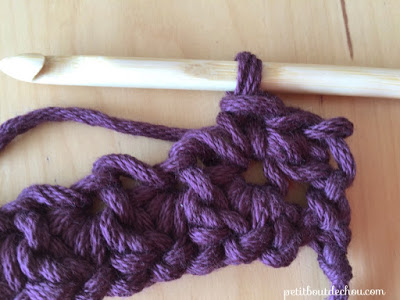
Row 3
We are back to the front side.

Chain 2,

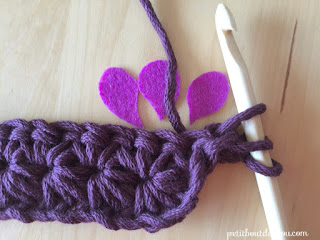
Insert hook and pull up a loop in front strand of the 2nd chain from the hook,

then insert hook and pull up a loop in the back strand of the same chain,


insert hook and pull up a loop in each of the next 3 sc (as marked by the drops),
yarn over and pull through all the 6 loops, chain 1,
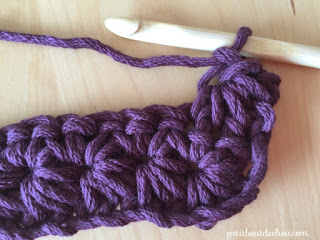
Then, repeat as per row 1.
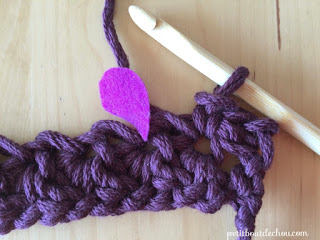
*insert hook and pull up a loop in the eye of the last star,
insert hook and pull up a loop in back of last loop of the star,
insert hook and pull up a loop in the same sc as last loop of the star,
insert hook and pull up a loop in each of the next 2 sc,
yarn over and pull through all 6 loops, ch 1, repeat from * across,
end with hdc in last sc (same sc as last loop of the last star stitch).
Repeat rows 2 and 3 until you have reached 7 or 8 rows of stars (depending of the tension you apply=> stop when you obtain a square).

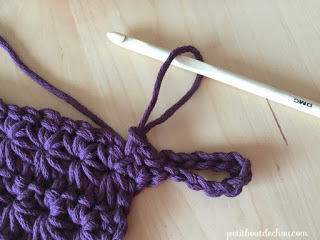
Chain 10,

and slip stitch in the first chain to close the chain loop created (this will be your hanging loop).
Single crochet all around and once you reached the starting corner, fasten off and weave in the end thread using your big needle.

Now you have learned the star stitch!

You can make variations of this potholder using different colours to decorate your kitchen following your cravings of the season!
I hope you enjoyed this tutorial about the star stitch crochet technique.
Follow me on Pinterest, Instagram or Facebook for more craft supplies tips, DIYs and free printables!
You might also like:

You can subscribe to Petit Bout de News my monthly newsletter to make sure you do not miss any post 😉


13 Comments
These are the best directions, pictures, purple pointer I have ever seen! I have been trying to do this stitch for years!! Thanks
Hi Carmen, thank you so much for your kind works, you made my day ;-). I am really glad the tutorial was helpful. Happy crochet time!
Beautiful! Thanks for the pictures! If I want to add a star to the row, how many stitches do I need to add?
Hi Katie, thank you for your kind words. You should add 3 stitches for an additional star if my count is correct. I hope this helps.
Hi – don’t you need to start with an odd-numbered foundation chain for the star stitch? I tried following this pattern last night and ripped out the first row more times than I care to admit because every time I did the 28-chain foundation chain, when I got to the end there would either be 2 chains left or no chains left. When I perused around online today, everything I’m finding says to start with an odd-numbered foundation chain so perhaps that was the problem. At any rate, I wanted to let you know in case you need to change the pattern above. Your pattern is great otherwise! I love all of the photos and detailed instructions.
I should also note that today, after trying with an odd-numbered foundation chain, I’ve had no problem. https://uploads.disquscdn.com/images/c52dbae1ef0d11834cc19a13e96d7518823934cced63501ce0a36c456dd2dd5d.jpg
Thanks Meredith for your feedback! Actually nobody mentioned it so far so I haven’t noticed.
You are right, the chain should be done with an odd number. I have changed that in the post.
Hello Estelle,
I’ve been wanting to try the star stitch, and this looks like a great way to learn! I love the look of the thick cotton yarn, and I’m looking for a supplier in the USA. Can you please tell me how many pot holders you can get from one ball of yarn?
Thank you!
Hi Victoria, thanks.
The ball of yarn I have used (DMC Cotton Natura XL) is 75m long.
As you can see from the picture, you can make one full pot holder out of it, however I doubt you can do 2 numbers. To be on the safe side, I would say you need 50m for one. I hope this helps.
Hi – I have regular cotton yarn on hand. How will this change the size of hook I use?
Hi Robin, with regular cotton yarn, I would suggest using a 4mm size hook.
Are these thick enough to use when pulling something out of the oven? Will they protect hands? Or would they just be for setting hot things on?
They are quite thick so I use them to pull things out of the oven and to set hot things on as well.