Some time ago, when I was a student in Paris, I remember Vanessa B. was the It bag. All the French girls had one of those in every possible color…
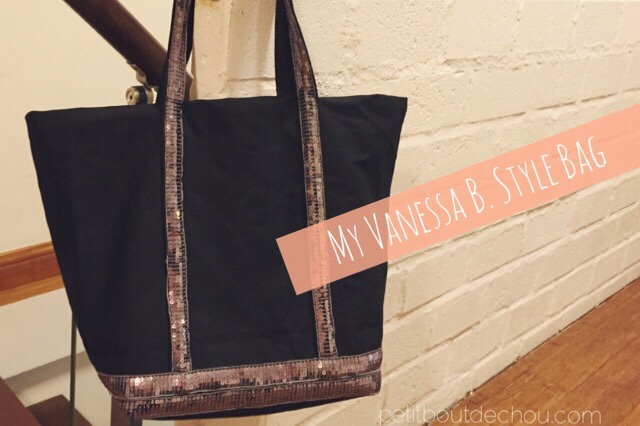
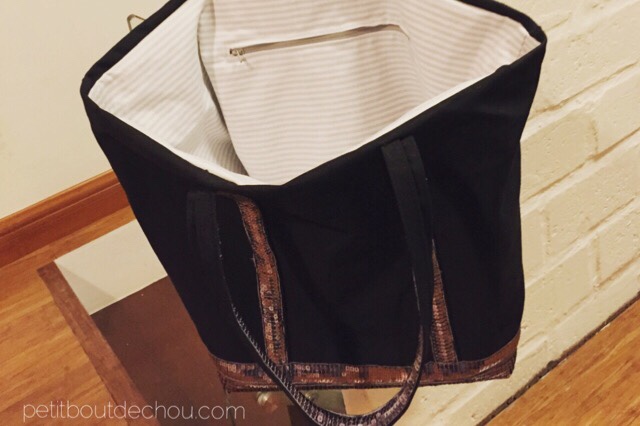
So that’s maybe why, today (hum hum a few years later…), I have decided to make my own Vanessa B. style bag.
There are many tutorials on the internet explaining how to do this bag maybe mostly in French as Vanessa B. is a French designer.
You can find below most of the tutorial steps for this bag. For the complete pattern, sewing tips and dimensions, you can download it here from my Craftsy page.
Supplies needed:
- 2 cm wide sequin ribbon – I bought 5 yards (4.6 m) – You can find a great choice of colors at Sunrise Garment Accessories, a small shop located Shop 5, G/F, Nam Cheong Center, 81-95 Nam Cheong Street, Sham Sui Po, Kowloon (this shop is actually on Ki Lung Street side of the building).
- 1 yard of external fabric of your choice (here I have used a thick black cotton)
- 1 yard of lining fabric – I took a 100% cotton (here I have used a striped white and light grey pattern).
- 1 yard of laminated fabric – can be any color => you will not see it any more at the end, it is just a layer to make the bag stiffer so it holds itself.
- 1 sewing machine with thread
- 1 20cm zipper
- 2 Nos. 25x 25cm pieces of fabric (here I have used a zigzag pattern Korean cotton from Dailylike)
I bought all these supplies from Sham Shui Po. If you are new to Hong Kong, have a look at my “10 shopping places every craft lover in Hong Kong should know!” post. I hope it will be helpful!
DIY Steps:
1. Cut your fabric
As shown in my pattern, just cut your fabrics following the dimensions.
For the big piece (which will be the bag itself), you need to:
- cut 2 times this piece in the external fabric
- cut 2 times this piece in the lining fabric
- cut 2 times this piece in the laminated fabric
For the long piece = the straps, follow the dimensions (130x8cm) and cut 2 pieces in the external fabric.
2. Make the straps
First you need to prepare the external fabric.
For this one, I just fold the strap in two and fold again the edges to hide them inside. Then, sew along the edge.
You just need to place the place this seam centered at the bottom of your strip and iron it.
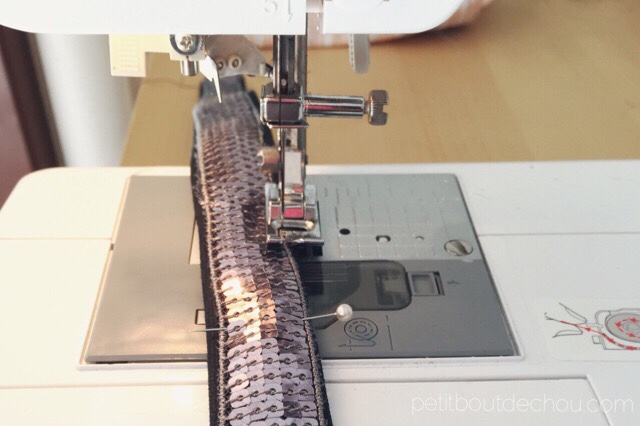
Then pin your sequin ribbon centered on the strap and sew along both edges of the ribbon.
Start again with the second strap.
3. Install the straps
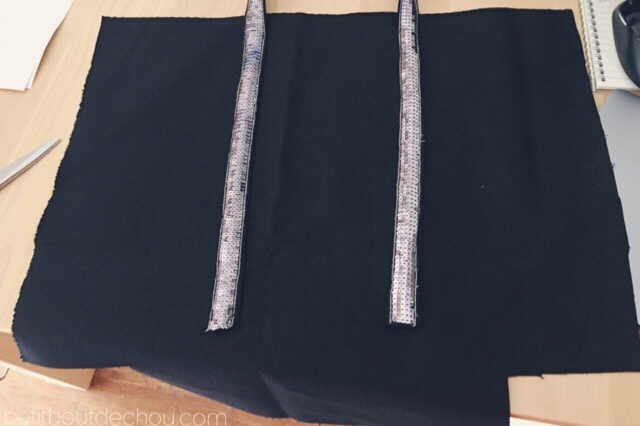
Pin the straps on the external fabric pieces following the spacing and dimensions indicated on the pattern.
Sew the straps by following the same seam as the one to fix the sequin ribbon on the straps.
Be careful, you have to stop the seam 2 cm before the edge of the fabric at the top!
4. Install sequin ribbons at the bottom of the bag
Cut 2 times 50cm of 2cm wide sequin ribbon.
Then, pin the first ribbon so that you cover 1.5cm of the bottom part of the straps.
Pin the second ribbon just below the first one. You should end up 1.5cm from the bottom side of the bag as shown in the tutorial.
5. Create an internal pocket
For this section, I have chosen a hidden pocket with zipper. I have followed this tutorial here in French only but with very clear pictures and easy steps.
6. Pieces assembly
Take the 2 pieces of lining.
Place them back to back.
Sew the sides at 1cm from the edge.
Then sew the bottom edges at 1 cm from the edge.
Finally, fold to form the bottom as shown on the picture below and sew the “sides” of the bag bottom.
Repeat these steps for the 2 pieces of laminated fabric.
And repeat again for the 2 pieces of external fabric.
7. Bag turning inside out and last seam
This is the most tricky part…
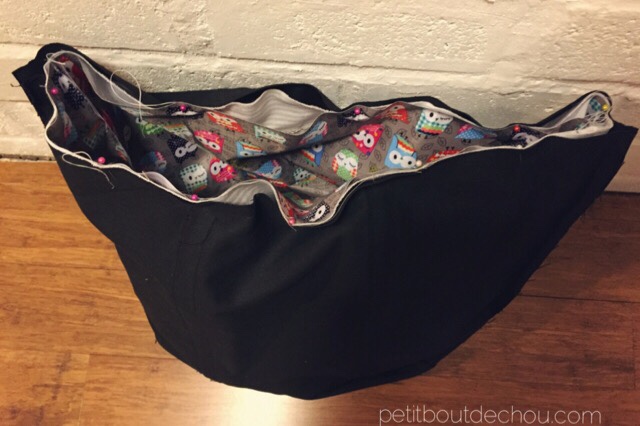
Place the pieces following the picture below (a bit like Russian dolls…):
- External fabric piece: place it wrong side out and place the straps inside.
- In the external fabric piece: place the lining piece right side out i.e. same as it will be once installed in your bag (the zipper is toward the inside => as you can see on the picture)
- In the lining piece: place the laminated fabric piece wrong side out (but for this one the side does not really matter as it will be completely hidden between the lining and the external fabric. Bye bye cute little owls…
- Then, you just have to sew all around the top edge except about 20cm that you need to keep open to turn the bag out.
- Turn the external fabric piece out through this opening.
- You just need to make an invisible seam to close the 20cm opening and you are done! Here is a tutorial for invisible seam if you do not know this stitch.
I am quite proud of the result! I am now using it to go to work everyday.
I hope you enjoyed this tutorial. Please share below if you have followed this tutorial or leave me your comments.
Happy sewing everyone!






2 Comments
Thanks for linking to my zippered pocket tutorial ! The tutorial is also available in English here : http://sacotin.com/en/zippered-pocket-tutorial/
Thanks Vero for your very useful tutorial!