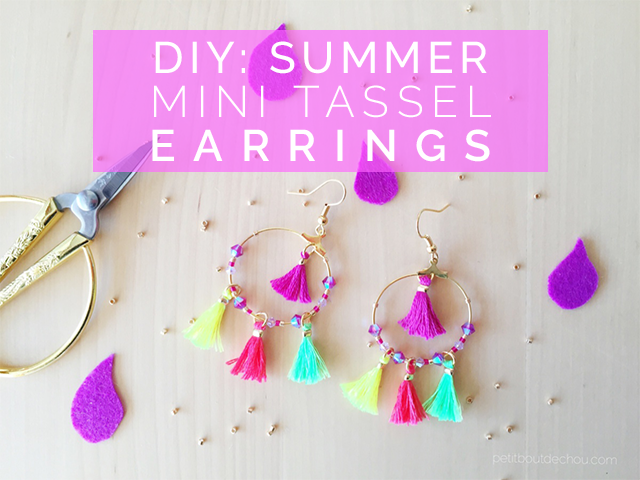
Hello Summer! As the temperature is rising and the sun shining bright here in Hong Kong, I was in the mood for some summery accessories creation. I have to admit I couldn’t resist this summer’s tassel trend! Cute and colourful, they are perfect to add a touch of joy on your accessories and jewellery. I have chosen some bright colours for these earrings to go with you to the beach ! Ready ? So let’s start.
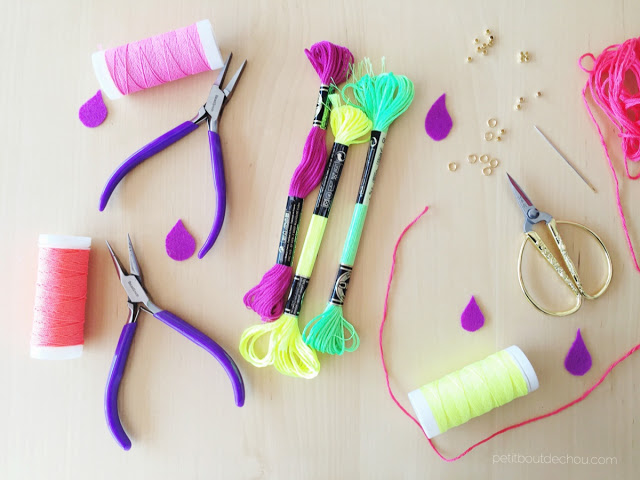
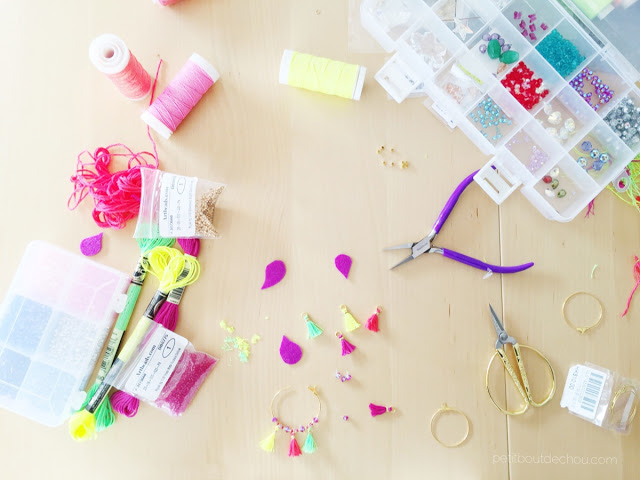
Supplies needed:
- Jewellery pliers
- Scissors
- Needle
- Miyuki delica beads
- Swarovski crystal beads
- Embroidery floss in fluorescent colours
- 8 Jump rings
- 2 Earwires
- 2 jewellery Hoops
- 8x 3mm crimp beads
I found most of these supplies in Sham Shui Po from the shops described in my ultimate shopping map for craft lovers.
DIY steps
1. Make mini tassels
So first let’s make a mini-tassel.
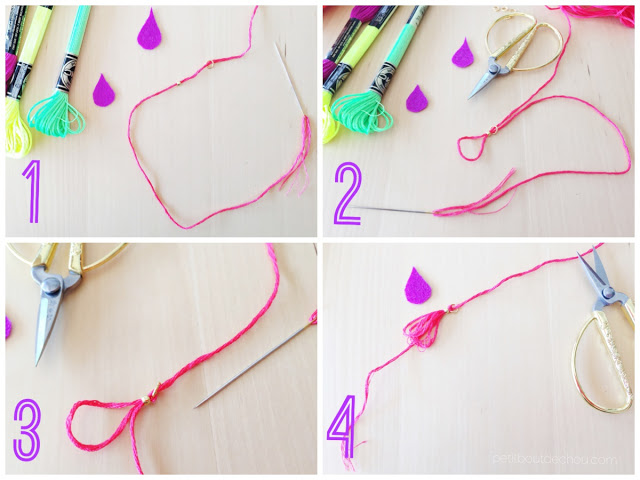
Thread the embroidery floss through your needle.
Go through a crimp bead and a jump ring (1).
Make a loop (you can use your little finger to hold the thread) and go through the crimp bead and jump ring again (2).
Wrap your thread around the jump ring and go through the crimp bead again (3).
Create two more loops (so 3 in total) and cut your embroidery floss about 15cm from your jump ring (4).
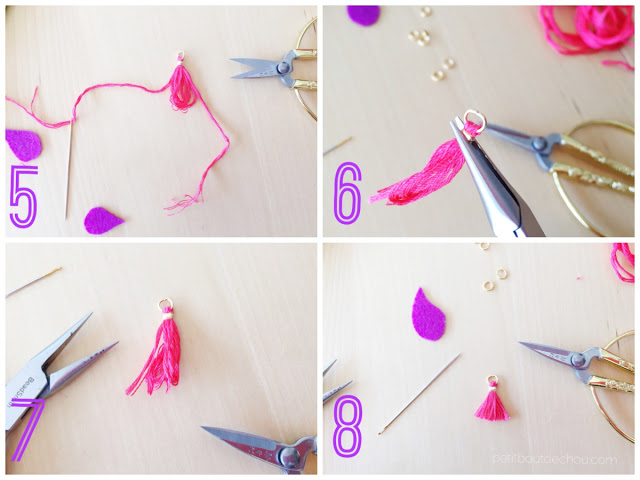
Remove your needle from previous floss end. Take the end you just cut and thread it through the needle. Make sure you wrap around the jump ring and go through the crimp bead (5).
Pull on the ends of the embroidery floss to make sure the part wrapping the jump ring is nice and tidy.
Take your flat plier and crimp the crimp bead to block the embroidery floss (6) & (7).
Use scissors to cut evenly the embroidery floss and finalise the shape and length of your tassel.
Repeat these steps to create the 7 remaining tassels.
A little view of what happens behind the scenes, it’s what I would call a beautiful mess! 😉
2. Create your earrings
I have used a mix of miyuki delicas and swarovski bicone crystals as shown in the pictures below.
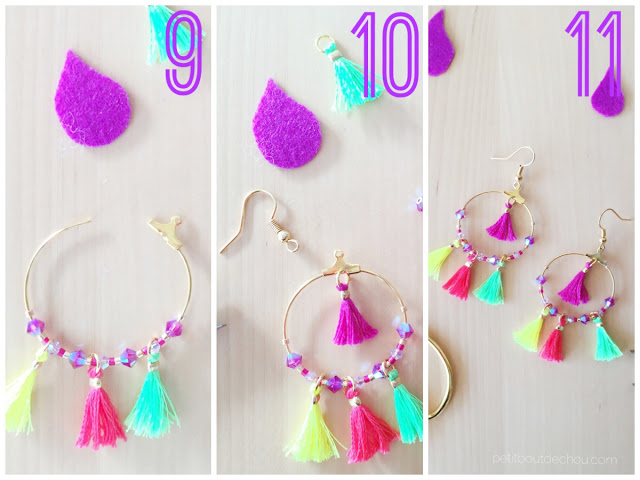
Just thread the beads in the hoop and insert the mini tassels following the pattern (9).
I kept one mini-tassel of the main colour to hang it to the top hoop hole.
To do so, first check that the opening of the jump ring is out of the embroidery floss. If not, just turn the ring until it appears. Use your pliers to open the ring and close it once hooked to the hoop (10).
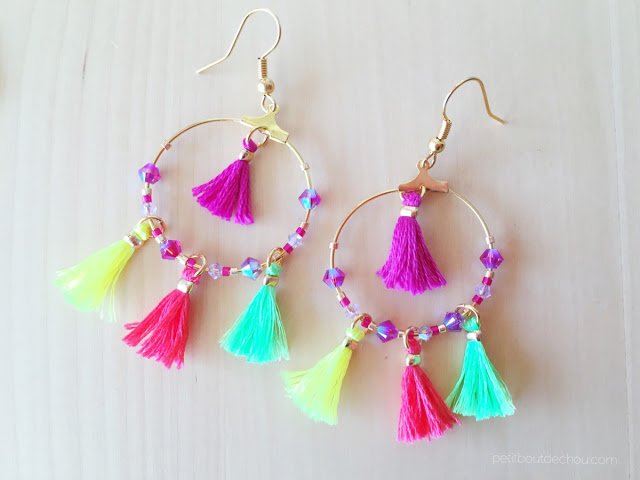
Repeat steps 9 & 10 for the other hoop to create the second earring (11).
And you are done! Ready for your next beach party :-).
I hope you enjoyed this tutorial.
If you did, follow me on Pinterest, Instagram or Facebook for more craft supplies tips, DIYs and free printables!
You might also like:
You can also subscribe to Petit Bout de News my monthly newsletter.



4 Comments
Oh my goodness! These earrings are adorable!!!!
I am glad you like them! Thanks 🙂
These earrings are so cute! I love all the vibrant colors you used, perfect for summer! So happy I found your blog, I’m following and subscribing!
Thank you so much! I am happy to count you in my followers 🙂