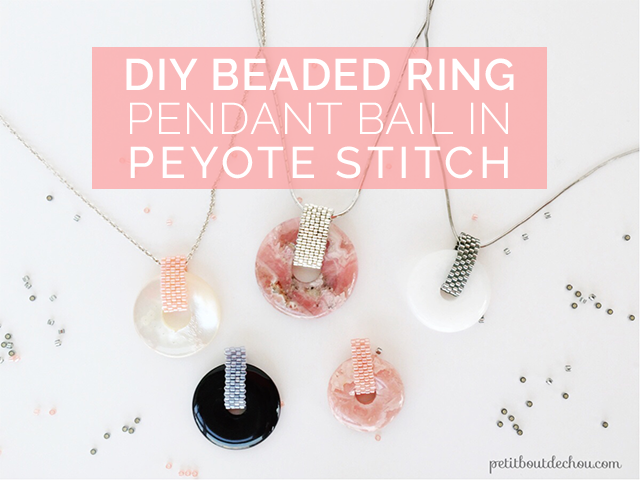
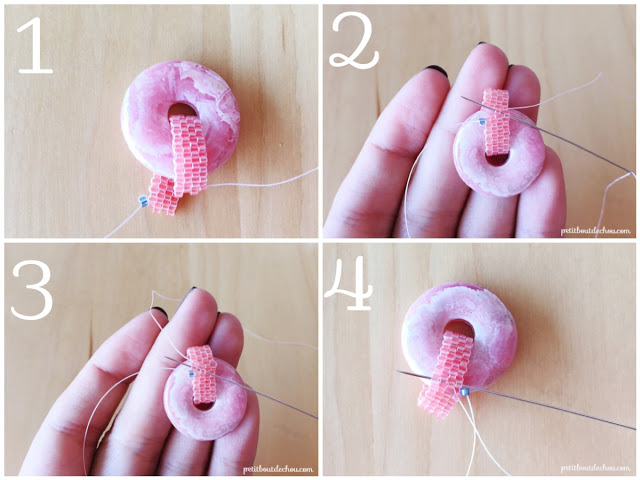
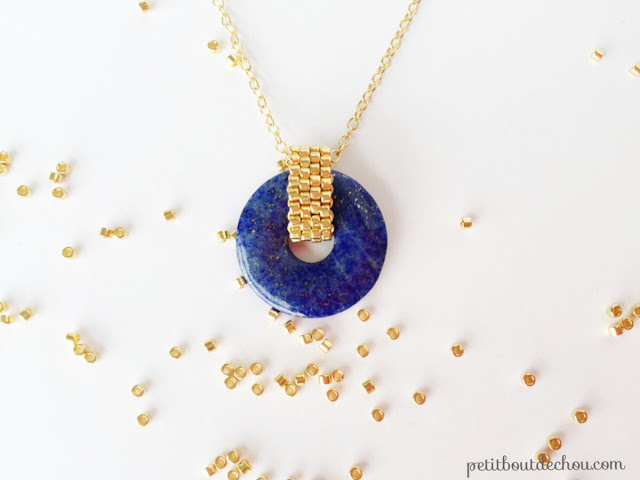
I have finally discovered a great solution to wear stone doughnuts. I love this shape of stones but so far my attempts at finding a beautiful pendant bail to mount them were vain. I recently learned how to make some small tubes or rings of seed beads using the peyote stitch and thought about using these rings as a bail and guess what? It looks great! I use Miyuki delica beads which are very regular in shape for an elegant finish and the even count peyote stitch.
These pendants are also available in my Etsy shop.
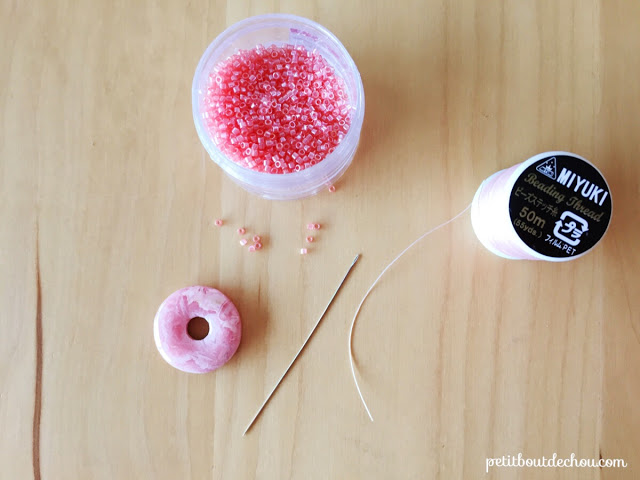
Supplies needed:
- one semi-precious stone doughnut of your choice
- one chain
- Miyuki delica beads 11/0
- 1 thin beading needle
- beading thread
DIY steps:
The ring is done using the even count peyote stitch. The even count is the easiest stitch for peyote as you are using the same steps for each row.
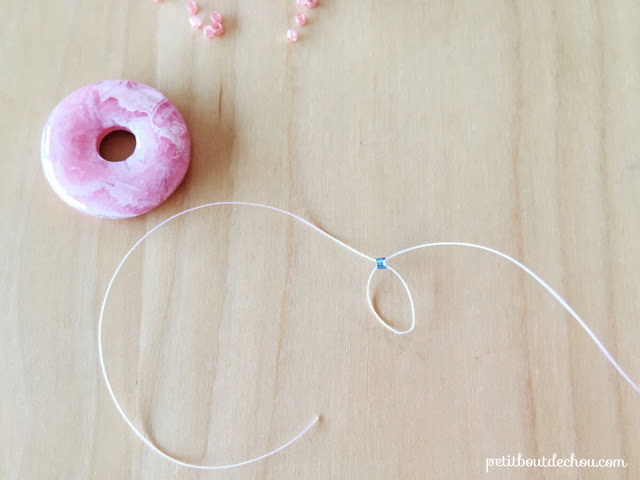
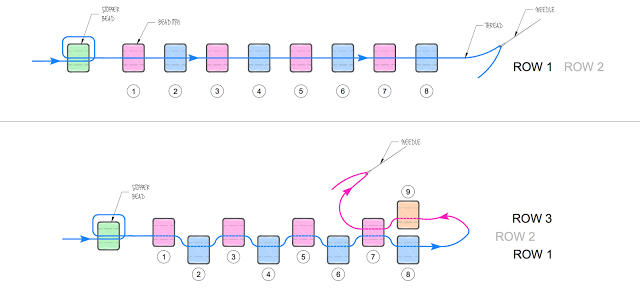
To start we will use a stopper bead. This bead should be well visible so you can use a different colour from the one you choose for your bail.
Simply make a loop around this bead. This will hold the bead in position and will help you stop the next beads on the row.
As we are working on the even count peyote stitch, the width of the ring will be made of a multiple of 2.
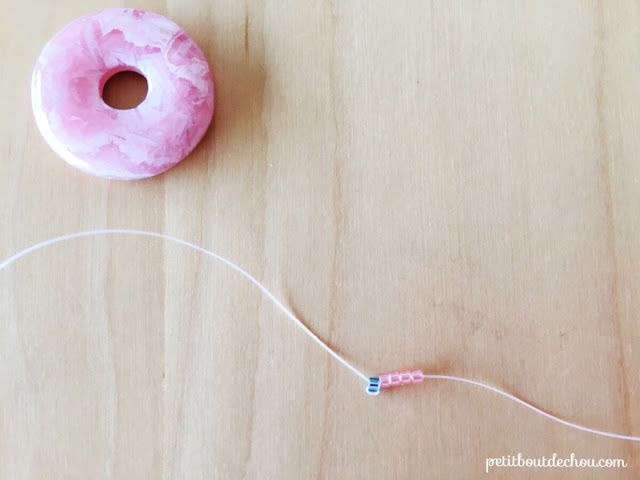
String on 2 beads (my picture example is with 4 beads). They will form the first and second row.
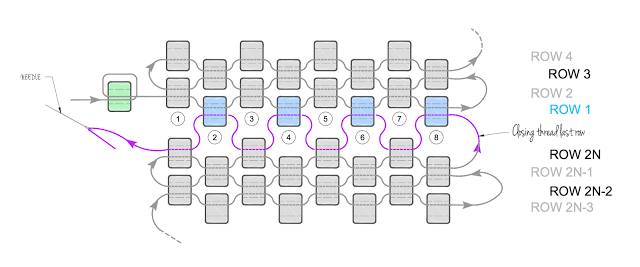
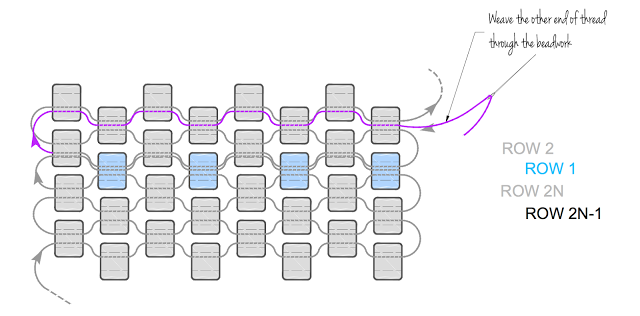
Add one more bead, this bead will be the first of your third row. See my diagrams below for an example 8-bead wide:
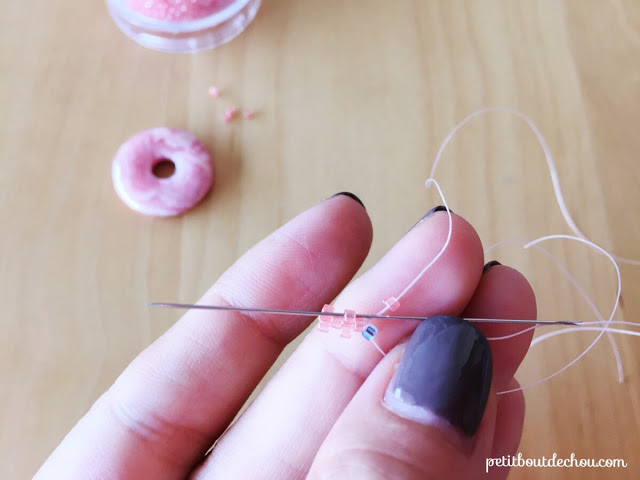
Skip one bead and go through the last bead of the second row(1) (it is actually the third bead from the needle) – pull the thread (2)
String on one bead, skip one bead and go through the next bead (3). Repeat until the end of the row.
(4)
Your third row is now done and the difficult part is behind you.
Turn your beadwork and repeat the previous steps to create the next row.
The number of rows depends on your doughnut stone’s size. You just need to stop at an odd number of rows.
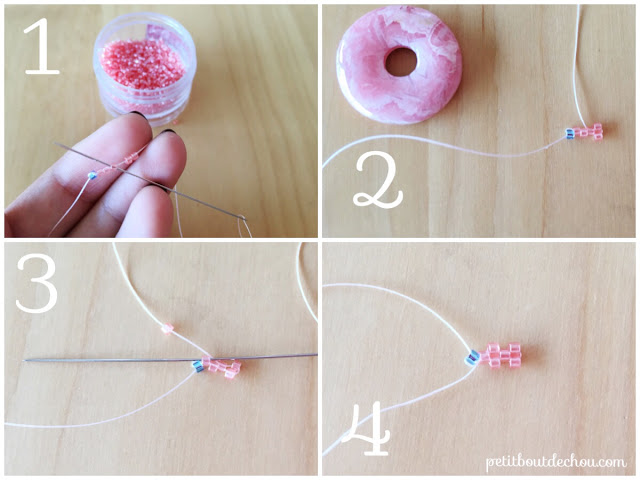
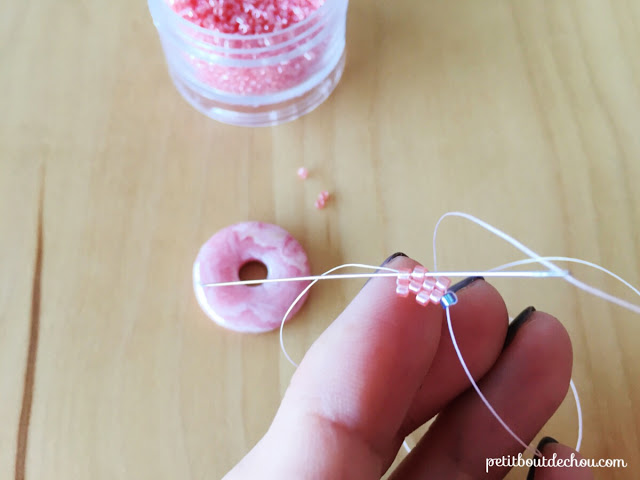
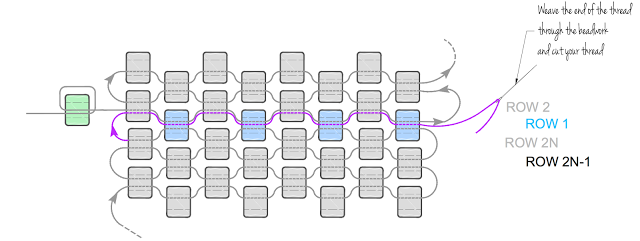
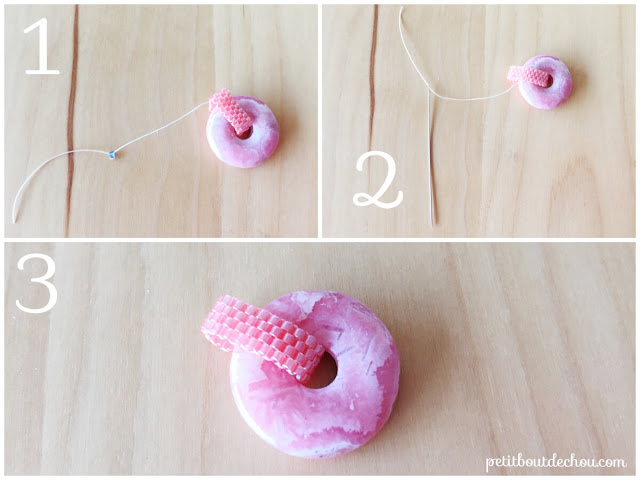
We will now close the ring. Make sure the doughnut stone is inside the ring before closing it (1)!
To do so, go through the first bead of the row on one end (2), then through the second bead on the other end and so on until you reach the end of the row (3). Then hide your thread through the beadwork (4).
Finish by removing the stopper bead and thread the needle with this end of the thread. Hide it through the beadwork.
You are done. The pendant is ready. Just add a chain to it and you have a beautiful necklace.
I hope you enjoyed this tutorial about the even count peyote stitch beading technique.
This pendant is available for purchase in my new Etsy shop along with my other jewellery creations.
Follow me on Pinterest, Instagram or Facebook for more craft supplies tips, DIYs and free printables!
You might also like:
You can subscribe to Petit Bout de News my monthly newsletter to make sure you do not miss any post 😉

