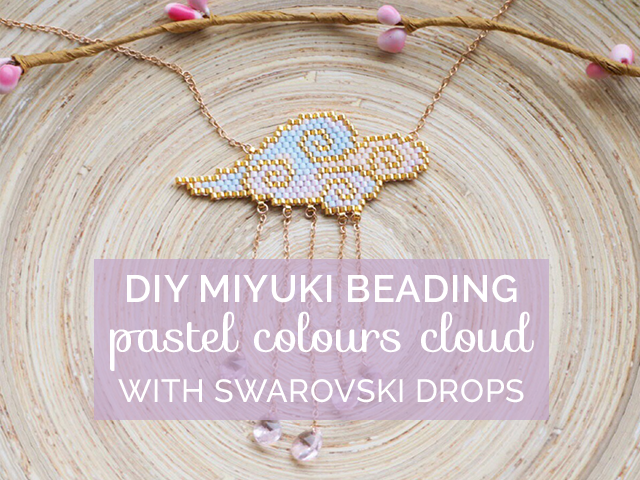
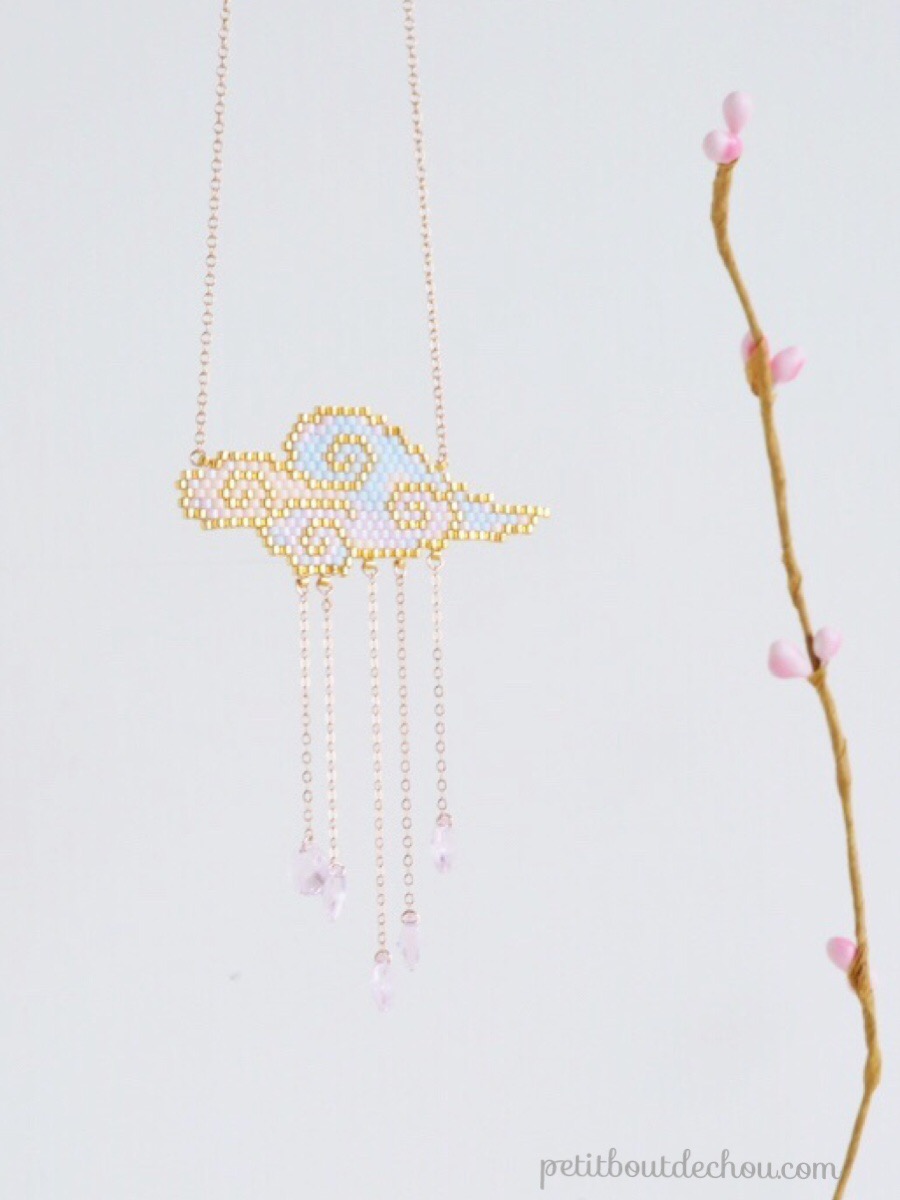
The weather is still a bit capricious at this time of the year. This aerial and coloured cloud long necklace will bring you a touch of joy and softness during these rainy times. The curvy lines of this cloud are inspired by the Japanese way of representing clouds that I find so poetic.
This post was prepared in collaboration with perlesandco.com. You can find the French version of the tutorial here on their website.
As usual, this post contains a free grid for you to follow this tutorial however, reproductions of this grid or beadworks created from this model are not allowed for any commercial use. It is strictly for personal use.
SUPPLIES NEEDED:
- Miyuki beading thread in light rose colour
- 1 beading needle
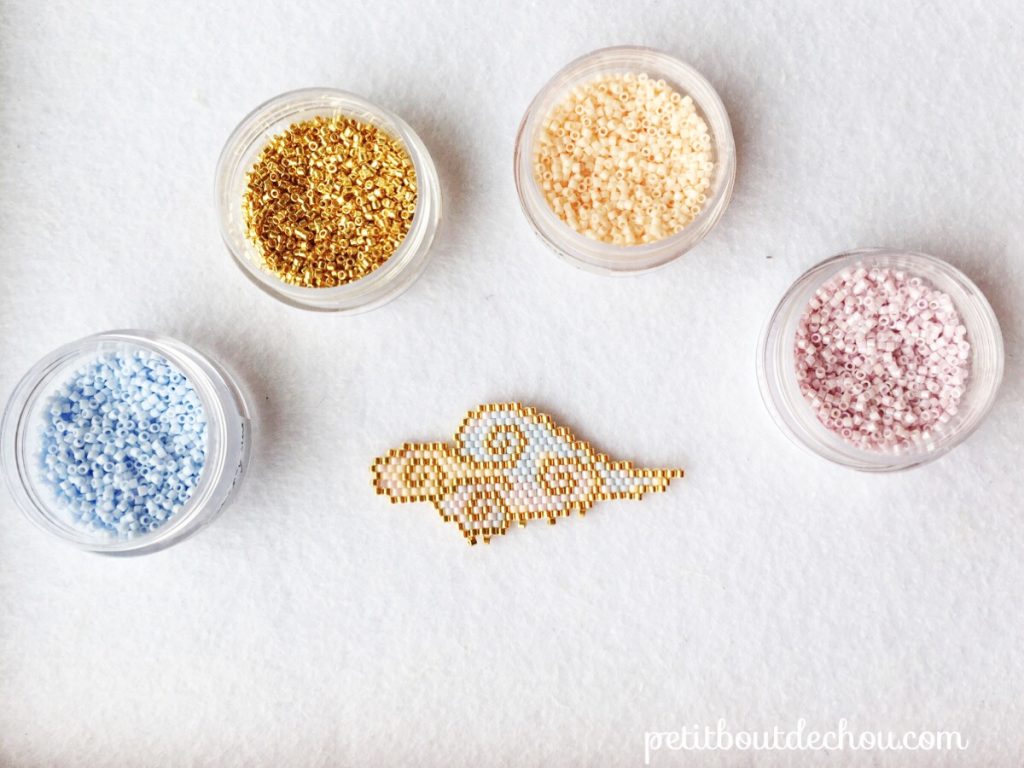
- Miyuki delica beads 11/0 as per the references below + DB0031 (gold plated 24k):

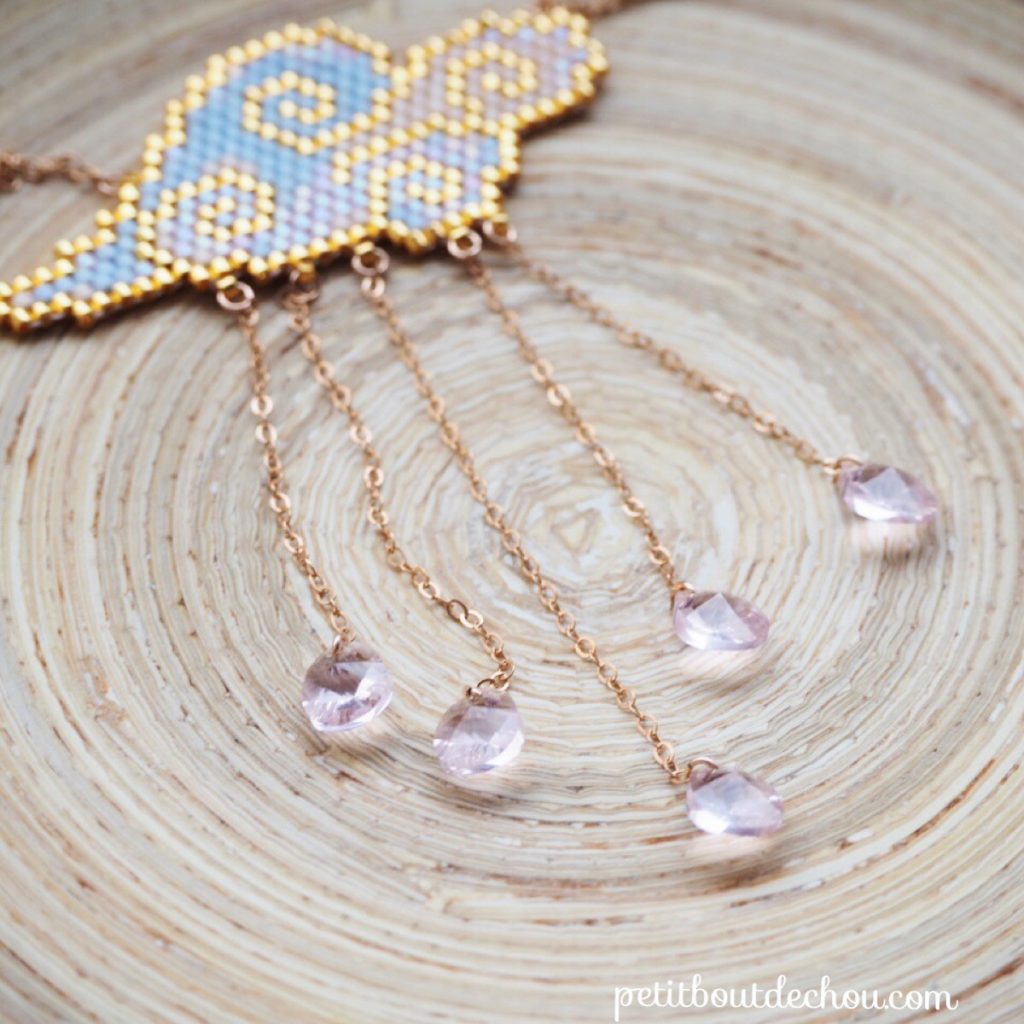
- Rose gold plated chain (for the long necklace)
- Rose gold plated extension chain
- Circular rose gold plated clasp
- Fine rose gold chain
- Open jump rings 2.5mm rose gold plated
- 5 Swarovski mini-pear crystals in rose poudre colour
- Pliers
- This grid by Petit Bout de Chou (no commercial use allowed)
If you are new at brick stitch or if you would like to discover some tips about Miyuki delica beading material and tools, check out my comprehensive guide.
DIY STEPS:
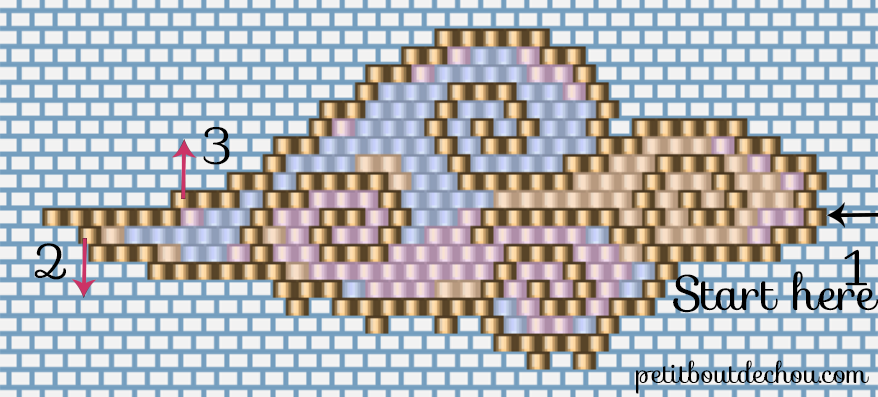
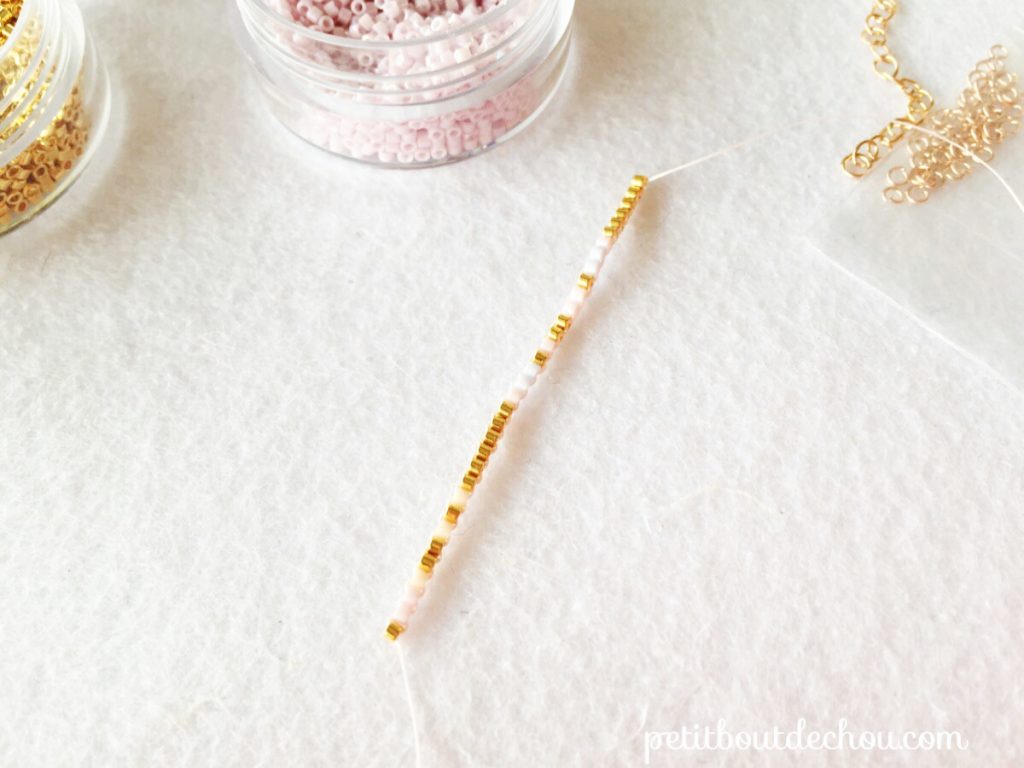
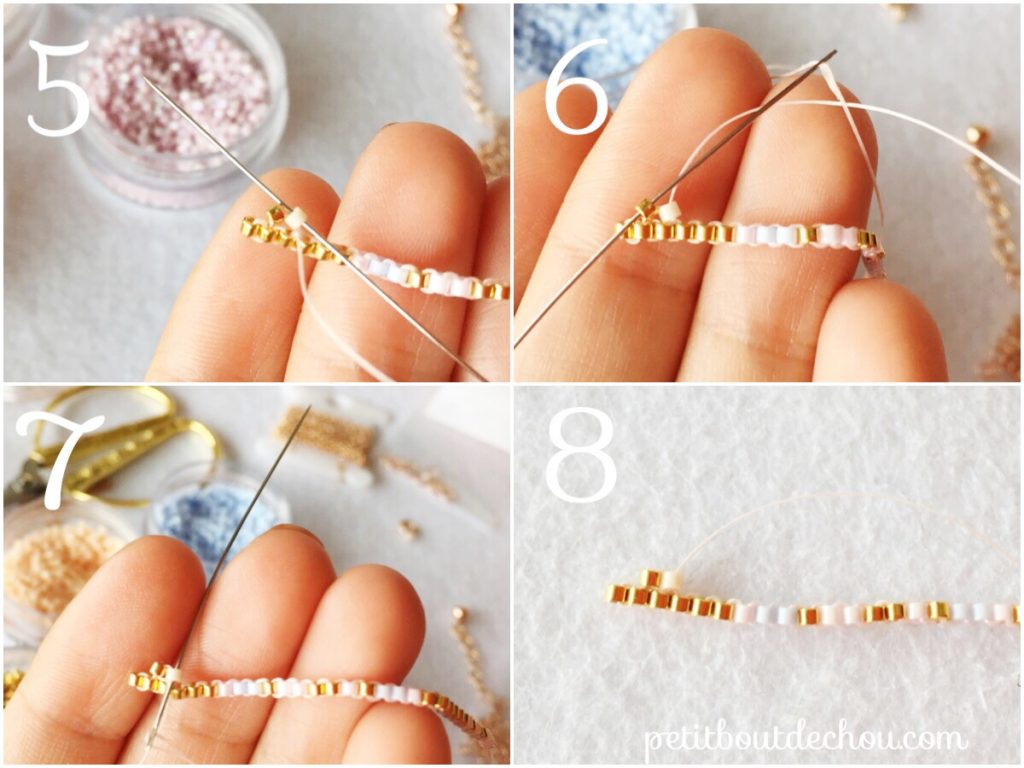
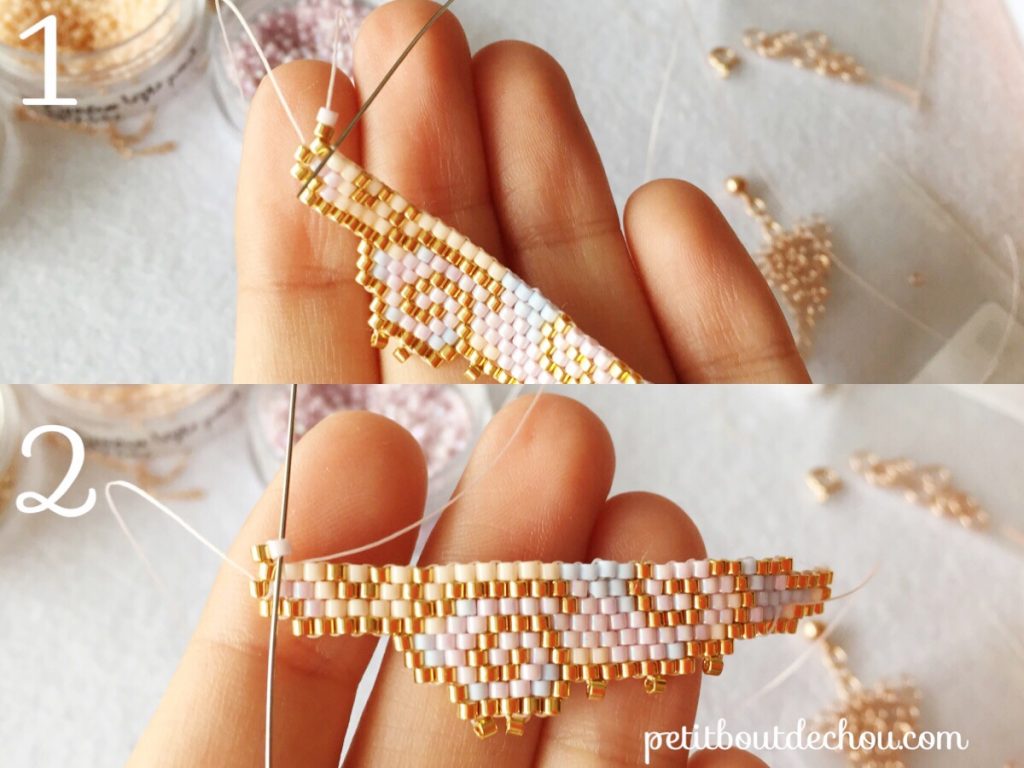
1. Make the first row using the ladder stitch
(starting at the point 1 of the grid)
Lock the first bead in position by going through it 2 times.
Thread a new bead and go through the first one, position the second bead et go through the first and second beads two times.
Repeat with the next pearls of the first row until the end of that row.
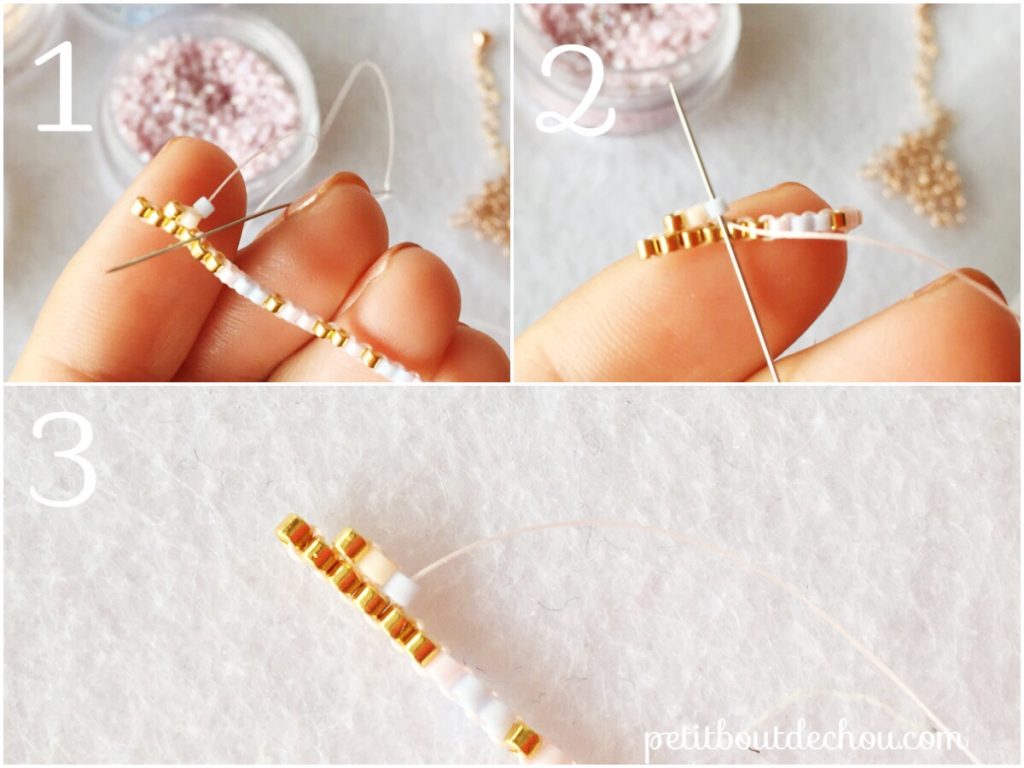
2. Lower part of the cloud
We will start this part from point 2 of the grid. To do so, go through the second bead on the sharp side of the cloud (1).
Continue by making a decrease. To do so, thread on the first two beads of the row (2) and pass the needle between the third and fourth beads of the previous row (3). Pull the thread (4).

Go upwards through the second bead (5), pull the thread and position the second bead correctly.
Go downwards through the first bead and pull the thread (6).
Go upwards through the second bead again (7) and pull the thread. Beads are getting aligned (8) in position.
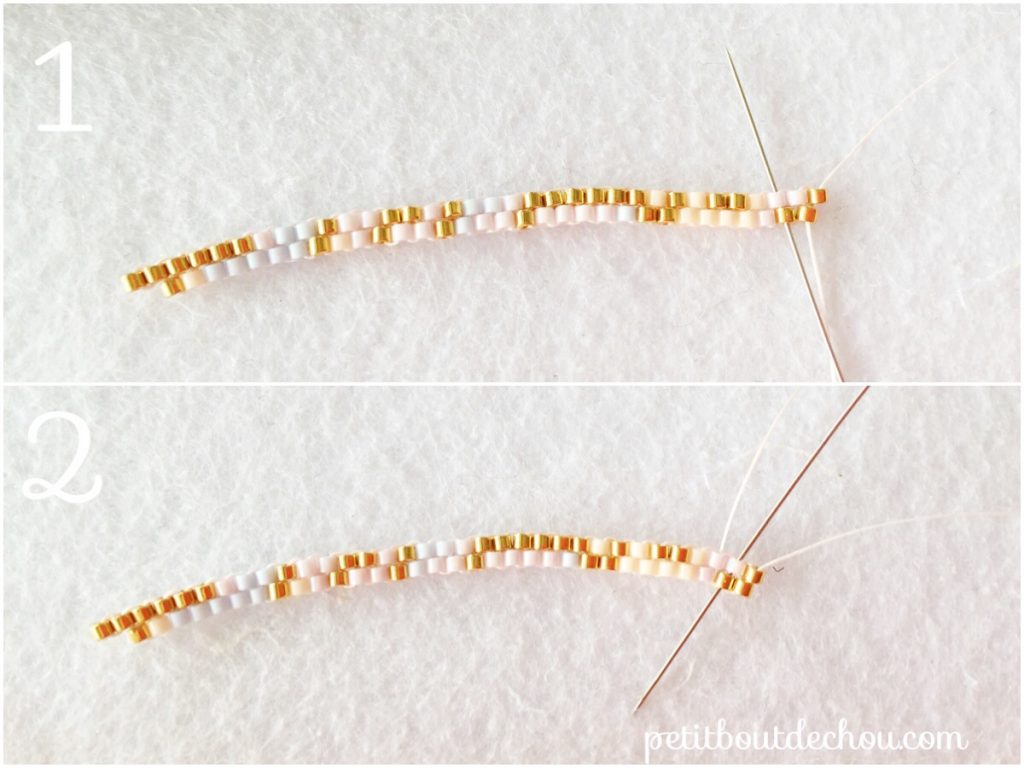
3. Continue in standard brick stitch
Thread one bead, pass the needle between the two beads of the previous row (1). Go upwards through the new bead (2) et and pull the thread to position the bead correctly (3).
A few particular points to start a row:
- start from the second bead of the previous row: go through the second bead and the bead diagonally located on the previous row (1) then come back to this same bead going through the bead of the previous row located on the other diagonal position (2). You are now in position to start from the second bead of the row.
- start from the third bead of the previous row: simply go upwards through the second bead of the previous row and go downwards through the third one.

- At the bottom of the cloud, position 5 beads to fix the jump rings later on. To do so, you just have to create a loop between the two beads of the previous row (see below). You can go through this new bead twice to give it more stiffness.
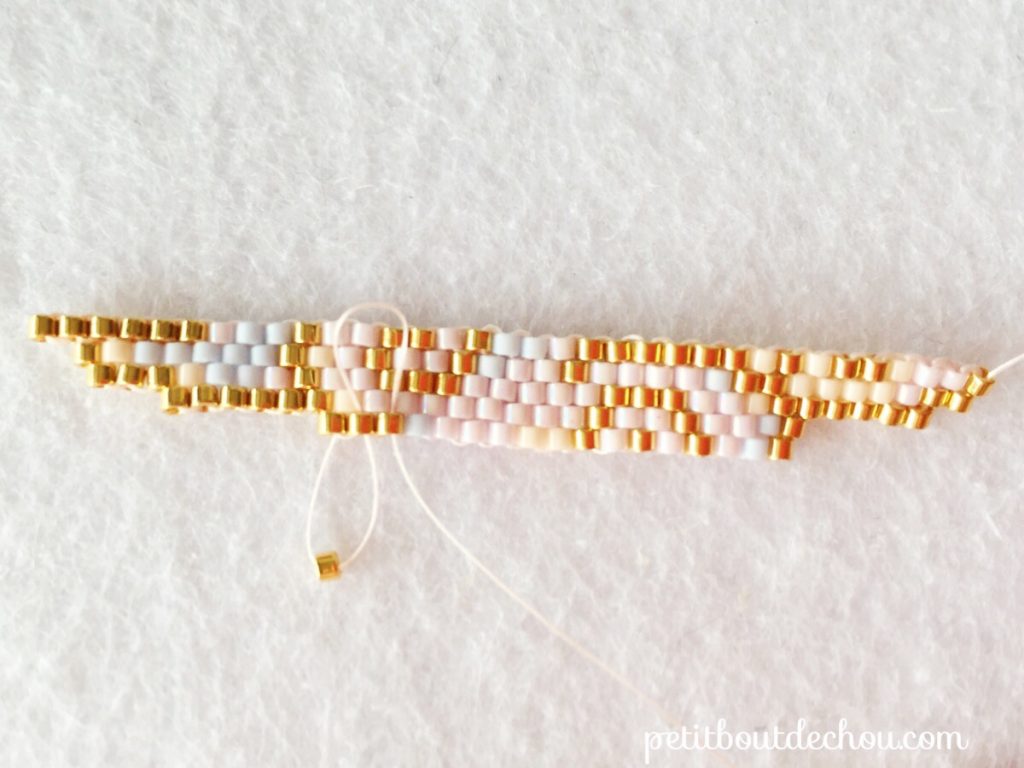
Once you have reached the bottom of the beadwork, weave your way through it to start again from point 3 of the grid and make the upper part of the cloud.
4. Weaving the upper part
You will use here decreases but also some increases.
To make an increase, thread 2 beads on and go through the first and second beads of the previous row (1). Go upwards through the second bead and pull the thread (2).
Once the beadwork is done, weave through it to block your thread. Do it also with the remaining part of your start thread.
5. Assembly
Cut 2x 20cm of rose gold chain.
Add open jump rings to each extremity of the chain and fix them to the cloud (1).
On the first chain, fix the clasp and on the other one fix the extension chain using your pliers (2).
Then cut 5 pieces of fine chain in different lengt hs (between 3 and 5 cm) and fix them using another ring into the bottom beads we prepared for this use (3).

Finally, fix the crystals to the extremities of the fine chains using another jump ring.
Your rainy pastel coloured cloud necklace is ready! I hope you had fun making it.
Please visit the “beading” category to discover my tutorials and free beading grids.
Follow me on Pinterest, Instagram or Facebook for more craft supplies tips, DIYs and free printables.
Subscribe to Petit Bout de News my monthly newsletter to make sure you do not miss any post 😉


