
Discover how to make one page of my future quiet book on the theme: “under the sea”. Quiet books are quite popular among parents as they not only attract baby’s attention but also allow them to play in a quiet manner.
As I am preparing a gift for my bestie’s little boy, I thought I would share this tutorial with you.
There is no major difficulty here, just some basic sewing and embroidery stitches on felt. So let’s start!
Supplies needed
- 18cm x18cm felt squares in various colours – you can find beautiful sets in Living Plaza if you are in Hong Kong
- Hook and loop fastener
- Embroidery floss in matching colours
- Embroidery needle
- Fabric scissors
- Some thick yarn
- One pearl
- A sewing machine with thread (you can also do it by hand if you don’t have the machine)
- Glue
DIY Steps
1. Prepare the background of your page
In this case, we are under the sea, so I choose some blue felt.
I cut some darker blue making some waves and assembles both by making simple running stitches with blue embroidery floss.

Then cut some zigzag green algae. Fix them using green embroidery floss. This time, I used the back stitch which makes a continuous line.

2. Prepare your loop fasteners
Cut some small rectangles of 2cm x 1.5cm of hook and loop fasteners.
Place the loop side pieces on the background and sew them using your sewing machine.

3. Prepare the sea animals
Start preparing the fish, the octopus and the shell.
Cut each shape twice in different felt colours.

Prepare the octopus’ tentacles by cutting your thick yarn.
You can also make some stripes on the fish by wrapping the yarn around the front side of the fish. You can use some glue on the back (that will be hidden inside when joining with the second side).
On the remaining fish side, sew the hook side of the fasteners. Do the same for the octopus.

To finalise the octopus, sew the yarn to the back side so that the yarn will be hidden inside.
Make sure this is well tightened so the baby cannot pull the yarn from the head of the octopus. You can add some glue here.
On the front side of the octopus, you can use black embroidery floss to to stitch the eyes and the mouth.
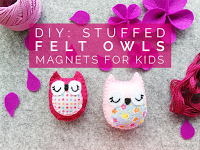
Then, join both front and back sides using a blanket stitch as described in my stuffed felt owl magnet tutorial.

For the fish, repeat the same steps to create the eyes, then assemble both parts with blanket stitches.
For the shell, fix both parts to the background using back stitches and draw some lines on the front part using back stitches as well.
Fix the pearl at the center between both parts so it stays hidden inside the shell. Make sure the pearl is well stitched and it won’t detach from the shell. I had to use beading thread and a special needle as my pearl was not very big but if you have a normal sized one, you may simply use your embroidery needle.

And we are done for this first page of our quiet book.
Stay tuned for more pages and the assembly of the book in the coming weeks.

I hope you enjoyed this tutorial.
Follow me on Pinterest, Instagram or Facebook for more craft supplies tips, DIYs and free printables!
You might also like:

You can subscribe to Petit Bout de News my monthly newsletter to make sure you do not miss any post 😉


