
It is finally time for a good rest, a lot of excellent food and many crafts: summer holidays, yeah!
An occasion to teach and share one of my favourite techniques to a very special person: my mum. Most of my crafting skills are coming from her and for once, I am teaching her a new technique. My mum grew up in Laos and we decided to try a laotian inspired pattern for these earrings. We made one earring each and we are very pleased with the result. See the instructions below to make your own. As usual, this pattern is the property of petitboutdechou.com and can be reproduced for personal use only.
Supplies needed
- Miyuki delica 11/0 beads in gold, bright purple and matte purple
- Beading thread in gold or white colour
- 2 thin and long needles
- Scissors
- Jewellery pliers
- 2 earwires
- this free pattern

DIY steps
Print the pattern and prepare the first row using two needles (1).

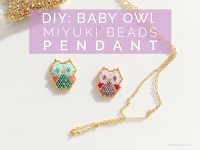
The instructions given here are specific to this pattern assuming you know the basics of brick stitch to increase/decrease the number of beads and how to make a start row. If you don’t, please have a look first at my baby owl pendant DIY where I explain the different steps in details.

Continue forming the bottom of the diamond by doing one decrease at the beginning of the row.
To do so, string on the 2 first beads of your row.
Then, slide the needle between the second and third beads of the previous row.
Pull the string fully and go through the second bead of the new row.
Pull the string. The first bead may not take its position yet but will do with the next rows.
At the end of the row, simply stop your row with a normal stitch.

Continue until you reach the last row at the bottom and weave through the beadwork to reach the start point and repeat the previous steps to form the second half of the diamond. Once you reach the row with 4 beads only, you start making increases for 4 rows.
Then, make decreases again for the last 7 rows.

Finish by 5 beads in a loop. Double the thread to make it stronger and weave your string through the beadwork, ensuring the edges beads are all correctly aligned on the row by going through a second time if needed.

Your first earring is ready. Time for a beautiful pic in the pink hydrangea 😉

Then, open the earwire loop and fix it to the beadwork loop.

My mum is now an expert in this technique 😉

One last pic in blue hydrangea this time.
I hope you enjoyed this tutorial. If you did, do not hesitate to share and follow me on Pinterest, Instagram or Facebook for more craft supplies tips, DIYs and free printables!
Love these earrings? You can now find them on my Etsy shop!
You might also like:


You can subscribe to Petit Bout de News my monthly newsletter to make sure you do not miss any post 😉


4 Comments
Just wanted to say how much I love your beaded jewellery designs! I love the quality of your photos too – do you take them with a professional camera or smartphone?
Thank you so much Hayley. I am glad you like them. For the photos, I use my iPhone 6. The secret is always in the natural light. These are taken in the morning and evening light, my prefered moments to take good pics. I hope this helps.
Thanks Estelle, it does. I live in the UK, so nice days are a little rare weather wise but I guess if it’s cloudy, that’s probably better than direct sunshine! 🙂
I just came back from London and the weather was really nice 🙂 Direct sunshine is indeed usually not giving good results: a lot of shadows. I am facing difficulties too as I don’t see much daylight at home during the week days.