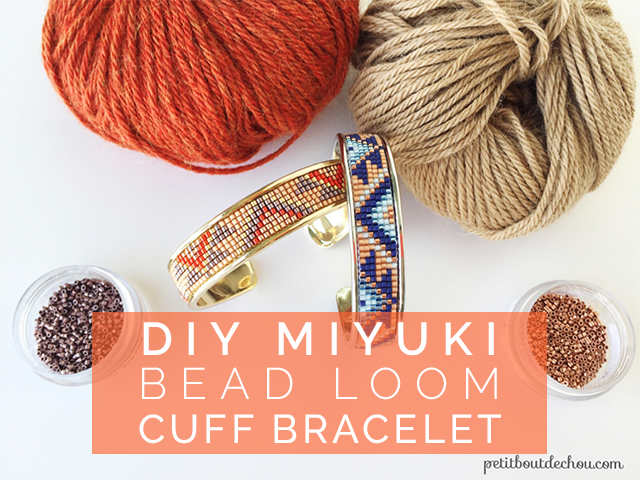
I have started the bead weaving technique last year with a homemade loom. I was actually hoping to prepare you a great tutorial about this shoebox loom but as it sometimes happen with DIY, it was a complete fail! The threads were not tight enough and I had a lot of difficulties finishing my bracelet, it took me ages… So for my birthday I ordered a small and inexpensive metallic bead loom (I put the affiliate link in the supplies list below) that does the job perfectly and is so easy to use. So here is a step by step tutorial to create your own Miyuki bead loom cuff bracelet.
Supplies needed:
- Bead loom – mine is metallic but you have also some nice wood ones
- Beading thread – Sono or Miyuki brands are great
- A fine beading needle
- Some miyuki delica 11/0 beads as described in the pattern
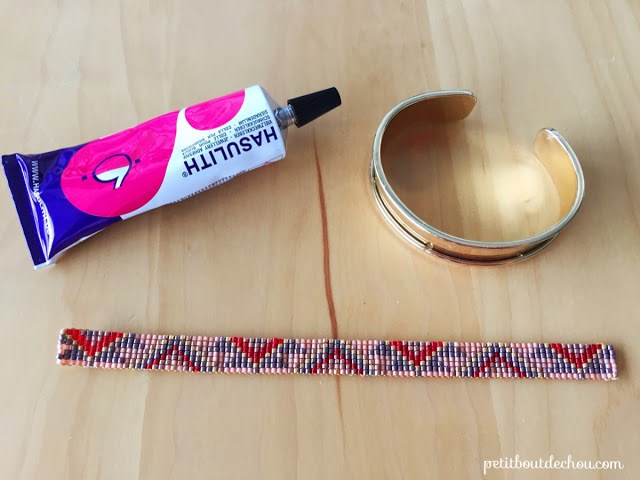
- Some jewellery glue like E6000 or Hasulith
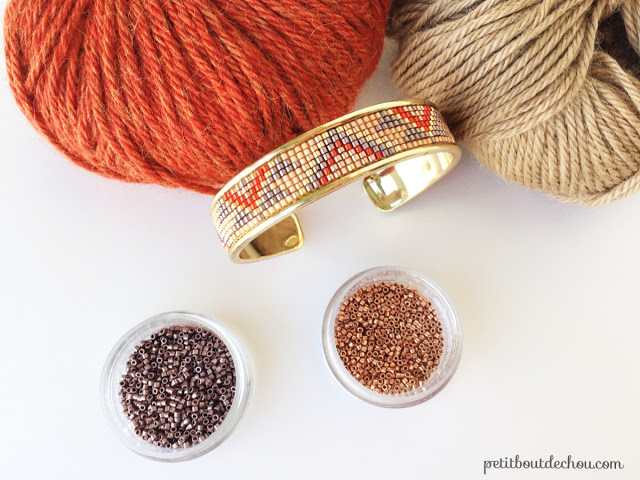
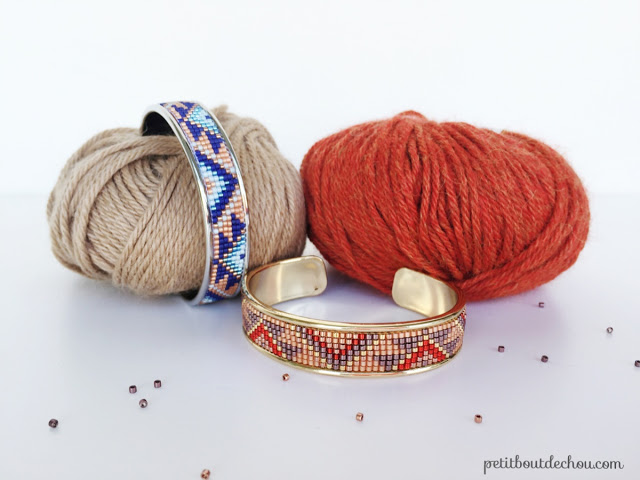
- A cuff bracelet 15mm wide in gold colour with curved edges in this example which is pretty easy to do but there are also many other ways to mount your bracelet
- Or if you prefer it in silver colour
- This free diagram
DIY steps:
1. Prepare your bead loom
To prepare your bead loom, you may be able to do the full length of the bracelet if you have an adjustable loom. In that case make sure you have at least the length of the bracelet +2 cm on both sides between your 2 coils. With the cuff bracelet I used, the total length is 16.5cm cm or 95 rows.
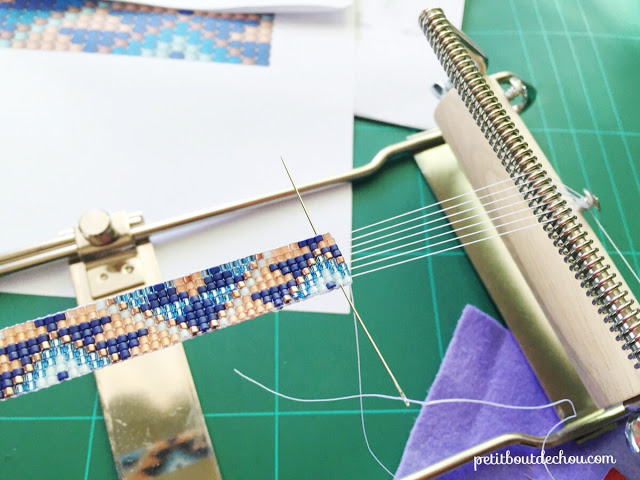
Then, fix your thread with a small knot on the center screw located on the wooden barrel on one side of your bead loom. From this anchor point, pull your thread through the coil on the same side a little bit offset from the center. Then cross to the other side coil, go through it and make a loop around the center screw on that side.
Go through the coil, leaving one spacer between this thread and the previous one and going towards the center, cross again to the other side, leave on spacer between this thread and the previous one, and make a loop around the screw and so on until you have 8 threads crossing the loom. It is really easy to do, believe me, even though the explanations look complicated…
Before starting, use the screws maintaining the barrels to tension the threads by rolling the barrels. It doesn’t need to be super tight, but the threads should be well maintained in position to keep a regular beadwork.
2. Thread your beads row after row
Print your pattern if it is not done already.
Prepare 2m of thread and just make a simple knot on the first thread about 5 cm from the coil. Thread your needle and go through the threads installed on the loom in one direction, then come back alternatively going above and below the threads.
Do that 2 times more and you are ready to start.
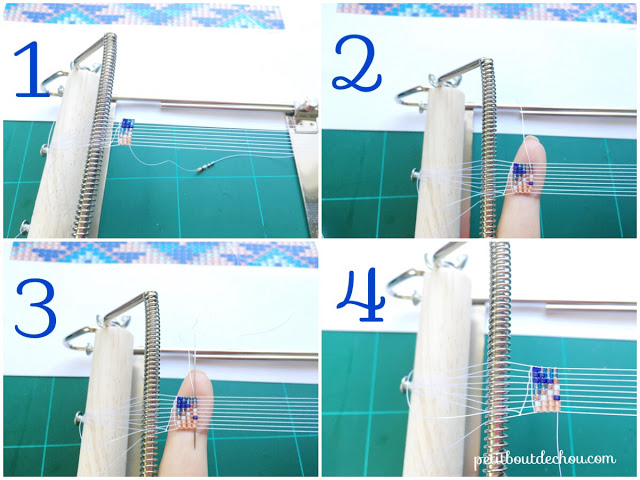 Thread your beads as per the pattern’s first row.
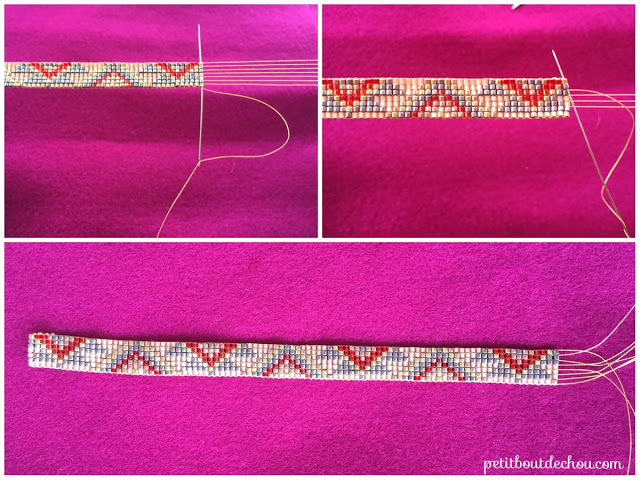
Pass your needle below the threads. (1)
Then use your fingers to position the beads between each thread by maintaining them from below (2).
Once they are all in position, thread all the beads of this row. Your needle should go above the loom threads (3). Your row is fixed (4).
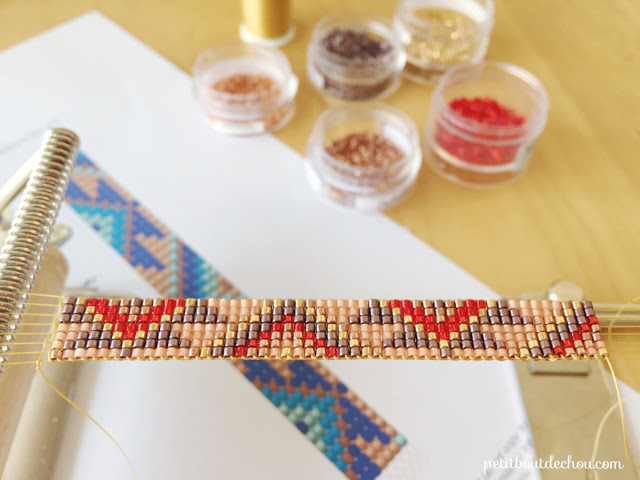
(You may have noticed that the pictures above are with an 8-bead per row pattern. I have made a new bracelet since then with a 7-bead per row pattern to fit the cuff bracelet.)
Then repeat this principle for all the rows of your beadwork. See how easy it is!
3. Renew / Hide your thread
During the beadwork, you may not have enough thread to finish. In that case, simply weave your thread back through the rows. Take a new thread, start about 5 rows before the row you stopped and weave through the rows until you reach it again. You can continue your beadwork.
If you are at the end of your beadwork, simply weave your thread back through the previous rows to hide the end thread.
Remember the few rows you did at the beginning only with threads? Carefully remove the knot, thread your needle and weave through the first rows to hide the thread.
4. Release your beadwork from the loom
How to release your beadwork from the loom?
Warning: this part can be a bit boring. Indeed, there is not only fun in making beautiful jewellery, there are also things you need to do so that your work does not fall into pieces after a while… The principle is to cut your threads as close as possible to the screws.
Then thread your needle with one thread and weave through the work. You have to do that with all of the threads to hide them and ensure your ends will not fray in the future.
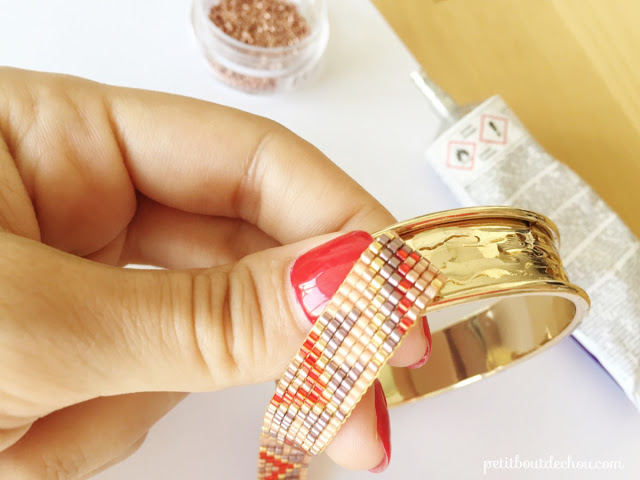
5. Mount your beadwork on the cuff bracelet
Your weaving work is done. One more thing before mounting it on the cuff bracelet: make sure you have the correct number of rows and that it fits perfectly within the allowable space! Looks stupid but I know what I am talking about…
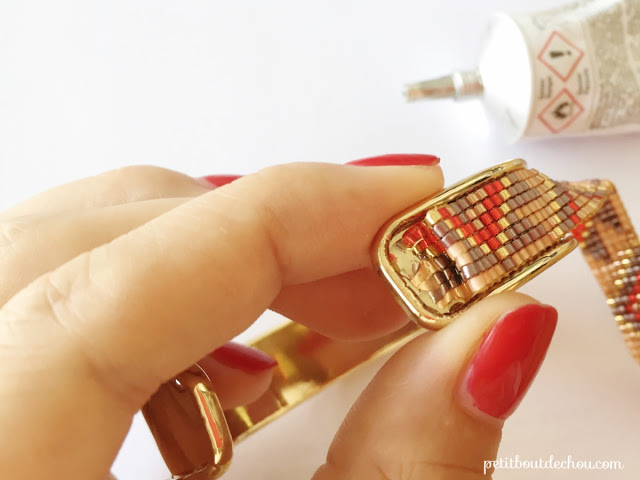
So once you checked that, you can use your magic glue to mount the weaving on the bracelet.
Start by one end and apply some glue.
Don’t put too much or it will overflow and it is never nice.
Leave it to dry for a good 24 hours before wearing it.
And you have done a wonderful bracelet with bead looming technique.
I hope you enjoyed this tutorial.
These bracelets are also available for purchase in my new Etsy shop along with my other jewellery creations.
Let me know below if you like this kind of post, have other techniques you would like to try with a tutorial, etc.
Follow me on Pinterest, Instagram or Facebook for more craft supplies tips, DIYs and free printables!
You might also like:
You can subscribe to Petit Bout de News my monthly newsletter to make sure you do not miss any post 😉





7 Comments
These bracelets look so cute and now I need a bead loom too! Pinning this, thanks so much for sharing!
I am happy that you like this technique. If you buy one bead loom you will find it addictive 🙂 Thanks for pinning!
I really love these bracelets Estelle – I’m including a link to this post in my blog round up later today!
Thanks a lot Hayley. It’s great to be part of your round up!
Loom bracelets look so elegant when included in metal cuffs! Thanks for sharing!
I love to do the loom beading and want to make the cuffs, but I cannot find the blank cuffs. Could you please let me know where I can purchase them?
Hi Jackie, I use the ones from perlesandco.com here are two affiliate links:
– one for the silver colour one:
https://www.perlesandco.co.uk/Bracelet-Eco-en-laiton-avec-rebord-courbe-15-mm-argente-x1-p-85205.html?affiliate_banner_id=1&ref=1003
– one for the gold colour one:
https://www.perlesandco.co.uk/Bracelet-Eco-en-laiton-avec-rebord-courbe-15-mm-dore-x1-p-79179.html?affiliate_banner_id=1&ref=1003
They are very reliable and ship worldwide. I hope this helps.