
Let’s celebrate today the 50th post on petitboutdechou.com! 🙂
It’s been such a rewarding experience so far, thank you all for your support. For this 50th post, I have prepared for you not only one but 2 free jewellery patterns. I hope you will love them.
Since I have received my new miyuki delica beads order, I wanted to create a beautiful summer jewellery set with these wonderful colours. As you may have noticed in my previous post about custom summer shoes embroidery, my current whim is about geometrical patterns. I have prepared this step by step tutorial so you can make your own set with a free pattern to download below.
Supplies needed
- Miyuki delica beads in 5 colours as described in the pattern
- Beading thread in gold colour
- 2 thin beading needles
- Scissors
- Beading pliers
- 4 gold jump rings 3mm
- 2 gold ear wires
- 2 gold eye pins
- 4 gold headpins with ball end
- 1 gold chain
- this free printable pattern

DIY Steps
1. Heart pendant

Follow the pattern’s instructions for the weaving of the heart pendant.
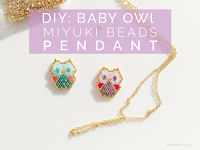
If you are not familiar with the basic steps of brick stitch, please have a look at my baby owl pendant tutorial first.
Then use your pliers to open one jump ring and place it as shown in the picture above in one of the top beads.
Break one link of your chain at the middle and place this link in the jump ring. Use your pliers to close the jump ring.
Do the same on the second top bead.
You can also use the eye pins to add a few rows of beads above the pendant.
Simply thread the beads on the eyepin. Use your pliers to form a second loop at the end of the pin.
Fix the eye pin to the chain using your pliers. You can repeat this operation to add as many bead rows as you like, just make sure you adjust the length for each pin to have a nice transition.

2. Star earrings

Follow the instructions on the pattern for the star earrings.
The first row is the center one, use two needles for this row. String on the first bead using one needle and go through it using the second needle and pull it up (1).
Repeat for the second bead (2) & (3)
Repeat this step for the other 5 beads on the first row (4).

Then continue with increases following the pattern, until you reach the step shown in (1). Weave you way through the beadwork so that the thread is the position shown in (1). Start decreases to form the third arm of the star (2).
Weave your way through the beadwork to reach the starting point and follow the pattern doing increases until you reach step (3), then weave you way through the beadwork so that the thread is the position shown in (3). Start decreases to form the last arm of the star. You are done weaving one star. Reapeat these steps to form the second one (4).

Now we will form the earrings. Take one head pin with ball end. Thread it through the top right bead and thread your delica beads. Stop about one inch from the end and use your round pliers to form a loop.
Repeat the operation on the top left bead. Open a jump ring with your pliers to connect your ear wire and the two eyes newly formed.

Repeat these steps for the other earring.
You are done!

I hope you enjoyed this tutorial.
If you did, do not hesitate to share and follow me on Pinterest, Instagram or Facebook for more craft supplies tips, DIYs and free printables!
You might also like:

You can subscribe to Petit Bout de News my monthly newsletter to make sure you do not miss any post 😉


2 Comments
I love these earrings, Estelle!!! Great work and thank you for sharing the tutorial.
I am glad you like them, thanks for your support! 🙂